Sales Order Processing - Invoice Entry
Function
Use this task to invoice standard sales orders once orders are filled and the shipped quantity of the order items is known. The Invoice Entry process may be used to enter a direct or one-time invoice without first creating a sales order. If the Allow Backorders? field in the OP Parameters task is checked, a backorder is automatically generated for any out-of-stock items, as described later. The Invoice Entry form features appear in three tabs; Addresses, Basics, Totals.
Details on processing backorders.
The Display additional options dropdown tool provides access alternate access to the button functions on the form plus access to Shipment Tracking, Refresh Aging, and Recalculate Tax.
=> To access this task...
Select Invoice Entry from the Sales Order Processing main menu.
When accessing this task, an Invoice Entry POS Station prompt appears:
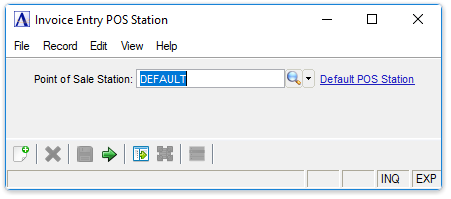
Invoice Entry POS Station
In the Point of Sale Station field...
-
Accept the default POS station.
-
Click
 to select from a list of all valid point of sale locations.
 -
Click
 to view a detail of the selected POS Station record.
 -
Click
 to enter or create a new POS Station selection.
 -
Click
 to commit the POS location to this batch of entries.
Addresses Tab (back to top)

Invoice Entry Addresses tab
About the Fields
The fields of the Invoice Entry task are nearly identical to those in the Order Entry task’s heading, ribbon, and detail sections.
In the Customer ID field...
-
Enter a valid customer number.
-
Enter a new customer number to create a new customer. See Creating a New Customer.
-
Click
to select from a list of customer IDs.
A valid Customer ID entry results in a Customer Credit Status recap window if the OP Parameters are set for this action.
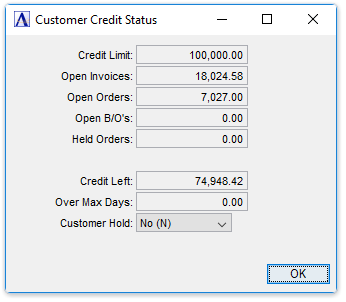
Customer Credit Status
- Click [OK] to close the window.
In the Order No. field...
For a new entry, the order number is automatically assigned at the same time as the invoice number. For existing orders, the invoice number is retrieved and displayed following entry of the order number.
-
Click
 to display the invoices for this customer. When an existing order is recalled, line items may be added, deleted, or modified during invoice entry.
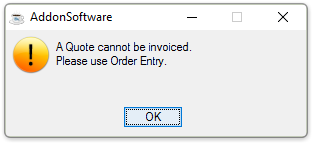
If the order number entered is a quote, it must first be converted to a sales order in the Order Entry task before it can be invoiced. the system displays the prompt:
-
Press [OK] to return to the Order No. field.
If an order number is entered which has not had a pick list produced, the system displays the prompt:

-
Press [Yes] to continue.
- Press [No] to return to the Order No. field.
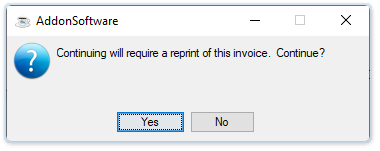
If an open invoice exists for the order, it will be displayed. If the invoice has already been printed, but not updated, then the system displays the prompt:
-
Press [Yes] to continue.
-
Press [No] to return to the Customer ID field.
-
Press [Yes] to continue. The next order number is assigned.
-
Press [No] to return to the Order No. field.
-
Press [Yes] to continue. The next invoice number is assigned.
-
Press [No] to return to the Order No. field.
In the Internal Customer Comments field...
These comments are internal only (don't appear on reports or customer-facing documents), and follow the order all the way through invoicing and into history. They can be changed/amended at any time (even AFTER the invoice goes to history).
-
Enter or edit by typing directly into the form field, or click
(or Ctrl-F) to launch the comment editor.
In the Internal Ord/Inv Comments field...
These comments are internal only (don't appear on reports or customer-facing documents), and follow the order all the way through invoicing and into history. They can be changed/amended at any time (even AFTER the invoice goes to history).
-
Enter or edit by typing directly into the form field, or click
(or Ctrl-F) to launch the comment editor.
Basics Tab (back to top)

Invoice Entry Basics tab
From the Order Type dropdown...
-
Select Sale (S) if the order is a standard sales type.
-
Select Quote (P) if the order is a quote.
-
Select Void (V to Void the selected Order.
Use a standard sales order to record information necessary for processing, shipping, and invoicing an order. Use a quote to produce an itemized quotation or bid containing the same information as that of a sales order. The quote may be printed and given to the customer and later converted to a sales order if desired.
An order type may be changed from S to Q (or vice versa) without any restrictions until reaching the detail line entry process. When recalling an existing order or backing up to the Order Type field from detail line entry, the order can be converted from Quote to Sale, but it is not possible to change from Sale to Quote. If this is necessary, the order must be deleted and re-entered.
In the Order Date field...
-
Enter the date of the order.
-
Click
 to select a date by using the calendar tool.
 -
Press [Tab] or [Enter] to accept the default.
In the Ship Date field...
-
Enter the shipping date.
-
Click
to select a date by using the calendar tool. -
Press [Tab] or [Enter] to accept the default.
In the Expiration Date field...
Active only when Quote (P) has been selected.
-
Enter the date the quote will expire.
-
Click
to select a date by using the calendar tool.
In the Invoice Date field...
-
Enter the invoice date.
-
Click
to select a date by using the calendar tool. -
Press [Tab] or [Enter] to accept the default.
In the PO Number field...
-
Enter the customer PO number.
In the PO Release No field...
-
Enter the identifying the purchase order release number.
In the Free On Board (FOB) field...
When entering a new order, this field is populated from the corresponding field on the Customer Master. This information flows through to the Invoice History Inquiry form when the Invoice is posted. It also appears on the Sales Order Picking List and Invoice Print documentation.
-
Enter the FOB details.
-
Select [Enter] or [Tab] to accept the default.
In the Customer Type field...
Display only. Displays the Customer Type for the selected Customer.
In the Misc Number field...
-
Enter up to 10 characters identifying a miscellaneous number.
In the Sales Disc Code field...
-
Enter a valid sales discount code.
-
Click
to display defined discount codes.
In the Terms Code field...
-
Enter a valid sales terms code.
-
Click
to display defined terms codes. -
Press [Tab] or [Enter] to accept the default.
In the Distribution Code field...
-
Enter a valid distribution code.
-
Click
to display defined distribution codes. -
Press [Tab] or [Enter] to accept the default.
In the Territory Code field...
-
Enter a valid territory code.
-
Click
to display defined territory codes. -
Press [Tab] or [Enter] to accept the default.
In the Ship Via field...
-
Enter the shipping means.
-
Click
to display defined shipping codes.
In the 3rd Party Shipping ID field...
Display only. Displays the ID assigned to the customer by the shipper. This code is maintained in the AR Customer maintenance task.
In the Shipping Email Address field...
Display only. Displays the customer contact email for shipping issues. This code is maintained in the AR Customer maintenance task.
In the Customer Pricing Code field...
Display only. Displays the Customer Pricing Code of the selected Customer. This code is maintained in the AR Customer maintenance task.
In the Salesperson Code field...
-
Enter a valid salesperson code.
-
Click the Find
button to display defined salesperson codes. -
Press [Tab] or [Enter] to accept the default.
In the Standard Message Code field...
This code identifies a standard message to print on the order.
-
Enter a valid message code.
-
Click
to display defined message codes. -
Press [Tab or Enter] to accept the default.
In the Tax Code field...
-
Enter a valid tax code.
-
Click
to display defined tax codes. -
Press [Tab] or [Enter] to accept the default.
In the List Price Code field...
-
Enter a list price code.
-
Press [Tab] or [Enter] to accept the default of the current price.
This code determines whether the current list prices from the inventory master file or the prior list prices are charged on this order. If the prior list prices are used, enter the prior list price code from the Inventory Item Maintenance task Warehouse Information option. If any code other than the correct prior list price code is entered, current list prices are used.
In the Job Number field...
This field is available when the Use Customer Job Numbers? field in OP Parameters Maintenance is checked.
-
Enter a valid job code.
-
Click
to display defined job numbers.
Job numbers are used for tracking customer sales by job. See the Flow of Processing section for more information.
Notes -
-
When accessing an existing order, the item detail lines are displayed.
-
If the Credit Management system is installed, the Customer Credit Status and Credit Action windows are displayed.
In the Line Cd field...
Optional Step. If the Skip Line Code Entry? parameter is checked in the OP Parameters Maintenance task, this field is skipped during the input process. Select the field to make changes.
-
Enter a valid line code.
-
Double click to select from a drop down list of line codes:
-
Design Labor
-
Restocking Charge
-
Extended Parts Warr.
-
Service Charge
-
Drop Ship Item
-
Message Line
-
Non-stock Item
-
Promotional Item
-
Std Item for Resale
-
Standard Inv. Item
-
Priced Message
-
Different line types are assigned to line codes. Depending on the type assigned to the selected line code, accessibility to the remaining fields in the detail line differs.
Standard, non-stock, and special distribution items may be drop shipped. Drop shipped items receive treatment identical to other ordered items, with the exception that they do not cause inventory to be committed or relieved from the inventory master file. Before an item can be drop shipped, one or more drop ship line codes must be established in the Line Code Maintenance task.
NOTE: If an order of all N -Non-stock Item types is created, the order can only be printed from this task; it will not be part of the batch printing of pick lists. However, this item prints in batch printing if other items appear on the order.
If the Enter Warehouse on Dropship? parameter is checked in the OP Parameters task, the cursor stops at the Whse ID field for entry of a warehouse code.
If the Enter Cost on Dropship? parameter checked in the OP Parameters task, the cursor stops at the Cost field for entry of the item cost.
If the amount of the order causes the customer to go over their credit limit, the system displays the prompt:

-
Click [OK] to continue. The words ***Credit Limit Exceeded *** will display next to the Order Total field as a reminder.
Credit is checked in Order Entry whether the order is new or duplicated from an historical invoice. Credit is not checked in Invoice Entry because it is assumed the order has already been shipped.
In the Whse ID field...
-
Enter a valid warehouse code for the inventory item.
-
Select the Display master record button
for details for the warehouse code entered. -
Click
to select from a list of all valid Warehouse records.
In the Item No. field...
-
Enter a valid inventory item number
-
Click
to open the Inventory Item Master Inquiry window
In the Description field...
Display Only. Displays the description associated with the Item Number entered.
In the Memo/Non-Stock Desc field...
Each detail line can have a comment associated with it using either the [Comments] button (or Alt-C) to invoke the detail line editor. These comments DO appear on Pick Lists and Invoices, i.e. customer-facing documents. The first 40 characters (or up to the first line feed) are stored in the Memo/Non-Stock Desc column so that the user has the visual clue that a comment has been entered. To see the entire comment, hover over the column or click with the mouse (Ctrl-F) to invoke the comment editor. Comments cannot be entered directly into the grid.
In the Prod field...
Display Only. Displays the Product Type as reflected in the Inventory Item maintenance for the item.
In the UM Sold field...
Displays the unit of measure used to sell the line item.
When not disabled, the "UM Sold" field provides a list to be used to select either the Item's Sale UM or the Item's Purchase UM.
Disabled, i.e. view only, unless both the IV Parameter "Allow Sales in Purchase UM" checkbox is marked and the Inventory Item maintenance "Allow Sales in Purchase UM" for the item is also marked.
In the Pick/Inv Cmts field...
Display Only. Displays the comments text to appear on the Pick List and Invoice.
In the Unit Cost field...
This field automatically displays the cost of the item for Standard Inv Item line code types.
-
If necessary, update the list price of the item.
There are several pricing methods from which a price is automatically entered in this field:
-
If a valid prior list price code was entered in the Lp Cd field of the ribbon section, the prior list prices are used.
-
If contract prices are currently in force for the customer, the contract prices are used.
-
If a pricing table was established for the customer's assigned price code in combination with the class of the inventory item, the pricing table prices are used. (The customer's assigned price code is displayed to the left of the bill-to address.)
-
If none of the previous applies, the current prices from the Inventory Item Maintenance task in Inventory Control are used. To access the Inventory Item Master screen, select the Display master record button
with the Item No field selected. -
If none of the previous applies and the current price of an entered item is zero, the price must be manually entered.
In the Qty Ord field...
-
Enter the quantity ordered.
In the Unit Price field...
This field automatically displays the price of the item for Standard Inv Item line code types.
-
If necessary, update the list price of the item.
In the Back-Ord Qty field...
This field automatically displays the quantity of any backorders.
-
Enter the amount of any back order to force a backorder quantity.
In the Qty Shipped field...
This field automatically displays the quantity to be shipped based on the quantity ordered less the quantity entered as backordered.
-
Enter the amount to ship.
In the Extended Price field...
This field is accessible for O line code types. Otherwise, it displays the extended price of the Order times the Price times the Ship.
-
Enter the amount for this line.
When done making selections...
-
Click
 to save the customer order.
 -
Click
to clear the form and begin again. -
Click
 to delete the current customer order.
Duplicate Invoice
-
Click
 to create a duplicate order from the history files which opens a Historical Invoice grid to expedite the creation of a re-order. As with all grids, there are search and filter query capabilities to assist in locating the invoice.

Historical Invoice grid
-
Selecting the invoice to duplicate opens the Invoice History Detail grid displaying in detail, the items on the invoice. Some or all of the line items for this invoice may be selected in creating the new invoice.
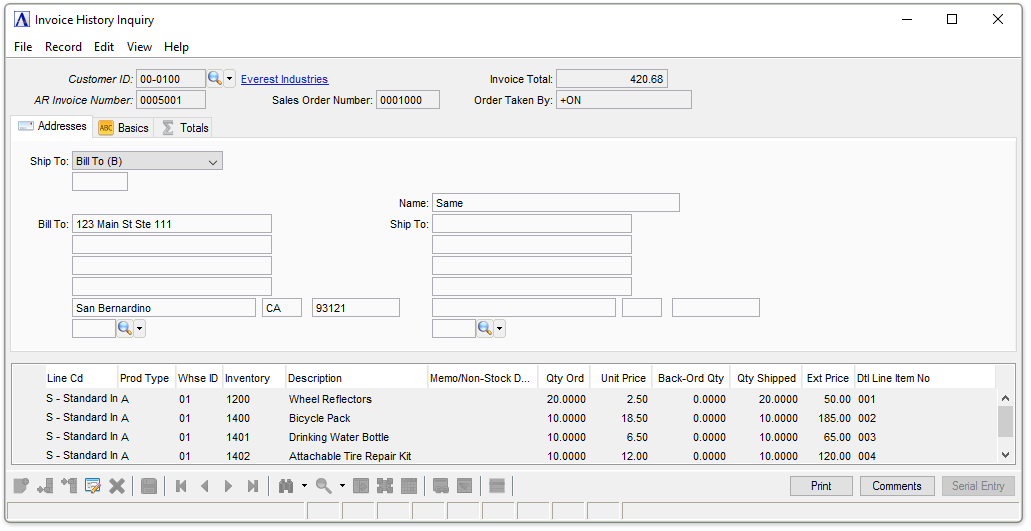
Invoice History Detail
-
After selecting the items for the new order, select the [Return] key. Selecting the Close window button returns to the Invoice History Header grid to facilitate selecting a different invoice.
-
Click
 to open a window to review the customer's credit information.
 -
Click
 to change the status of an invoice back to an order. Answering 'Yes' to the print order prompt adds the order to the batch to be printed in the Order Picking List task.
 -
Click
 to create a Print Preview of the invoice. See Print Now.
 -
Click
 to launch the Cash Sale Transaction window. See Cash Sale.
 -
For serialized/lotted inventory items, select the line on which the item appears, then click
 . This action opens the Lot/Serial Detail File window. See Serial Entry.
-
Click
 (becomes active when accessing the Qty Ord field of an existing line item) to force the system to recalculate the Extended Price for the line.
 -
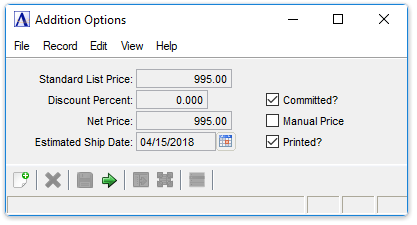
Click
 to open an item review window that includes the Standard List Price, Discount Percent, Net Price, Estimated Ship Date and other features.
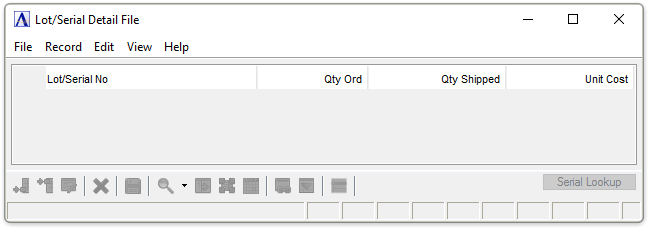
Serial Entry
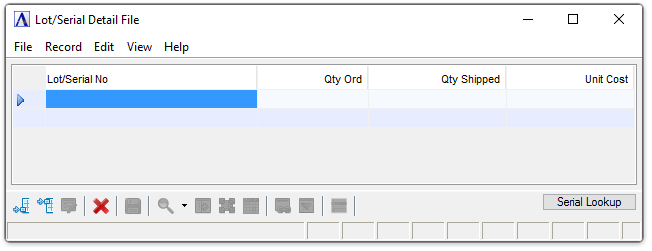
Lot/Serial Detail File
If the invoice item does not have serialized inventory assigned to it, it may be assigned by clicking ![]() . Selecting the button opens the Inventory Lot Lookup window where the item's locations can be selected for the invoice.
. Selecting the button opens the Inventory Lot Lookup window where the item's locations can be selected for the invoice.
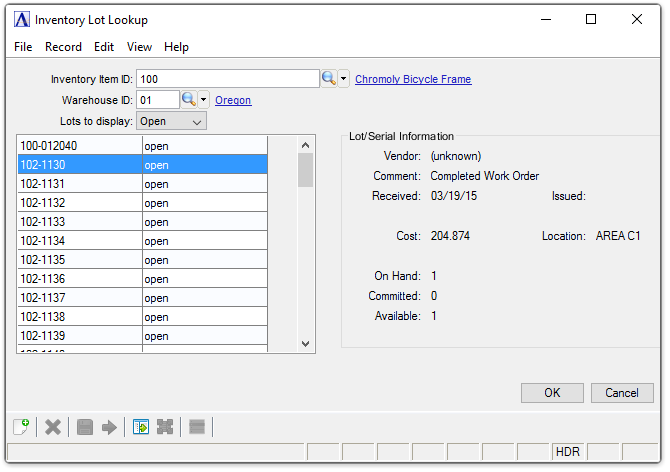
Inventory Lot Lookup
-
After selecting the item location, press [OK] to return to the Lot/Serial Detail File. The item and its location are now selected.
-
On the Lot/Serial Detail File window Click to return to the Invoice Entry Header.
Totals Tab (back to top)
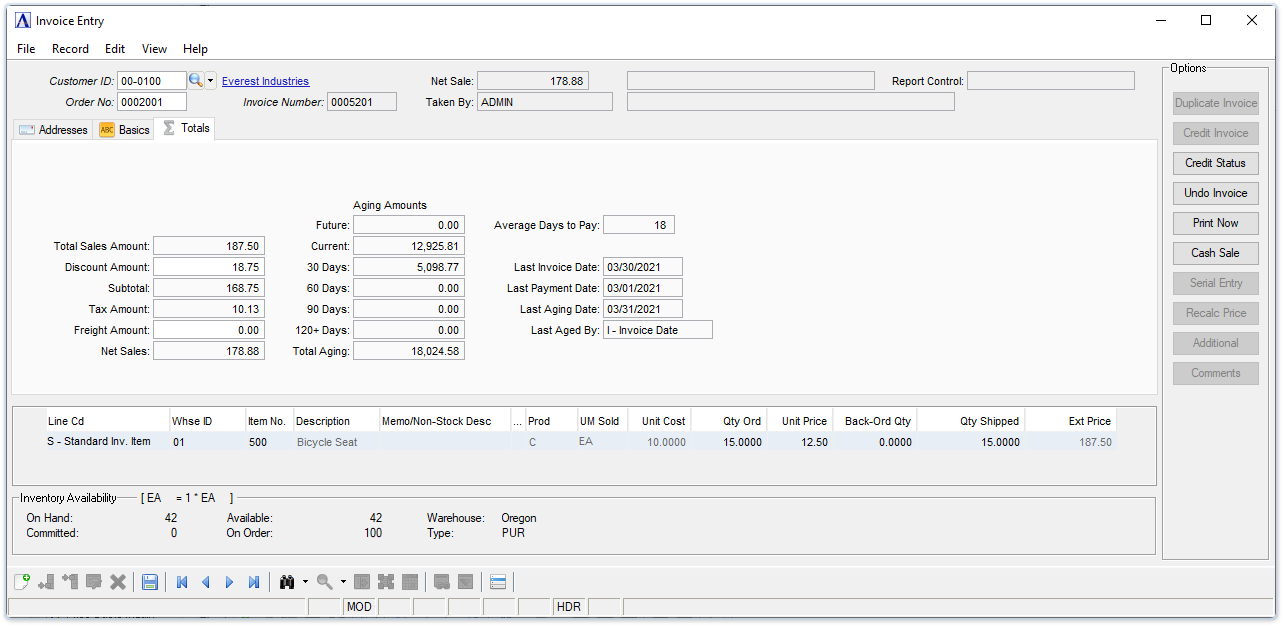
Invoice Entry Totals tab
In the Total Sales Amount field...
Display only. Shows the gross sales total for the order.
In the Discount Amount field...
When entering a new cash customer, [F2] must be selected to access this field.
-
Enter a dollar amount to decrease or increase the list price.
-
Press [Enter] to leave blank.
In the Subtotal field...
Display only. Shows the gross sales amount minus the discount amount.
In the Tax field...
Display only. Shows the total sales tax calculated for all applicable state, county, and local tax jurisdictions applied to this invoice.
In the Freight Amount field...
-
Enter the freight amount in dollars.
-
Initialized when freight charges are available in the Shipment Tracking table, unless the freight amount was previously entered in Order Entry.
-
Press [Enter] to leave blank.
In the Net Sales field...
Display only. Shows the amount of the subtotal minus the tax minus the freight.
When finished making entries to the fields...
-
Click
to save the entries to the form. -
Click
to clear the form and begin again.
Printing Invoices/Receipts (Back to Top)
The Order/Invoice Processing module is fully capable of handling point-of-sale or over-the-counter transactions. If both the Cash Sales and Receipt Printer On System fields are checked in the OP Parameters task, cash and on-account sales may be processed and a tape receipt or invoice printed without leaving the sales counter. For suppliers to the industrial and construction trades, or for any business that handles a large volume of walk-in sales, this feature offers optimum speed, convenience, and accuracy.
To enable Print Now select  .
.
-
Click
.
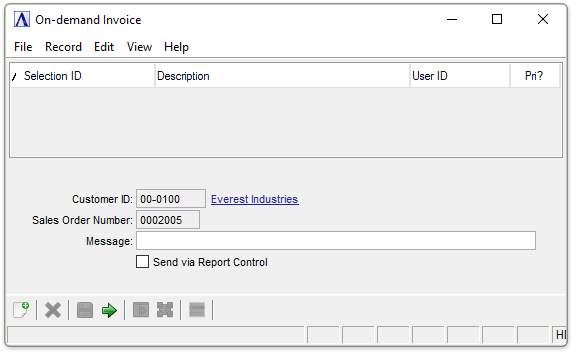
On-demand Invoice
In the Customer ID field...
Display only. Displays the customer ID selected in the previous step.
In the Sales Order Number field...
Display only. Displays the order number selected in the previous step.
In the Message field...
Enter a message to be added to the bottom of the on-demand invoice.
Send via Report Control checkbox...
-
Mark the box to send the report via the Report Control feature via email or fax based on the report control settings.
-
Unmark the box to display the report in the Viewer.
When done making selections...
-
Click
to save the settings -
Click
to clear the form and begin again. -
Click
to create the on-demand invoice.
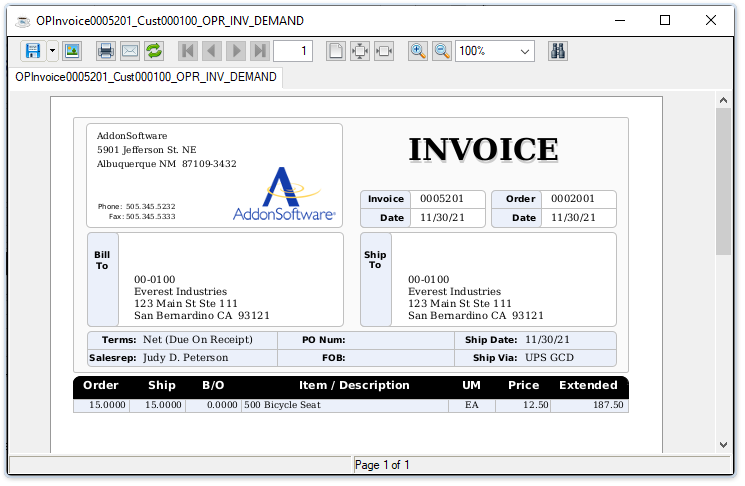
Sample On-demand Invoice
Closing the print preview of the on-demand invoice creates the following prompt:
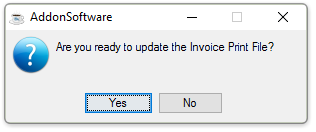
-
Select [Yes] to update the print file removing this invoice from future print batch jobs.
-
Select [No] to preserve the invoice in the print file.
Entering Cash Transactions (Back to Top)
Cash sales can be processed when the Cash Sales field is checked in the Parameter Maintenance task. During invoice entry, at the completion of a cash sale additional information specific to that sale may be entered.
-
Click
.
A cash sale may be a sale for which actual dollars are received, a sale for which a check is received, or a sale that is charged to a credit card. There are two ways to record them: entering the sale as cash "C" in the Customer ID field, or selecting the Cash Sale button.
When a cash sale is made, a general ledger cash account (rather than an Accounts Receivable account) is debited during the Sales Register update. No invoices are created in Accounts Receivable, although the month-to-date and year-to-date sales information is updated in the customer master file. If the Sales Analysis module is installed, sales analysis information is updated as usual.
In addition, information recorded for cash sales appears on the Cash Sales Register which is printed at the end of the Sales Register. The Cash Sales Register provides separate totals for cash, checks, and charge amounts received.
For most cash sales, use the [Cash Sale] button at the beginning of invoice entry to access the default Cash Customer number set up in the customer master file. You may quickly default through all or most of the heading and ribbon line information for the invoice.
When recording a cash sale for a regular on-account customer, use a regular customer number when creating the invoice. The sales history information is updated to the customer’s record in the customer master file.
As is the case with on-account sales, cash sales also update the customer sales history and all sales analysis files during the Sales Register update. However, cash sales do not affect customer aging and accounts receivable balance information, since these are not on-account sales.
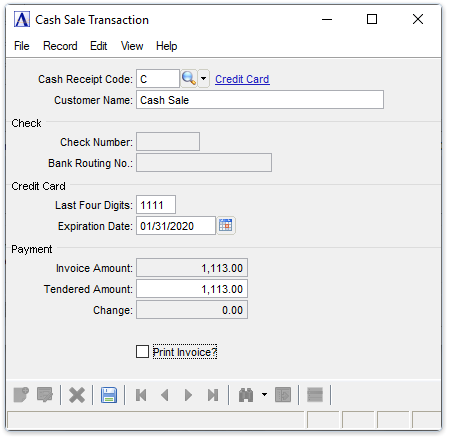
Cash Sale Transaction
In the Cash Receipt Code field...
-
Enter a valid cash receipts code.
-
Click
to select from a list of all valid cash receipt codes.
In the Check Number field...
This field is accessible and required when a check code is entered in the Cash Receipt Code field.
-
Enter the check number.
In the Bank Routing No field...
This field is accessible when a check code is entered in the Cash Receipt Code field.
-
Enter up to 16 characters for the bank routing number.
In the Credit Card No field...
This field is accessible when a credit card code is entered in the Cash Receipt Code field.
-
Enter the last four digits of the credit card number.
In the Expiration Date field...
This field is accessible when a credit card code is entered in the Cash Receipt Code field.
-
Enter the expiration date of the credit card.
A valid date must be entered in order to complete the transaction. If an invalid card number is entered the system displays the prompt:
- Press [OK] to access the Exp. Date field again.
Credit is not checked in Invoice Entry because it is assumed the order has already been shipped. Refer to Accounts Receivable Maintenance and Credit Management Parameters to ensure that all customer- and credit-related fields and flags are properly set up.
In the Cust Name field...
-
Enter up to 30 characters for a customer name.
-
Press [Enter] to accept the default name taken from the Invoice Entry Header.
This information is printed on the Cash Sales Register.
In the Tendered Amount field...
-
Enter the amount of payment.
If the amount entered is less than the amount that appears in the Invoice Amount field the system displays the prompt:
-
Press [OK] to access and correct the Tendered Amount.
In the Change field...
Display only. Shows the amount of any overage due the customer.
Print Invoice? checkbox...
-
Mark the box to create an invoice.
-
Unmark the box to proceed without creating an invoice.
Shipment Tracking (Back to Top)
This task is accessed from the Display additional options dropdown. It launches the Shipment Tracking inquiry grid where tracking information for the order can be viewed. The [Shipment Tracking] button launches the carrier's shipment tracking website using the carrier's URL from the Accounts Receivable Carrier Service Code maintenance task.
![]()
Shipment Tracking
Refresh Aging (Back to Top)
Use the Refresh Aging option to re-age this customer, showing the aging stats as of the current system date. If the customer invoices have never been aged, the "Last Aged By" is determined from the AR Parameters > Default Age By Option.
Recalculate Tax (Back to Top)
Use the Recalculate Tax additional option to recalculate the sales tax for the Invoice. This additional option is disabled unless the Invoice form is in Edit mode and the focus is in the header.
Processing Backorders (Back to Top)
If the Backorders field is checked in the OP Parameters task, backorders are automatically generated by Invoice Entry and the Sales Register update whenever inventory items are not available to fill an order. If the field is unchecked, orders for items not available to ship are deleted by the Sales Register update.
When a backorder is created, it is placed in the Order Entry file under its original order number. When such an order is recalled by Invoice Entry, it is identified with a “B/O” just to the left of the Bill field.
The backorder remains in the Order Entry file until the backordered items are received and ready for shipment. At that time, the backorder may be recalled with the Invoice Entry task by its original order number and re-invoiced. A backorder may be re-invoiced as many times as necessary to completely fill the order.
Backorders are maintained in the same manner as a standard order. Backorders can be reviewed whenever needed by creating the Order Status Report by Item, Order Status Report by Customer, or the Open Order Detail Report and selecting backorders only.
Establishing Backorder Quantities
To establish backorder quantities during Invoice Entry, follow the procedures for entering header and ribbon line information for the invoice, then proceed to detail line entry.
For each line item requiring a backorder quantity, recall the line and position the cursor in the Ship field. Enter the quantity actually shipped, and the backordered quantity is automatically calculated as the difference between the order and ship quantity. Or the B/O field may be accessed directly and the backordered quantity entered manually
Backorder quantities may be entered for as many inventory line items on an invoice as necessary. After printing the invoice and running the Sales Register update, backorders are automatically generated for any invoice that contains backordered quantities. Backorders can be accessed through the Order Entry task, printed and maintained in the same manner as standard sales orders.
Backordered quantities may be entered on a standard sales order during order entry if the backordered quantity is known at the time the order is recorded. However, this does not automatically create a backorder. The order must first be invoiced and printed and the Sales Register update run before a backorder is generated and placed in the Order Entry file.
If an order is invoiced that contains uncommitted items, both the ship quantities and the backorder quantities of the uncommitted items are zero. If all the committed items on an order are shipped and only items which are not committed remain to be shipped, the order will not be considered a backorder (even if it was previously a backorder).
Return to Invoice Entry Header
When done making selections...
-
Click
to save the order
______________________________________________________________________________________
Copyright BASIS International Ltd. AddonSoftware® and Barista® Application Framework are registered trademarks.