Sales Order Processing - OP Parameters
Function
The fields in this task determine how the Sales Order Processing module performs for the system. In addition to the fields pertaining to all order and invoice entry, there are several for establishing defaults when a new customer is entered in the system.
=> To access this task...
Select OP Parameters from the Parameters menu.
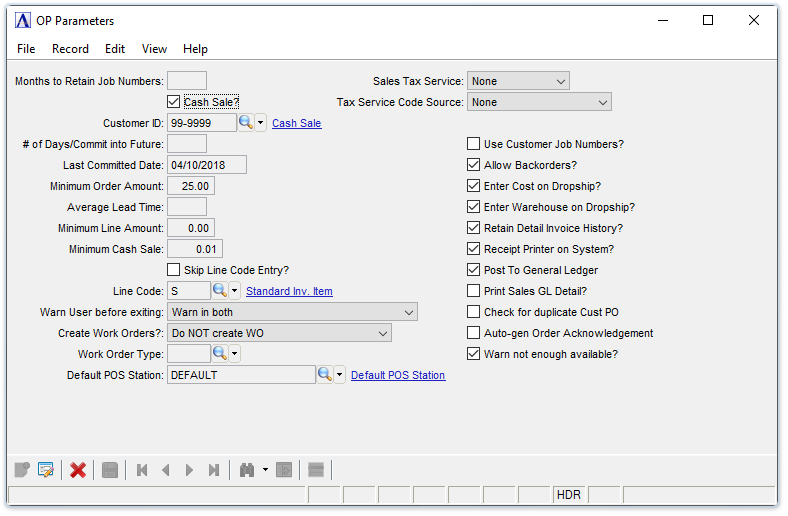
Sales Order Processing Parameters
About the Fields
To enable edits to the form select  .
.
In the Months to Retain Job Numbers field...
This field is accessible when you check the Use Customer Job Numbers? field.
-
Enter the number of months from the date of the last invoice to retain job information.
This number informs the Accounts Receivable module how long you want to maintain job details. If the Retain? parameter in the Accounts Receivable Customer Maintenance task is checked, job detail data is deleted by the Accounts Receivable Period End Update when the last invoice is older than the above specified months.
Cash Sale? checkbox...
-
Mark the box to process cash sales with this system.
-
Unmark the box if cash sales are not processed with this system.
When marking this parameter the Sales Register debits cash sales transactions from the appropriate General Ledger cash account, rather than an Accounts Receivable account.
In the Customer ID field...
-
Enter 1 to 6 digits to identify cash sales.
-
Press [Tab] to leave blank.
-
Click
 to view the Customer Master records.
 -
Click
 to view the master record for this customer when an ID number is entered.
In the # of Days/Commit into Future field...
-
Enter the number of days stock remains committed for ordered items.
-
Press [Tab] to accept the default (if any).
If the item’s scheduled ship date falls within the specified commitment range, stock is automatically committed.
Future Commit Example
If the number of days to commit in future is 7 and the item’s scheduled ship date is 7 days after the order date, stock is automatically committed. However, if the item’s scheduled ship date is 8 days after the order date, it is necessary to commit stock with the Commit and Release Future Orders task.
In the Last Committed Date field...
Display only. Shows the last date that the Commit and Release Future Orders task was run.
In the Minimum Order Amount field...
-
Enter the amount of acceptable minimum orders.
-
Press [Tab] to accept the default (if any).
In the Average Lead Time field...
-
Enter the average number of days between order date and ship date.
-
Press [Tab] to leave blank.
Each time the Order Entry task is accessed, entry of a shipping date is first requested. The default displayed on the screen is the current terminal date plus the number entered in this field.
In the Minimum Line Amount field...
-
Enter the amount of acceptable minimum orders per detail line.
-
Press [Tab] to accept the default (if any).
When orders below this amount are entered in order or invoice entry, a warning message displays on the screen.
In the Minimum Cash Sale field...
-
Enter the amount of acceptable minimum orders for cash sales.
-
Press [Tab] to accept the default.
When orders below this amount are entered in order or invoice entry, a warning message displays on the screen.
Skip Line Code Entry? checkbox...
-
Mark the box to allow line codes to be skipped.
-
Unmark the box if line codes are to be required.
In the Line Code field...
-
Enter a valid line code to be used as a default.
-
Click
to view a list valid line codes. -
Click
to view the master record for this code when a Line Code is entered.
The default line code identifies the type of sale most commonly entered. If a default line code is not established, a valid line code for each new order/invoice line must be manually entered. The default code can be overridden.
From the Warn User before exiting dropdown...
This parameter enables a warning in Order Entry and Invoice Entry processes to check the Discount Amount and Freight Amount on the Totals tab before leaving the order or invoice.
Select from the following settings:
-
Warn in both
-
Don't warn user before exiting
-
Warn in Order Entry
-
Warn in Invoice Entry
From the Create Work Orders? dropdown...
Select from the following settings:
-
Do NOT create WO - to disable creating Work Orders from Order Entry.
-
Ask before creating WO - to create Work Orders for items ordered in Order Entry that have Bill of Materials.
This field is disabled if either Bill of Materials or Shop Floor Control is not installed, or Shop Floor Control Parameter "Ord Proc Interface Enabled?" is unchecked.
In the Work Order Type field...
-
Enter the Work Order Type code to use when creating planned Work Orders
-
Click
to select from a list of WO Type codes.
The Work Order Type must use a Work Order category of "Inventory Item (I)". This field is disabled when the "Create Work Orders?" field is disabled or set to "Do NOT create WO".
In the Default POS Station field...
-
Enter a valid POS station code to be used as the default.
-
Click
to view a list valid POS codes. -
Click
to view the master record for this POS code when a POS code is entered .
From the Sales Tax Service dropdown...
-
When using a sales tax service to calculate sales tax, select the service from the list. Or, select "None" when using AddonSoftware to calculate sales tax. Currently the only sales tax service supported is Avalara's AvaTax.
From the Tax Service Code Source dropdown...
-
Disabled and "None" unless a sales tax service is selected for the Sales Tax Interface.
-
Select the source for an inventory item's default tax service code.
-
Selection other than "None" is required when a sales tax service is selected for the Sales Tax Interface.
Use Customer Job Numbers? checkbox...
-
Mark the box to assign separate job numbers for specific customer projects and to track customer sales.
-
Unmark the box if customer job numbers will not be used.
For point-of-sale businesses such as building material suppliers, use this feature to maintain separate sales records for contractors who routinely purchase materials for multiple building sites. All necessary information for filing a lien (job name and address, total sales to date, date of first shipment, etc.) may be retained for as long as desired. The information is also used to produce the Customer Job Report.
NOTE: If you check this option, parameter job numbers should be established and maintained with the Customer Maintenance task of the Accounts Receivable module.
Allow Backorders? checkbox...
-
Mark the box to automatically create backorders for incomplete invoices.
-
Unmark the box if backorders are not to be created.
If backorders are not created, any unavailable order detail line items are deleted (along with the original order) when the Sales Register is updated.
Enter Cost on Dropship? checkbox...
-
Mark the box to enable entry of both price and cost of drop ship items on orders/invoices.
-
Unmark the box to enable entry of price only.
Enter Warehouse on Dropship? checkbox...
-
Mark the box to require entry to the Warehouse field for drop ship detail lines.
-
Unmark the box to ignore.
NOTE: This field takes precedence over the Skip Warehouse Entry field in the Order/Invoice Terminal Maintenance task.
Retain Detail Invoice History? checkbox...
-
Mark the box to enable viewing of historical invoices.
-
Unmark the box to ignore.
NOTE: Only customers with the Retain Invoice Detail History parameter checked in the Accounts Receivable Customer Maintenance Profile Maintenance option can retain historical invoice information.
This parameter enables the viewing of historical invoice detail line items during order entry and invoice entry. It also enables the copying of information from a historical invoice and save it as a new order or invoice.
Receipt Printer on System? checkbox...
-
Mark the box if a receipt printer is used to print tape receipts.
-
Unmark the box if a receipt printer is not used.
When this parameter is marked, a printer option during invoice entry is provided.
Post to General Ledger checkbox...
-
Mark the box to post sales orders to the GL.
-
Unmark the box if the GL in not used/installed.
Print Sales GL Detail? checkbox...
This field is accessible when the General Ledger module is installed.
-
Mark the box to include an audit report of all General Ledger postings by invoice line item on the Sales Register.
-
Unmark the box to ignore.
Check for duplicate Cust PO checkbox...
-
Mark the box if you record Customer PO numbers and would like the system to check for and warn about duplicates.
-
Unmark the box to skip this checking process.
Auto-gen Order Acknowledgment checkbox...
-
Mark the box to automatically generate Acknowledgements for customer orders. If the customer is setup in Report Control Recipients to receive OPR_ORDCONF reports (Acknowledgements) via email, or fax, they will be sent automatically without having to print the Acknowledgement.
-
Unmark the box to NOT automatically generate Acknowledgements for customer orders. Instead, Acknowledgements will be generated on-demand or in a batch.
Warn not enough available? checkbox...
-
Mark the box to provide a warning in Order Entry and Invoice Entry when shipping more of an item than are available.
-
Unmark the box to skip the warning.
When finished making entries to the fields...
-
Click
 to save changes to OP Parameters.
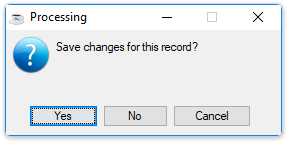
Closing an unsaved record will issue the prompt:
-
Select [Yes] to save the changes.
-
Select [No] to return to the OP Parameters form.
______________________________________________________________________________________
Copyright BASIS International Ltd. AddonSoftware® and Barista® Application Framework are registered trademarks.