Installing BBj 10.x to 18.x — GUI
Use this guide to install BBj versions 10.x through 18.x in GUI mode. The Installer requires Java to be installed on the system in order to run. Installing a Java Development Kit (JDK) is required for a BBj installation to take advantage of the full scope of BBj features. Refer to the Platform Availability list for supported versions of Java. The list includes links to download JDKs for all BBj-supported operating systems.
Download BBj
-
BBj downloads are available at: https://www.basis.cloud/bbj-downloads/
-
Select the Revision of BBj you wish to download:

-
Select the desired feature package:

-
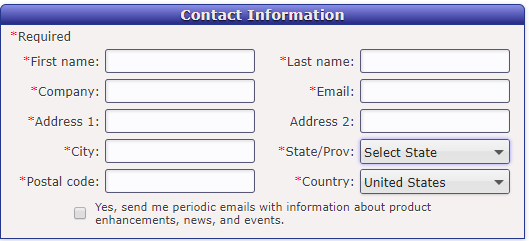
Complete the following:
-
Fill in the required Contact Information fields.
-
Mark the "I agree..." and "I understand..." checkboxes in the Download Terms.
-
Click [Download] to start the download.
-
Install BBj
-
The download will arrive in the form of an executable Java archive (.jar) file named in the following format: BBj<revision><date_time>.jar
Example: BBjBaristaAddonDemos1802_06-11-2018_0950.jar
-
Launch the installer:
-
On Windows and Mac systems, double-click the executable .jar to launch the installer. If Java file associations differ and do not run the file automatically, execute the following so Java runs the file:
-
Windows:
%JAVAHOME%\bin\java -jar <jar_file_name>
-
macOS and UNIX:
%JAVAHOME%/bin/java -jar <jar_file_name>
-
The Language Selection panel appears. Choose the language you wish to use to run the install and click [Next].
Also visible on the panel is the Response File group, with the following checkbox options:
-
Record - checking this box will record the installation so that it can later be played back in an interactive or silent installation where no user interaction is needed.
-
Playback - this box will be checked if the installation was launched with a previously recorded response file.
For more information on these options, see links in the See Also section at the bottom of this page.

-
-
The Welcome panel appears, displaying the version of BBj about to be installed. Click [Next].

-
The End User License Agreement (EULA) panel appears. If you agree with the terms, choose "I ACCEPT..." and click [Next].

-
The Directory Selection panel appears. Click [Next] to accept the default installation path, or use the browse button or type a file path to select a new path to install BBj to.
As of BBj 19.12, the default installation directories are as follows:
Windows: C:\bbx
macOS: /Applications/bbx
Other operating systems: /usr/local/bbx
-
The JVM Selection panel appears. As stated above, a Java Development Kit (JDK) is required to enable the full scope of BBj features. If the panel does not display a JDK, use the browse button to locate the JDK install directory.

-
The Installation Type Selection panel is displayed. Choose "Typical" to install all of the features included in the installation package or choose "Custom" to select/deselect features to install. After clicking [Next], the Custom Installer Feature Selection panel will appear if "Custom" is chosen, otherwise, the Installation Summary panel will appear.

-
The Configure Web Start panel appears. Choose "Trust BASIS International Ltd. to generate a certificate for Web Start" to have BBj automatically generate a certificate for Web Start clients, or choose "Use an existing certificate for Web Start" to configure BBj to use an existing certificate.
Also in this panel is the following checkbox: "Make installer available to Web Start clients". Checking this box will enable BBj to host Web Start installations to other systems on the network. Web Start installations of this type are handy for installing the ODBC driver and standard Thin Client on multiple client systems.
Note: Checking this box will double the size of the disk space for the installation. See "Web Start Installation" below for more information.

-
The Generate Web Start Certificate panel appears (if the "Trust BASIS..." option was chosen in the previous dialog). Enter the appropriate company name in the Company Name field. This name will be visible to the Web Start clients when Web Start applications are first launched.

-
The Installation Summary panel appears, summarizing the options chosen in the previous panels and the amount of disk space that will be consumed. If any option/configuration is incorrect, you may click the [Back] button to return to the panel where a particular selection/configuration was made. Click [Next] to start the installation.

-
After the installation is complete, the configuration wizards appear to complete the installation configuration. The first wizard is the UAC Configuration wizard, with two options:
-
Use standard privileges - (Recommended) Runs BASIS applications with standard user privileges.
-
Require elevation to administrator privileges - Elevates privileges to 'Administrator'

-
-
Next is the Select Licensing Option wizard, with three options:
-
Retrieve a license - Choose this option to register for a new license (serial number and authorization number will be needed) or to register for a demo license.
-
Install a license - Choose this option to install an existing license.
-
Select a BASIS License Manager - Choose this option to designate an existing BASIS License Manager, if one is already running on the network.

-
-
Assuming the first option was chosen in the dialog above, the Register for a License dialog appears. Complete the contact information fields. Click [Next].

-
The License Registration Information dialog appears. There are two options:
-
Check "Requesting a 30-day evaluation license" to register for a demo license.
Note: Increasing the User Count above '2' will result in the delivery of a 7-day emergency license. -
Enter a valid Serial Number and authorization number to receive a permanent license for this server.
-
The License Registration and Delivery Methods dialog appears. Registration and Delivery Methods available:
-
Register and install a license automatically - Preferred method. Requests and installs the license automatically.
-
Web browser - Submits or receives the license via HTTP.
-
E-mail - Submits or receives the license via email.
-
Other - Save the license request to a file that can be sent by email later from a system that has Internet access.

-
-
The Configure BLM Startup dialog appears. Three options are available:
-
"Configure the BLM to run as a Windows service" - Runs the BASIS License Manager as a service, with three sub-options: Automatic, Manual, or Disabled.
-
"Configure BLM services to run automatically after user login" - Runs the BLM after the user logs in to the system.
-
"Configure the BLM to run manually" - Choosing this option will skip all BLM configuration. The BLM must be manually started via the Admin utility.

-
-
The Stop/Start the BASIS License Manager wizard appears with 3 options:
-
Start the BASIS License Manager
-
Stop the BASIS License Manager
-
Restart the BASIS License Manager

-
-
The Configure BBjServices Startup wizard appears with two options for configuring BBjServices:
-
"Automatically after user login" - Primarily used in a development environment, this option starts BBjServices after the user logs into the system.
-
"As a Windows service" - Primarily used in a production environment, this option starts BBjServices as a service. Complete the "User Account" and Password fields that BBjServices should use to start.
Note: The user account should be a member of the Administrators group.

-
-
The Start/Stop BBjServices wizard appears with three options:
-
Start BBjServices
-
Stop BBjServices
-
Restart BBjServices

-
-
Install Complete.

In both cases above, the "Host Name" and "Host ID" fields will be automatically filled and should not be modified unless you are instructed to do so by BASIS support.

See Also
Installation - Record/Playback
Installing BBj 5.x-9.x - UNIX/macOS
Installing BASIS Products - UNIX
Installing BASIS Products - Windows