Payroll - Employee Maintenance
Function
Use this task to define and maintain employee
information used by the payroll system. Information is entered to
establish the employee number and department, the pay rate, the normal
pay periods, and, if applicable, the appropriate union code. The
Display additional options...
button ") provides access to additional features.
provides access to additional features.
To access this task...
Select Employees from the Inquiry and Maintenance menu.
Employee maintenance
About the Fields
For each new employee and all employees defined during the data conversion process, pay codes, deduction codes, tax codes,
contribution codes and union codes that apply to all employees (i.e., codes for which the Special field is set to ‘N’) are automatically assigned.
The Employee Masterfile Maintenance screen is divided into two sections. The upper section (header) fields are used to enter the employee number, name and display name. The lower section is used to enter supporting information, it is divided into 4 Tabs - Employee Information, Deposit Information, Image, and Comments.
In addition, the additional options button leads to a complete inquiry and supporting screens:
To Enable Edits to the form select ") .
.
In the Employee Number field...
-
Enter an employee number.
-
Click
") to select from a list of all valid employee
numbers.
to select from a list of all valid employee
numbers. -
Click the record navigating buttons;
") to view the first record,
to view the first record, ") to view the previous record,
to view the previous record, ") to view the next record, and
to view the next record, and ") to view the last record.
to view the last record.
NOTE:
The format of the employee number is defined in the Payroll Parameter Maintenance task.
When you enter a valid employee number, the first and last name of the employee are displayed and the Employee Maintenance Options sub-menu appears. Changes or additions to the employee’s records can be made by selecting options from this menu.
Although the original designation was for a Department Code - Employee Number designation with the ability to change an employee Number, the current system will always use the Home Department field, to determine which department the employee belongs in. Employee Renumbering is no longer permitted for historical tracking.
In the Last Name field...
-
Enter up to 16 characters for the last name of the employee.
In the First Name field...
-
Enter up to 14 characters for the first name of the employee.
In the Display Name field...
-
Enter up to 32 characters for the last name ", " first name that would normally be displayed on reports and searches. This is automatically filled in for you initially, but it is not directly connected to the Last Name and First name Fields that are used for check printing.
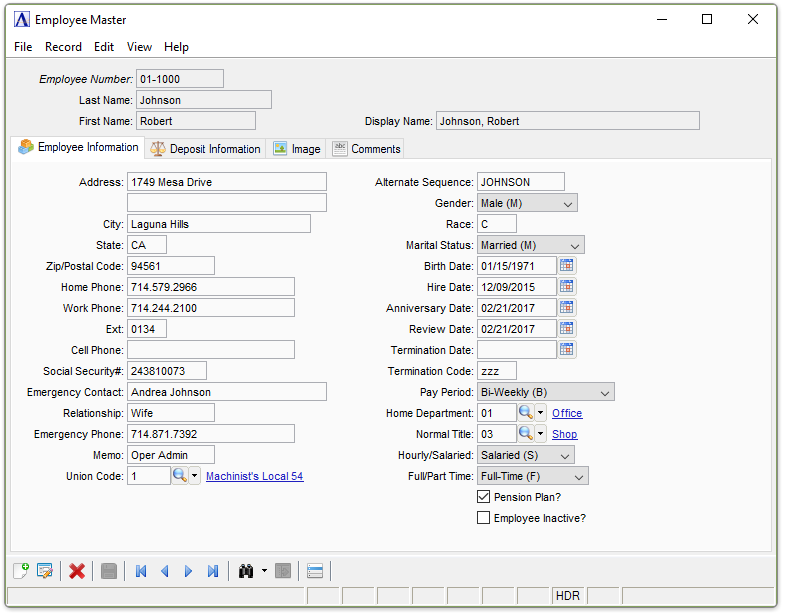
Employee Information Tab
Function
The Employee Information tab allows for the inquiry and maintenance of personal information that pertains to the Employee.
Employee Maintenance - Employee Information tab
In the Address field...
Use this field to enter any additional street information, i.e., suite number, building number, apartment number, etc...
-
Enter up to 24 characters for the first line of the employee’s address.
In the City field...
-
Enter up to 22 characters for the name of the employee’s city.
In the State field...
-
Enter the 2-character state code for the employee’s address.
In the Zip/Postal Code field...
The zip/postal size is determined in the Payroll Parameter Maintenance task.
-
Enter a 5-character or 9-character zip/postal code.
In the Home Phone field...
-
Enter the employee’s home phone number with area code. The punctuation for the area code and prefix will automatically display.
In the Work Phone field...
-
Enter the employee’s work telephone number with area code.
In the Ext field...
-
Enter any telephone extension number.
In the Cell Phone field...
-
Enter the employee’s cellular telephone number with area code.
In the Social Security # field...
-
Enter the employee’s Social Security Number without dashes. The module displays the entry in the proper format.
In the Emergency Contact field...
-
Enter the name of the person to contact in an emergency. Up to 24 characters may be used.
In the Relationship field...
-
Enter the relationship of the emergency contact to the employee, such as father, mother, husband, or wife. Up to 10 characters may be used.
In the Emergency Phone field...
-
Enter the phone number with area code of the emergency contact.
In the Memo field...
-
Enter information that may apply in an emergency. Up to 10 characters may be used.
In the Union Code field...
This field is accessible when the Union History parameter in Payroll Parameter Maintenance is checked.
-
Enter a valid union code for the employee.
-
Click
") to select from a list of valid codes.
to select from a list of valid codes.
In the Alternate Sequence field...
-
Enter an alphabetic code of up to 10 characters for the employee, usually the employee’s last name.
NOTE:
Government agencies at times require periodic reports on the sex, ethnicity, and other protected status of employees. The following optional data are only for analysis and possible affirmative action. Submission of information is voluntary.
From the Gender dropdown...
-
Select Unknown to leave unresolved.
-
Select Male (M) for male.
-
Select Female (F) for female.
In the Race field...
-
Enter a one character code from the following list identifying the employee's race.
Examples:
-
C - White (Caucasian)
-
O - Asian/Pacific Islander (Oriental)
-
I - American Indian/Alaskan Native (Indian)
-
N - Black (Negro)
-
S - Hispanic (Spanish)
-
From the Marital Status dropdown...
-
Select Unknown to leave unresolved.
-
Select Married (M) for Married.
-
Select Single (S) for Single.
-
Select Widowed (W) for Widowed.
-
Select Divorced (D) for Divorced.
The following date fields may be used by the Payroll Date List task to produce a report of employees by anniversary, birth, hire, review, or term date. The report is sorted by year, month, day.
In the Birth Date field...
-
Enter the employee’s date of birth.
-
Click
") to select from a Pop Up Calendar.
to select from a Pop Up Calendar.
In the Hire Date field...
-
Enter the employee’s original hire date.
-
Click
to select from a Pop Up Calendar.
In the Anniversary Date field...
-
Enter the anniversary date to be used for employee accruals.
-
Click
to select from a Pop Up Calendar.
Employee earnings such as vacation and sick pay are accrued based on the employee’s anniversary date or on the calendar year, as described in the Pay Code Maintenance task.
In the Review Date field...
-
Enter the employee’s next review date.
-
Click
to select from a Pop Up Calendar.
In the Termination Date field...
-
Enter the employee’s Termination date.
-
Click
to select from a Pop Up Calendar.
This can also be accessed by the Terminate/Reactivate Employee option
In the Termination Code field...
-
Enter a 3-character alphanumeric code identifying the reason for the employee’s termination.
Enter DDD for a deceased employee. Termination codes are any user-defined codes used for termination record keeping. The termination codes are not retained in any maintenance section. Be sure to document the codes and their meanings for future users who may be accessing the Payroll module.
From the Pay Period dropdown...
Select one of the following to designate the normal pay period for this employee.
-
Select Daily (D)
-
Select Weekly (W)
-
Select Bi-Weekly (B)
-
Select Semi-Monthly (S)
-
Select Monthly (M)
-
Select Quarterly (Q)
-
Select Annually (A)
This is used to determine the number of days in a normal period for Tax Calculations.
In the Home Department field...
-
Enter the department where the employee normally works.
-
Click
to select from a list of valid codes.
This determines which department the employee is reported in, on certain reports.
In the Normal Title field...
-
Enter the title normally used for the employee.
-
Click
to select from a list of valid codes.
From the Hourly/Salaried dropdown...
Select one of the Following to designate the normal pay type for this employee
-
Select Hourly (H) when the employee is paid on an hourly basis.
-
Select Salaried (S) for a salaried employee.
This information is used during Payroll Entry to calculate dollars earned for hourly and salaried employees.
From the Full/Part Time dropdown...
Select one of the Following to designate the normal status for this employee
-
Select Full-Time (F) for a full-time employee.
-
Select Part-Time(P) to represent a part-time employee.
Pension Plan? checkbox...
-
Mark the box when the employee participates in a qualified pension plan.
-
Unmark the box if the employee does not participate in a pension plan.
When Checked, during W-2 form printing, the pension plan box on the W-2 form is checked to indicate participation.
Employee Inactive? checkbox...
-
Mark the box to have Employee marked as inactive, which will hide them from Lookups and certain reports.
-
Unmark the box for normal employment.
Note:
This is not the same as Terminating/Reactivating an Employee, it is for maintaining historical data.
Deposit Information Tab
Function
The Employee Deposit tab allows for the inquiry and maintenance of special payment handling for the Employee.
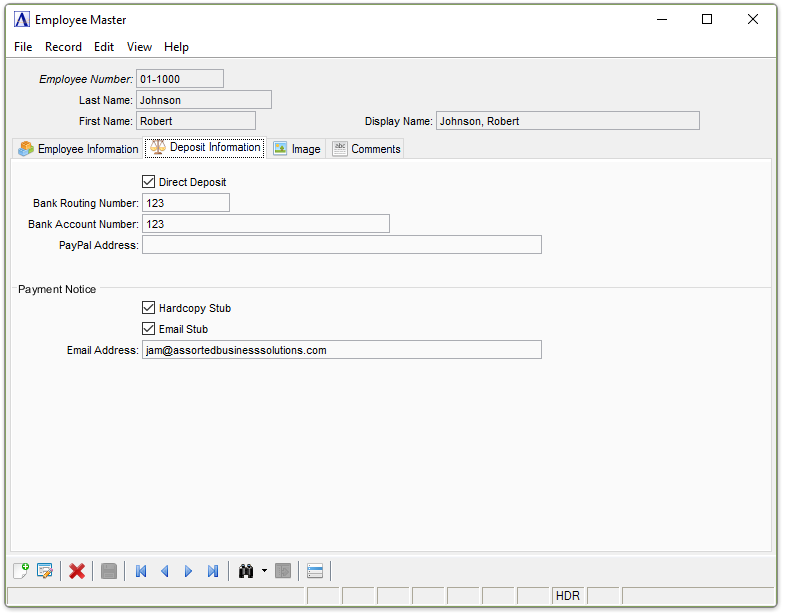
Employee Maintenance Deposit Information tab
Direct Deposit checkbox...
-
Mark the box when the employee's pay is to directly deposited, and not have a paycheck issued.
-
Unmark the box if the employee receives Pay via a regular paycheck.
NOTE:
This Field is Locked if Check Printing is in progress.
In the Bank Routing Number field...
This field is only accessible if Direct Deposit has been Checked.
-
Enter the Bank Routing Number used for EFT.
In the Bank Account Number field...
This field is only accessible if Direct Deposit has been Checked.
-
Enter the Bank Account Number used for EFT.
In the PayPal Address field...
This field is only accessible if Direct Deposit has been Checked.
-
Enter the Email Address of the PayPal Account Holder if this Employee is Paid via PayPal MassPayment
Payment Notice Section
Hardcopy Stub checkbox...
-
Check the Hardcopy Stub if a Facsimile Hard Copy Check should be printed for this Employee, when Paychecks are issued.
-
Leave it Unchecked to not print a facsimile check.
Email Stub checkbox...
-
Check the Email Stub if a Facsimile Check should be e-mailed to this Employee, when Paychecks are issued.
-
Leave it Unchecked to not email a facsimile check.
This is dependent upon the configuration in the Barista Administration -> Document Management -> Email Accounts having been established. It will use an Acct ID of "PR" for all Emailed Facsimile Checks.
In the Email Address field...
-
Enter up to 80 characters for the employee email address to send the facsimile checks to.
Image Tab
Function
The Employee Image tab allows for attaching a photograph of the employee and the location of a biometric file for Time Clock Usage.
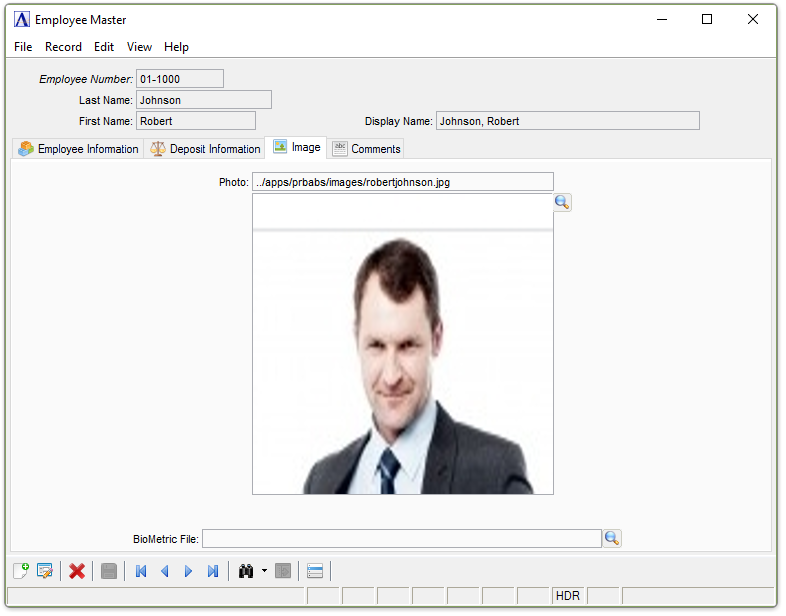
Employee Maintenance Image tab
In the Photo field...
-
Enter a valid path to a file the contains the image of the employee.
-
Click
to enter a file lookup dialog.
In the BioMetric File field...
This file may be used by some Time Clocks.
-
Enter a valid path to a file the contains the biometric data for the employee.
-
Click
to enter a file lookup dialog.
Comments Tab
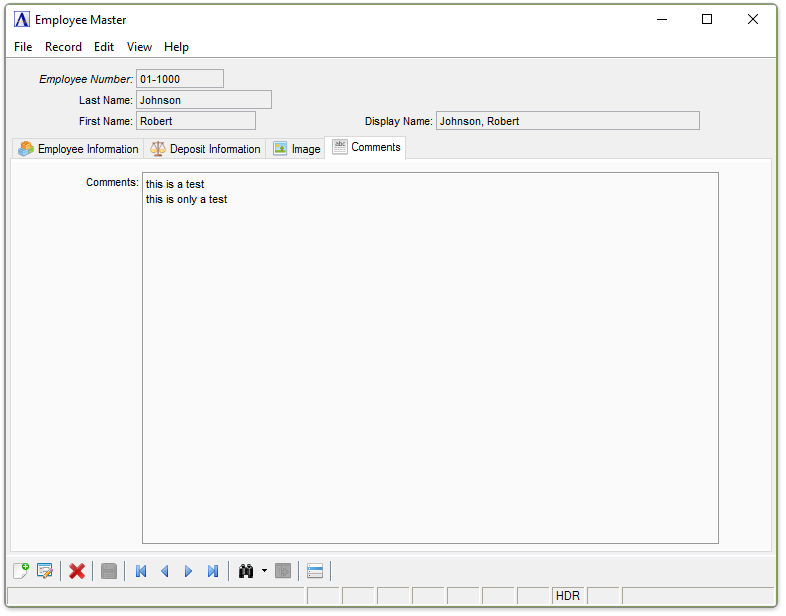
Employee Maintenance Comments tab
In the Comment field...
- Enter any comment of up to 4096 characters in length.
When finished entering Employee Information...
-
Click
") to save the record.
to save the record.
-
Click
") to clear the form and begin again.
to clear the form and begin again. -
Click
") to delete the record selected.
to delete the record selected.
If the Window is closed without saving the record, the module issues this confirmation prompt:
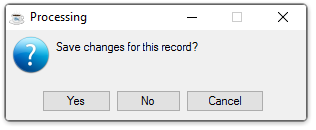
-
Click Yes to save the changes.
-
Click No to return to the Payroll Maintenance Menu without saving the record.
-
Click Cancel to return to the Employee Record you are Editing.
Selecting the [Display
additional options button...] presents
additional choices related to this Employee: