Payroll - Employee Earnings History
This task is accessed from the Display additional
options button ") on the Employee
maintenance form.
on the Employee
maintenance form.
Function
This option is used to maintain pay code information for the selected employee using the pay codes defined in the Pay Code Maintenance task. The pay codes assigned to each employee define what is valid for that employee during payroll entry. This option is automatically accessed during the set-up of a new employee, or may be used at any time to view information for the employee, or change accrual rate.
NOTE:
All non-special pay codes (where the Special Pay Checkbox was left unchecked in the Pay Code Maintenance task) are automatically assigned to new employees added to the Employee Masterfile. Verify that all automatically assigned pay codes apply to the new employee. When the automatically generated pay code does not apply, delete the pay code from the employee’s masterfile.
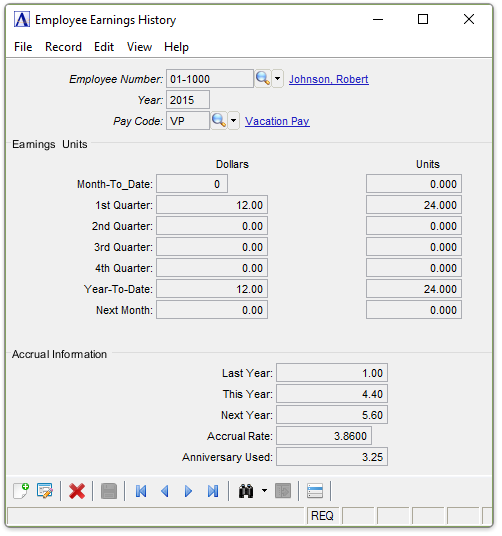
Employee Earnings History
About the Fields
The Earnings History Maintenance screen is divided into three sections. The upper section (header) fields are used to enter the Payroll Year and Select the appropriate code. The middle section displays historic information. The lower Accrual Information section is used to enter and edit items specific to this employee.
If designated as an Administrator, you may edit the Historical Data by selecting the Display additional options... button
and selecting Edit History:
Edit Employee Earnings History
The Month-To-Date and Next Month Fields are only relevant to the current Payroll Year. Non-current year fields are disabled.
As an Administrator, when finished entering Check History Information...
-
Click
") to save the record.
to save the record. -
Click
") to add a new record at the end of the
form or
to add a new record at the end of the
form or ") to insert
a new record at the current location.
to insert
a new record at the current location. -
Click
") to delete the record selected. A record may
be deleted if all numeric data is set to zero.
to delete the record selected. A record may
be deleted if all numeric data is set to zero.
If the Window is closed without saving the record, the module issues this confirmation prompt:
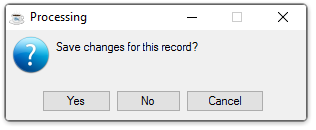
Save changes for this record?
-
Click Yes to save the changes.
-
Click No to return to the Employee Masterfile Maintenance without saving the record.
-
Click Cancel to return to the Employee Record you are editing.
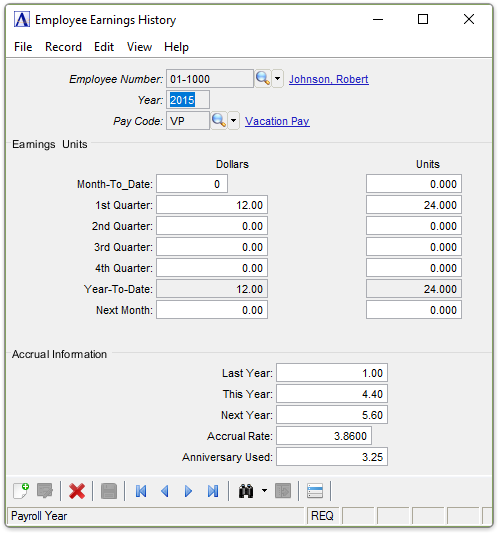
In the Year field...
-
Enter the Calendar Tax Year that this Record Applies to.
-
Click
") to select from a list of all existing employee
earnings records.
to select from a list of all existing employee
earnings records. -
Click the record navigating buttons;
") to view the first record,
to view the first record, ") to view the previous record,
to view the previous record, ") to view the next record, and
to view the next record, and ") to view the last record.
to view the last record.
In the Pay Code field...
Pay codes with the Special Pay checkbox left unmarked in the Pay Codes maintenance task are automatically assigned to new employees.>
-
Enter a valid Pay code. The description is displayed.
-
Click
") to select from a list of valid codes.
to select from a list of valid codes.
For established employees, historical information for the pay code will display on the screen (Dollars,Units, andAccrual Information fields). When the initial payroll is processed as the first payroll in January, this information begins accumulating to the Employee Masterfile. If the payroll is initiated at any other time, this annual historical data must be entered during the conversion process (refer to the Installation section of this manual).
The only changeable information in this option is the accrual rate, and then only when the Accrual Type field in the Pay Code Maintenance task is not set to ‘None’ (it must be Fixed, Units, or Dollars to make the change). All other pay code information displayed on the screen cannot be changed.
In the Accrual Rate field...
-
Enter an accrual rate for this employee when different than the defined accrual rate in the Pay Code Maintenance task.
When finished entering Earnings Information...
-
Click
to save the record. -
Click
") to clear the form and begin again.
to clear the form and begin again. -
Click
to delete the record selected. (All Numeric
Fields must be Zero to Allow Deletion)
If the Window is closed without saving the record, the module issues this confirmation prompt:
Save changes for this record?
-
Click Yes to save the changes.
-
Click No to return to the Employee Masterfile Maintenance without saving the record.
-
Click Cancel to return to the Employee Record you are editing.
If an "Allow Undefined Code"
option was accepted for an employee during Payroll Entry, and the
Payroll Check Register is updated by over-riding the warnings. A
new record will automatically be created for the employee. Be sure
to check the Earnings Information, which will initially be blank.