Installing BLM 18 and Higher
Note:
The BASIS License Manager (BLM) has been superseded by the BASIS License Service (BLS) for BBj/BBx 22.0 and higher. See one of the following articles to install the BLS:
For BLM 18 and higher, the installer requires a JVM to be installed on the system to run, and installing a Java Development Kit (JDK) is recommended. In an environment where BBj will not be installed, a JRE is adequate to install BLM 18.
If you have already downloaded BBj 18.0 or higher, you do not need to download this version of the BLM because it is included in your BBj download.
Refer to the Platform Availability list for a list of supported versions for your operating system, which includes links to download JDKs for all of the supported BBj operating systems.
Note:
BLM 20 incorporates important security fixes and requires a version 20 or later BASIS license. Check your .lic file in your BLM directory for version 20.0 or later on the FEATURE BBJ line to ensure your license is up to date. If it needs to be updated and you are covered by SAM, simply run "Register for a License" from the BASIS Admin tool or execute the UPDATELIC verb from within an interpreter session. If you are not covered by SAM, contact your BASIS Account Manager to upgrade your license to run BLM 20.0 with its security updates.
Download
-
Point your browser to: https://www.basis.cloud/basis-license-manager-download
-
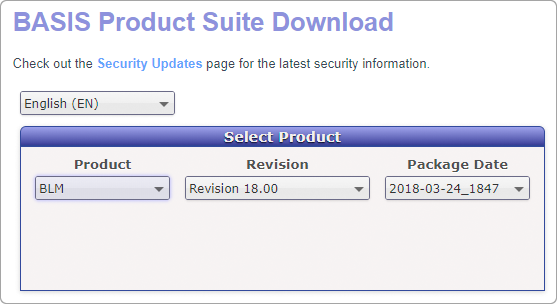
Select the BLM to download:
Installation
-
The download will arrive in the form of an executable Java archive (.jar) file named in the following format: BLM<revision><date>_<time>.jar
Example: BLM1800_03-24-2018_1847.jar -
Launch the installer:
On Windows and Mac systems, double-click the executable JAR to launch the installer. If the Java file associations differ, execute the following so Java runs the file in a command console:Windows:
%JAVAHOME%\bin\java -jar <jar_file_name>macOS:
%JAVAHOME%/bin/java -jar <jar_file_name>UNIX:
%JAVAHOME%/bin/java -jar <jar_file_name> -
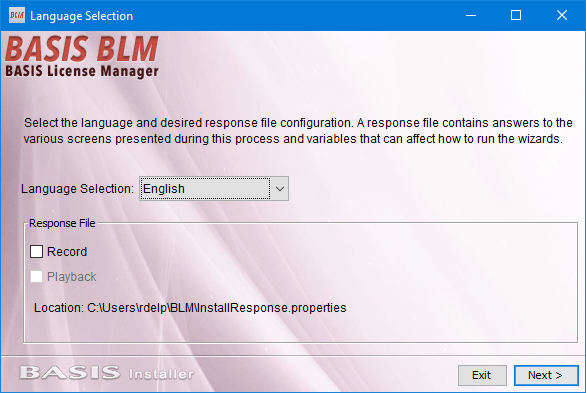
The Language Selection panel appears. Select which language to run the install in and then click Next.
The Response File group is also visible on this panel, and contains the following checkbox options:
Record – checking this box will record the installation so that it can later be played back in an interactive installation or a silent install, where no user interaction is needed.
Playback – this box will be checked if the installation was launched with a previously recorded response file.
For additional information about these options, see Installation Record/Playback.
-
The Welcome panel appears, displaying the version of BLM about to be installed. Click Next.
-
The End User License Agreement (EULA) panel appears. If you agree with the terms, check “I Accept..” and click Next.
-
The Directory Selection panel appears. Click Next to accept the default installation path or use the Browse button (or type) to select a new path to install the BLM.
As of BBj 19.12, the default installation directories are as follows:
Windows: C:\blm
macOS: /Applications/blm
Other operating systems: /usr/local/blm -
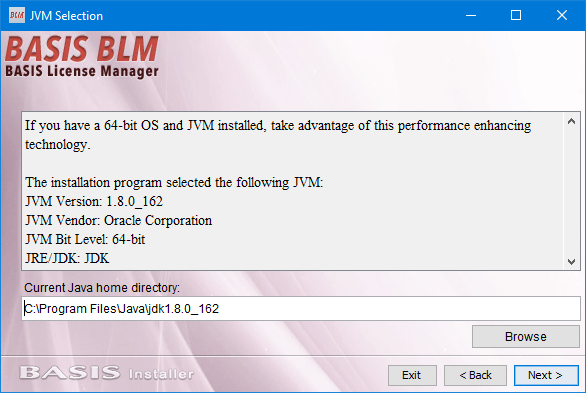
The JVM Selection panel appears. As previously stated above, a Java Development Kit (JDK) is recommended.
-
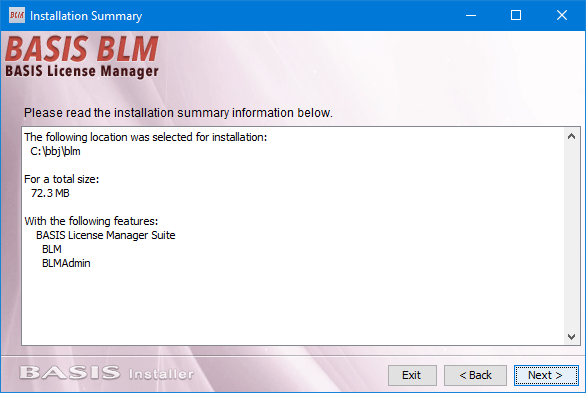
The Installer Type Selection panel is displayed. Choose "Typical" to install all of the features included in the installation package or choose "Custom" to select/deselect features to install. After clicking Next, the Custom Installer Feature or Summary panel will appear.
-
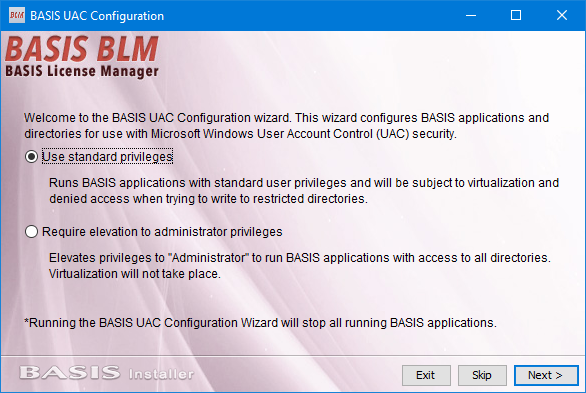
After the installation is complete, the configuration wizards appear to complete the installation configuration. The first wizard is the UAC Configuration wizard, with two options:
Use standard privileges -- (Recommended) Runs BASIS applications with standard user privileges.
Require elevation to administrator privileges -- Elevate privileges to "Administrator."
-
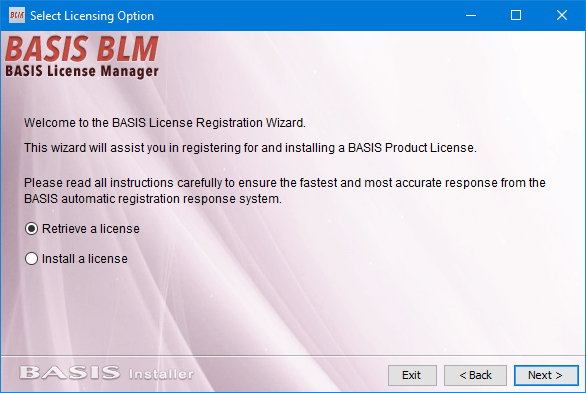
Next is the Select Licensing Option wizard, with two options:
Retrieve a license – Choose this option to register for a new license (you will need a serial number and authorization number) or to register for a demo license.
Install a license – Choose this option to install an existing license.
-
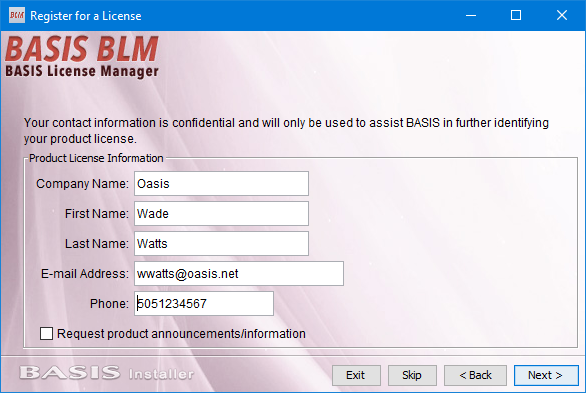
If the first option is chosen, the Retrieve a License dialog appears. Complete the contact information fields and then click Next.
-
The License Registration Information dialog appears and offers two different options:
-
Check "Requesting a 5-day 5-user evaluation license" to register for a demo license.
-
Enter a valid Serial Number and authorization number to receive a permanent license for this server. In both cases above, the Host Name and Host ID fields will be automatically filled and should not be modified unless instructed to do so by BASIS support. Click Next.
-
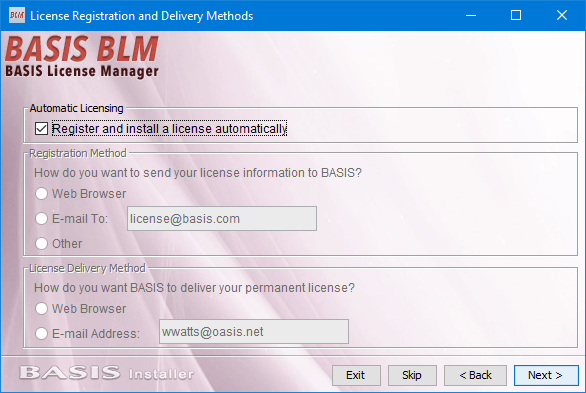
The License Registration and Delivery Methods dialog appears and lists the following methods available:
Register and install a license automatically – Preferred method. Requests and installs the license automatically.
Web browser – Submits or receives the license via HTTP.
E-mail – Submits or receives the license via email.
Other – Save the license request to a file that can be emailed later from a system that has Internet access.
-
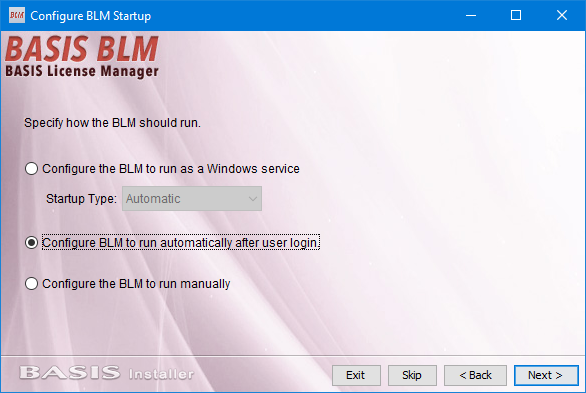
The Configure BLM Startup dialog appears. Three options are available:
Configure the BLM to run as a Windows service – Runs the BASIS License Manager as a service, with three sub-options: Automatic, Manual, or Disabled.
Configure BLM services to run automatically after user login – Runs the BLM after the user logs in to the system.
Configure the BLM to run manually – Choosing this option will skip all BLM configuration. The BLM must be manually started via the Admin utility.
-
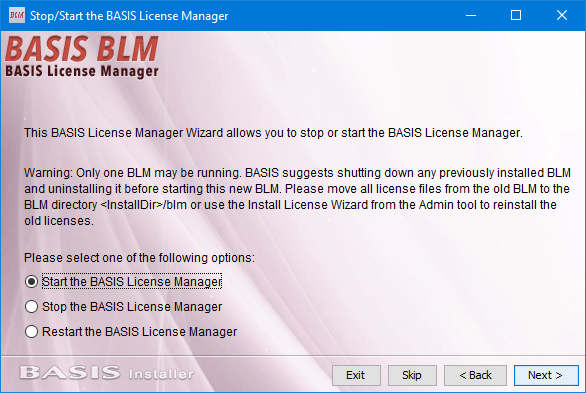
Start the BASIS License Manager, then click Next.
-
The BASIS BLM Wizard Process is now complete. Click Finish.