BASIS IDE Explorer
Overview
The Explorer provides a hierarchal view of objects associated with a project. An Explorer window may be opened in any Workspace, such as Editing or Debugging, where it is convenient for navigating through a development project and initiating actions on the project's files and components.
The Explorer's Filesystems tab presents a view of all the directories and files mounted for use in the current NetBeans Project. The IDE recognizes Business BASIC files according to their extensions. See Additional Options and Configurations for more information about registering file extensions in the IDE.
Files used by BBj or one of its accessory programs (ResBuilder, GUIBuilder or DDBuilder) are identified by unique icons to the left of the name. Clicking on one of these files with the left mouse button selects it, while clicking with the right mouse button opens a popup menu displaying the operations available for that file.
Editing, Executing or Debugging a File from the Explorer
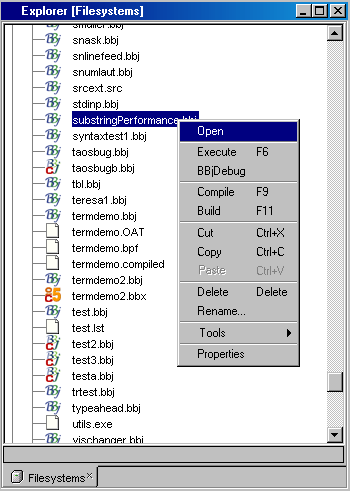
As shown in the image above, a popup menu appears when a file is right-clicked in the Explorer. The operations available in the popup menu depend on the type of file selected.
To work with BBj or BBx source code files, as in the above example:
1. Select Open to load the program file into the Source Editor.
2. Select Execute to run the program in non-debug mode.
3. Select BBjDebug to load the program file into the Debugger for testing.
4. Select Compile or Build to compile the file into token format.
See Compiling Program Source for more information about compiling.
To work with ResBuilder .arc or .brc files:
1. Select Open to load the file into the default plain text editor.
2. Select Execute to start Resbuilder.
To work with GUIBuilder .gbf files:
1. Select Open to load the file into the default plain text editor.
2. Select Execute to start GUIBuilder.
To work with DDBuilder .tpm files:
1. Select Open to load the file into the default plain text editor.
2. Select Execute to start DDBuilder.
Mounting a Directory in the Explorer
The IDE is only able to work with directories and files that have been mounted in the Explorer. Any shared filesystem on your network that is available to your computer can be mounted and browsed in the Explorer. Once mounted, the IDE will remember them from session to session as part of the currently loaded Project.
To mount a filesystem:
1. Select File | Mount Filesystem from the main menu, or go to the Explorer itself and select Filesystems then press the right mouse button to open a popup menu. Select Mount and then Local Directory.
2. Follow the steps in the New Wizard.