Accounts Receivable - Cash Receipts Entry
Function
The Cash Receipts Entry task allows entry of payments and adjustments to a customer's account and also permits entry of miscellaneous transactions to the general ledger accounts. If Bank Reconciliation is used, payments are grouped into user-defined deposits to facilitate the reconciliation process.
=> To access this task...
Select Cash Receipts Entry from the Accounts Receivable main menu.
If the Bank Reconciliation? checkbox in the Accounts Receivable Application Parameters form is marked, the Bank Deposit Entry form is launched prior to the main Cash Receipts form. If not using Bank Reconciliation, the main Cash Receipts from launches and no deposit data is entered.
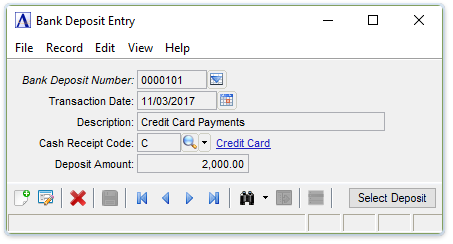
Bank Deposit Entry
About the Fields
In the Bank Deposit Number field...
-
Enter an existing Deposit Number directly, or leave the field blank to have the next deposit number automatically assigned.
-
Select the record navigating buttons;
 to view the first record,
  to view the previous record,
  to view the next record and
  to view the last record.
 -
Select
 to select a customer ID from a list of existing code records. See Query Functions.
NOTE: The  button next to the Bank Deposit Number field provides a handy drilldown into the cash receipts that comprise an existing deposit record.
In the Transaction Date field...
-
Enter the date directly or use the
 button. This is the date when the deposit is expected to be made at the bank.
In the Description field...
-
Enter an appropriate description for the deposit.
In the Cash Receipt Code field...
-
Enter a valid Cash Receipts Code or use the
 button to view/select the desired code. This code will be used for all Cash Receipts that become part of this deposit.
In the Deposit Amount field...
-
If the total deposit amount is known, enter it. The total of the cash receipt payments in the deposit will be validated against the deposit amount entered here. The Cash Receipts Register may be printed, but the update cannot be run unless the cash receipts bundled in a given deposit are equal to the stated deposit amount.
-
Leave the deposit amount zero to bypass deposit amount validation. It will be automatically set to the total of the cash receipt payments in the deposit.
After calling up an existing deposit or entering and saving a new deposit, click the Select Deposit button to dismiss the Bank Deposit Entry form and carry the selected deposit number into the Cash Receipts form.
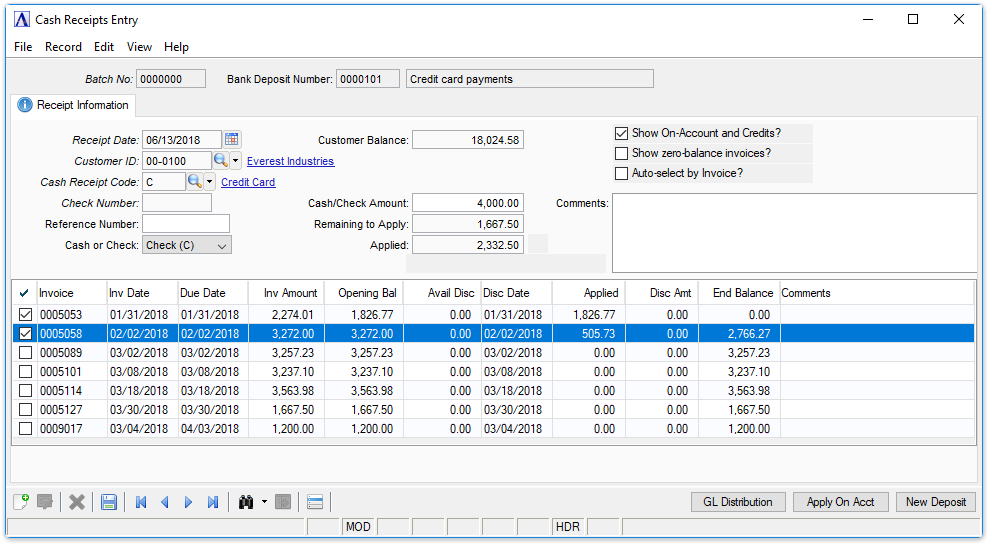
Cash Receipts Entry
The top of the Cash Receipts Entry form contains information common to this receipt, such as the customer, receipt date, and payment amount. If Bank Reconciliation is used, the Bank Deposit Number and description, Receipt Date, and Cash Receipt Code are pre-populated from the Bank Deposit Entry form. When saved, cash receipts become part of the Bank Deposit displayed on the form.
Once the key heading information has been entered, the detail grid populates with invoices for the given customer. The grid is sorted on Invoice number by default. Change the sort order by clicking in the desired column heading.
About the Fields
In the Receipt Date field...
-
Enter the receipt date directly or use the
button to enter the date that the receipt is posted to the general ledger.
The Receipt Date is used to determine whether or not a discount has expired for a particular invoice. Because the Receipt Date is also used to identify cash being applied on-account, only one on-account payment may be made per customer per receipt date. Change the Receipt Date field to make subsequent on-account payments for a customer.
In the Customer ID field...
-
Enter a valid customer number, or click
to select from a list of all valid customers.
The name of the customer whose number entered in the Customer ID field is displayed.
In the Cash Receipt Code field...
-
Enter a valid one to three-character cash receipts code, or click
to select from a list of all valid codes. -
When using deposits, the Cash Receipt Code is entered when creating a deposit and will be display only on the Cash Receipt form.
The description of the code is displayed. This code is used to determine the cash account in the general ledger and parameters that affect the processing. Refer to Cash Receipts Code Maintenance task for additional information.
In the Check Number field...
-
Enter a check number or any other identifying number.
In the Reference Number field...
Optional. This is included in the Cash Receipts Register and is helpful in preparing the deposit slip.
-
Enter any reference number from the check.
From the Cash or Check dropdown...
-
Select Check (C) to indicate a check.
-
Select Cash ($) for a cash transaction.
In the Customer Balance field...
Display only. Displays the customer balance remaining to be paid.
In the Cash/Check Amount field...
-
Enter the amount of cash received.
Adjustments, credit memos and other transfer transactions may not require a cash amount, depending on how the cash receipts code is defined. (Refer to note for Cash Receipt Code.)
In the Remaining to Apply field...
Display only. The balance of the invoice(s) remaining to apply.
In the Applied field...
Display only. The amount of payment that has been applied to invoice(s).
Show On-Account and Credits? checkbox...
-
Mark the box to show On-Account and Credits details in the detail section.
Show zero-balance invoices? checkbox...
-
Mark the box to show zero balance invoices.
Auto-select by Invoice? checkbox...
-
Mark the box to show auto selection by invoices.
In the Comments field...
Enter free-form comments about this cash receipts entry. These comments are useful in saving notes about specific details related to this specific entry.
-
Enter or edit by typing directly into the form field, or click
(or Ctrl-F) to launch the comment editor.
GL Distribution button
The two common methods for writing off small balances are:
-
Use a Cash Receipt Code with the AR/GL flag set to "Both." Enter a check# such as "WRTOFF" with a zero dollar amount. Credit the desired amount as if it were a payment, then select "GL Distribution" and enter the same amount in a miscellaneous over/short or other GL account.
-
Set up a Cash Receipt Code with the "Deposit Amt and Adjustments" and "Discount" checkboxes both unmarked. This eliminates the entry of a dollar amount and forces the user to distribute the write-off to an appropriate account rather than the default discount account.
Apply On Acct button
Select the [Apply On Acct] button or click  and select Apply On Acct. An on-account payment for the full amount of the check is created automatically. An on-account payment will be identified with this structure: OAymmdd, where "OA" stands for on-account, last number of the year (i.e. 3 for 2013), month and day of the payment. An on-account payment posted on October 15, 2013 would be labeled "OA31011". Only one on-account payment can be created for a specific day.
New Deposit button
Select the [New Deposit] button to launch the Bank Deposit Entry form and create a new or select an existing deposit.
AR Distribution Information
In the Invoice field...
Invoices are displayed with the invoice date, due date, current invoice amount and available payment terms discount. An invoice originally created with a terms discount is displayed if the cash receipts date is not after the discount due date. Select the checkbox to the left of the Invoice column to apply funds.
When selecting individual invoices for payment, entries may be made for each of the following fields:
In the Applied field ...
-
Enter the amount of cash you want to apply to this invoice.
-
Select [Enter] to apply cash up to the amount of the invoice, less available discount. If the cash is less than the invoice balance, the remaining amount is applied when pressing Return.
In the Disc Amt field...
-
Enter the amount of discount to be applied to the invoice.
-
Select [Enter] to apply the available discount shown.
NOTE: The discount amount for an invoice is shown only when the cash receipts date is earlier than the discount expiration date as determined by the terms code associated with the invoice.
In the End Balance field...
Display only. The remaining invoice balance is automatically calculated and displayed.
In the Comments field...
Enter free-form comments about this specific invoice.
-
Enter or edit by typing directly into the form field, or click
(or Ctrl-F) to launch the comment editor.
When done making selections...
-
Click
 to save the cash receipt entry.
If the check is not fully distributed, the following prompt is issued:
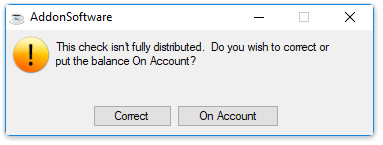
Correct or On Account?
-
Select [Correct] to continue to distribute the cash/check amount to additional invoices.
-
Select [On Account] to apply any Remaining to Apply balance to the customer account. (Refer to the On Account Payment section below for more information.)
Attempting to leave an unsaved Cash Receipts Entry or the closing window causes the module to issue the following confirmation box:
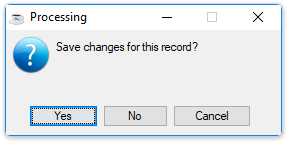
Save Changes
-
Select [Yes] to save the current record and return to Accounts Receivable Processing menu.
-
Select [No] to return to the Accounts Receivable Processing Menu without saving the current record.
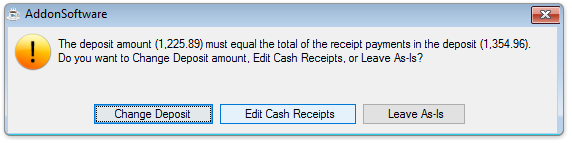
When leaving the Cash Receipts Entry task, the amount entered or accumulated in the Bank Deposit Entry form is compared with the total of receipts associated with the deposit. A warning displays if the amounts are not equal.
-
Select [Change Deposit] to reset the total in the Bank Deposit Entry record to match the accumulated receipts.
-
Select [Edit Cash Receipts] to stay in the Cash Receipts form and make corrections.
-
Select [Leave As-Is] to exit Cash Receipts. Note that in this case, you can run the Cash Receipts Register, but will not be offered an option to update until either the Deposit or Cash Receipts have been corrected.
Applying a Previous On Account Balance to Open Invoices
When using an existing on-account amount to pay invoices and there are no external funds being received, you should enter zero for the Amount field in the heading. Proceed with data entry as follows:
-
Apply payment to invoices in the usual manner. This will cause the Balance field in the heading to accumulate a negative amount if a zero deposit amount was originally entered.
-
Check Show On-Account and Credits box to show On-Account and Credits details.
-
Check Show zero-balance invoice box to show zero balance invoices.
-
Check Auto-select by Invoice box to show auto selection by invoices.
-
Enter the on-account invoice number (yymmdd) in the Invoice field and apply a negative amount to the on-account invoice in the same amount as applied to the invoices that were paid.
An existing on-account amount normally appears as a negative number that indicates a credit to the customer's account. To use on-account, you apply a matching negative amount. As a result, the Balance field in the header is increased. Apply a positive amount to an invoice to pay it. Balance field changes to zero.
Applying Credit Memos to Open Invoices
When using an existing credit memo amount to pay invoices external funds are not being received, you should enter zero for the Amount field in the heading. Proceed with data entry as follows:
-
Apply payment to open invoices in the usual manner.
-
Call up the credit memo to be applied by entering its number at the Invoice field.
-
Apply a negative amount to the credit memo in the same amount as applied to the invoices that were paid.
Credit amounts normally appear as negative numbers indicating a credit to the customer's accounts. To use the credit, you apply the matching negative amount. The Balance field in the header is increased as a result.
In a cash receipts transaction where cash is not actually received, the general ledger postings normally created by the application of payment (i.e. Debit to Cash, Credit to Receivables) are offset by the postings created when the credit is applied as payment (i.e. Debit to Receivables, Credit to Cash). The net result is that general ledger postings are not created. This is the desired result as the credit to receivables (and debit to sales) was made at the time the credit memo was originally updated.
______________________________________________________________________________________
Copyright BASIS International Ltd. AddonSoftware® and Barista® Application Framework are registered trademarks.