Accessing Google APIs in BBj with OAuth 2.0
Description
In BBj, applications use OAuth 2.0 authorization to access Google APIs. In BBj 24.22 and higher, authorization is handled by a servlet, allowing chosen Google APIs to run in all clients. This document explains how to implement OAuth 2.0 authorization by creating Google Credentials through Google Cloud services.
User Interface Layout:
This document reflects the Google Cloud interface as of February 2025. Google frequently updates and modifies its interface, so some details may differ in the future.
Choose a Google Cloud Project
- Go to the Google Developers Console.
- Click the [Select a project] button in the header. The name of this button changes based on the selected project’s name.
- Select an existing project, or click the [New project] button to create a project. If choosing an existing project, skip to the Enable APIs section of this document.
![pointer to the [Select a project] button in the Google Cloud header](../images/Google_OAuth2/Google_OAuth2_1.png)
[Select a project] Button
Create a Google Cloud Project
The "New Project" page can be accessed from two different buttons: clicking the previously documented [New project] button, or clicking the [Create project] button that’s inside the gray message box:
![Message box with the text, "To view this page, select a project" and a [Create project] button](../images/Google_OAuth2/Google_OAuth2_2.png)
Message for Selecting a Project
Regardless of what button is clicked, users are shown the following:
![New Project fields with two buttons at the bottom, [Create] and [Cancel].](../images/Google_OAuth2/Google_OAuth2_3.png)
Fields on the "New Project" Page
- Give the project a name related to what the OAuth keys will be used for.
- (Optional) Change the Project ID by clicking [Edit] and editing the new Project ID field.
- Select an organization to attach the project to.
- Select a parent organization or folder.
- Click the [Create] button.
Enable APIs
The “Enabled APIs & services” page includes a list of currently enabled APIs. Here are the steps to enable an API:
- Go to the Google API Library by clicking Library on the side navigation menu.
- Find a desired API. Clicking on it will go to its "Product details" page.
- Click on the [ENABLE] button:
![Gmail API Product details page with an arrow on the [ENABLE] button.](../images/Google_OAuth2/Google_OAuth2_4.png)
"Product details" Page for the Gmail API
If that API is already enabled, a [MANAGE] button is displayed instead:
![The [MANAGE] button replaces the [ENABLE] button and there is a checkmark with the text 'API Enabled'.](../images/Google_OAuth2/Google_OAuth2_5.png)
Product Details Buttons for an Enabled API.
Create OAuth Client ID
**The following information is subject to change. Verify with official Google announcements for the most current information.**
Inactive OAuth Clients:
Google has announced that starting in June 2025, it will automatically delete OAuth clients that have remained inactive for six months to prevent credential theft and misuse. See Unused Client Deletion for more information.
- A consent screen is required to create an OAuth client ID. Follow this Google guide to configure one: Configure the OAuth consent screen and choose scopes.
- Return to the Google Developers Console and click Credentials on the side navigation menu.
- Click [+ CREATE CREDENTIALS] and choose OAuth client ID.
- For Application type, always select Web application, regardless of whether your application is GUI, DWC, or BUI.
- Click the [+ Add URI] button under Authorized redirect URIs.
- Provide URL(s) to access a BBxServlet in Enterprise Manager. These URLs must point to the web protocol + web server host + web server port + servlet name, like the following example:
https://documentation.basis.cloud:8443/goauth2servletNote:
Remember the servlet name, as it will be needed in the Create a BBxServlet section of this document.
- Click the [CREATE] button.
- Copy the Client ID and the Client secret when the following confirmation appears:
- Click [OK]
![The [+ CREATE CREDENTIALS] button is in the section header, and the 'OAuth client ID' is the second option.](../images/Google_OAuth2/Google_OAuth2_6.png)
Navigation from the Side Menu to OAuth client ID
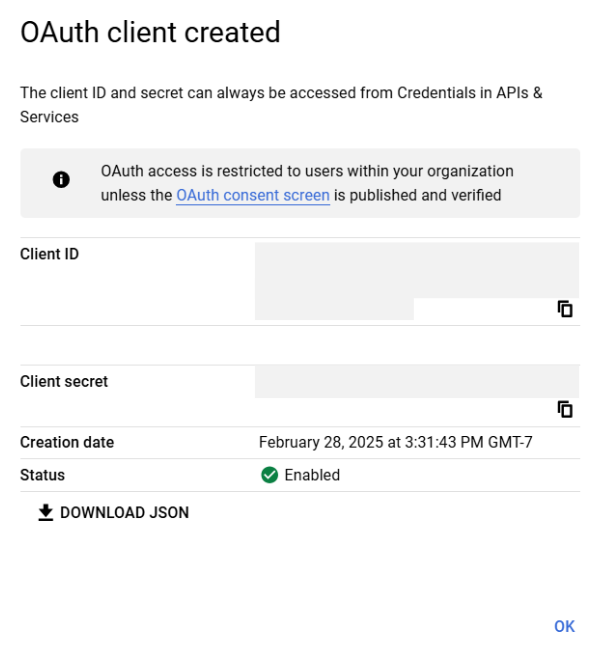
"OAuth client created" Page
Update BBj Properties
- Go to <bbjhome>/cfg/BBj.properties.
- Add the following properties:
- com.basis.util.goauth2.clientid=<created client id>
- com.basis.util.goauth2.clientsecret=<created client secret>
 Optional properties:
Create a BBxServlet
- Log into Enterprise Manager.
- Navigate to
 Web >
Web >  Context Configuration.
 - Choose a Context.
- Click the [
 ] button to add a BBxServlet.
 - At a minimum, specify the following configuration settings for the BBxServlet:
- Restart BBjServices.
| Configuration setting | Value |
|---|---|
| URL Mapping |
Match the URL Mapping given in step 6 of Create OAuth Client ID. For the provided example, this value would be: /goauth2servlet |
| Source File | <bbj home>/utils/gapps/GOAuth2Servlet.bbj |
| Class Name | GOAuth2Servlet |
| Method Name | service |
Alternative:
Instead of using Enterprise Manager, a BBxServlet can be added with the BBjJettyContextConfiguration::addBBxServlet method. Those creating a BBxServlet this way will also need to use the BBjJettyServerConfiguration::saveConfig method.
See Also
Using OAuth 2.0 to Access Google APIs