Creating Your First BBj Project
In this tutorial, you will create a new BBj Project containing a simple “Hello World” application and execute it.
Before beginning, for a BBj Project that's using BBj 26.00 or higher, follow the instructions on BDT Studio and install BBj with BDT Studio on your development computer, then skip to Create the project.
For BBj 26.00 and higher, accessing the BDT plug-ins in the BDT Studio, a standalone application, supersedes using the Eclipse IDE.
For a BBj Project that's using a version prior to BBj 26.00, follow the instructions on Preparing Eclipse for BASIS-Provided Plug-ins and install compatible versions of Eclipse, the BDT plug-ins, and BBj on your development computer. Please pay particular attention to the fact that you must install the correct Eclipse depending on which versions of the BDT plug-ins and BBj you will use -BBj/BDT installations prior to 16.00 must be installed with Eclipse 4.4 (Luna), BBj/BDT installations 16.00 and higher must be installed with Eclipse 4.5 (Mars), BBj/BDT installations 17.00 and higher must be installed with Eclipse 4.6 (Neon), and BBj/BDT installations 18.00 and higher must be installed with Eclipse 4.7 (Oxygen).
Once you have installed compatible Eclipse, BDT, and BBj versions, follow these simple instructions:
Create the project
-
In BDT Studio, select the menu item File > New > Project to open the New Project wizard.
-
Select BDT > BBj Project.
-
Click [Next] to start the New BBj Project wizard.
-
In the New BBj Project window:
-
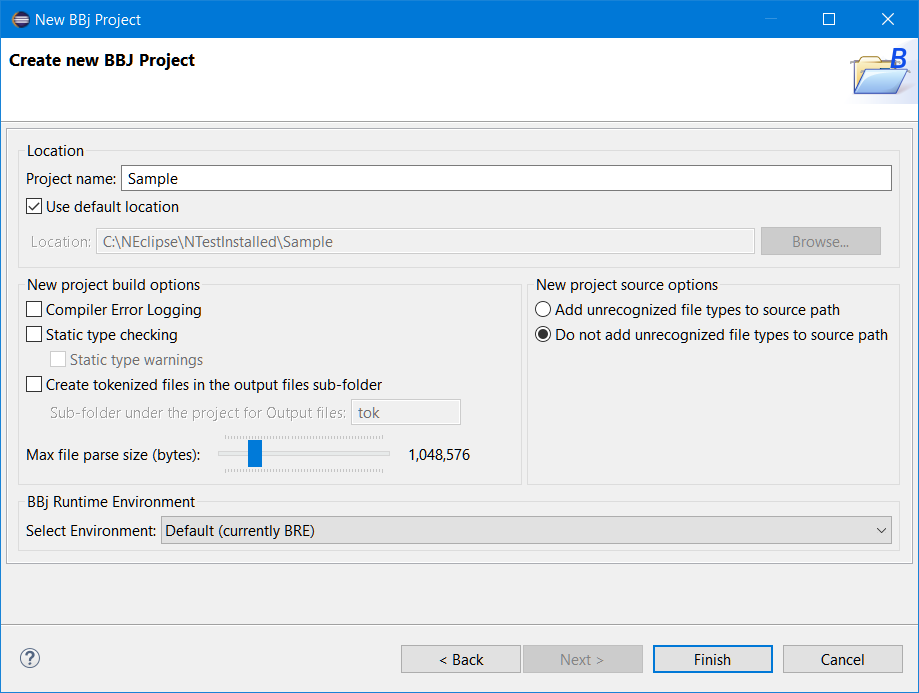
In the Project name: field, enter a name (in this case use “Sample” or any other unique name).
-
If it is not already checked, check the Use default location box.
-
You may leave the other fields set to their default values, or you can use the values shown in the image above, as you wish.
-
-
Click [Finish] to create the project. If you are in the BDT Perspective and the BDT Explorer is open, the new "Sample" BBj Project will appear there; if you are not already in the BDT Perspective, Eclipse will offer to open it for you with this window:
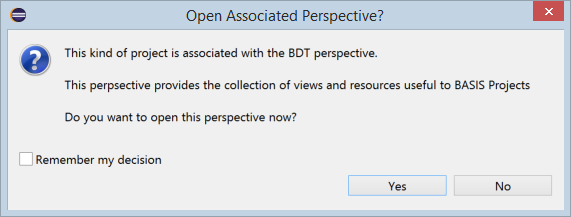
If this window appears, click [Yes] to open the BDT Perspective; you can check Remember my decision if you like, and BDT will ensure that the BDT perspective always displays after you create a new BBj project.
Create a BBj source file in the project
- Select your project in the BDT
Explorer if it is not already selected there.
If the BDT Explorer is not
already showing, choose Window >
Show View > BDT Explorer in BDT Studio's main menu.
- Select File > New > BBj Source File from the BDT Studio main menu, which
displays the Create new BBj
File wizard.
The Source folder field is automatically set to the name of the BBj project that was selected in the BDT Explorer; this represents the BBj project’s top-level folder in the Eclipse workspace.
-
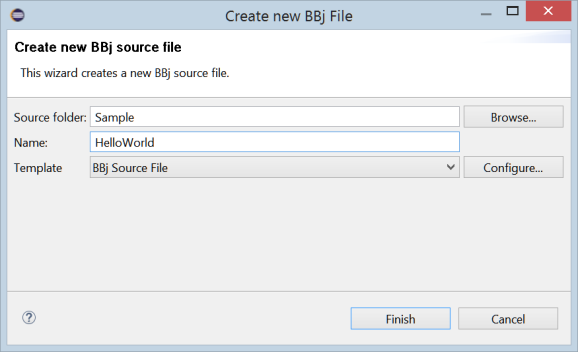
In the Create new BBj File window:
a. Leave the Source folder: field set to the “Sample” value; this will cause your new file to be created in the “Sample” project’s root folder.
b. In the Name: field, enter a name for your BBj source file, with or without a file extension (in this case use “HelloWorld”).
c. Leave the Template field set to “BBj Source File”, since this is the type of BBj file we are creating.
-
Click [Finish] to create the new file, which automatically opens in the editor.
-
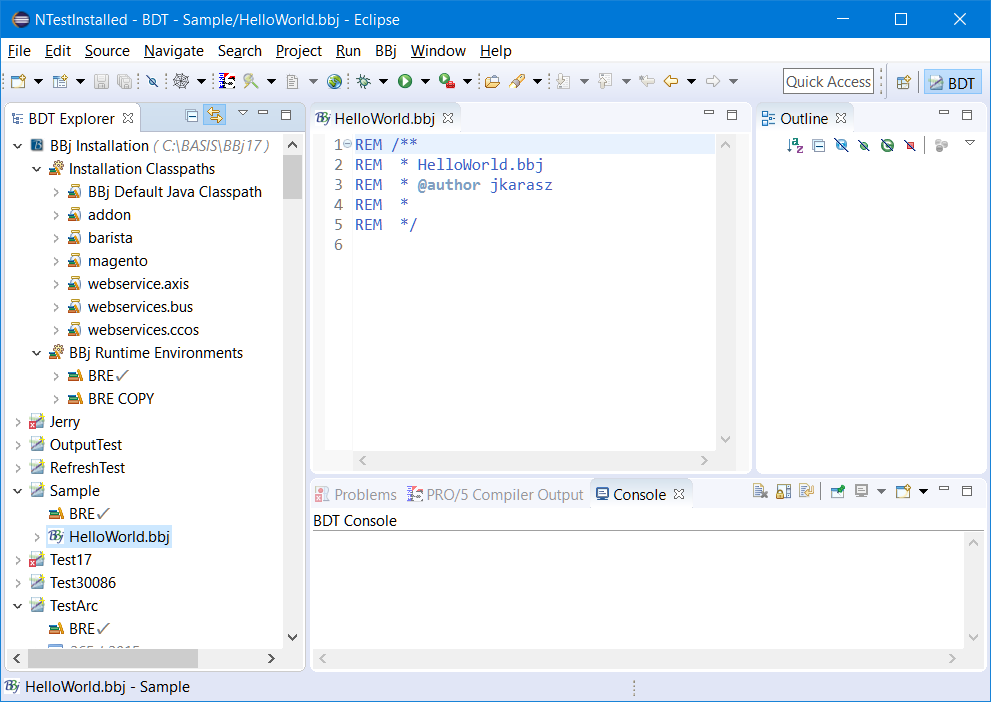
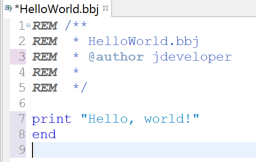
Notice the new HelloWorld.bbj file contains some starter comments at the top of the file, which came from the template selected in the Create new BBj File dialog.
-
Click in the editor and add the following code to finish the HelloWorld program:
print "Hello, world!"
end
Execute the BBj source file
-
Right click on the BBj source file (HelloWorld.bbj) in the BDT Explorer view and select Run As > BBj Program from the popup context menu.
-
Since you just edited your file, and have not yet saved the changes, BDT will prompt you to save HelloWorld.bbj before it executes:
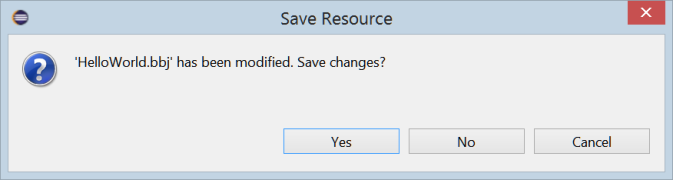
Click [Yes] to save the file and continue. -
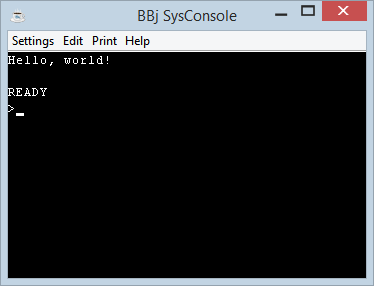
With the output of the HelloWorld program appearing in a BBj console session, type release or bye to close the session.
Your BBj Project is now ready for your to use for BBj development.