
Preparing Eclipse for BASIS-Provided Plug-ins (Superseded)
For BBj 26.00 and higher, accessing the BDT plug-ins in the BDT Studio, a standalone application, supersedes using the Eclipse IDE.
This topic contains the following topics:
Install BASIS Eclipse Plug-ins
Updating BASIS Eclipse Plug-ins
Configuring Eclipse to Automatically Check for Software Updates
Manually Checking for Software Updates
Viewing the List of Available Software Sites
NOTE:
Be sure to have a current licensed version of BBj downloaded and installed from the BBj Download page. The BBj major version digits must match the major version digits of the BASIS plug-ins.
DO NOT MIX MAJOR REVISIONS BETWEEN BBj AND BASIS PLUG-INS :
For example, all BBj 15.xx releases are incompatible with BASIS plug-ins downloaded from any 13, 14, 16, or 17 URL, and vice versa. The same is true for every BBj and BASIS plug-in combination - both must have the same major version number (14, 15, 16, 17, etc.).
Install Eclipse
Go to https://www.basis.cloud/eclipseplug-ins and determine the version of Eclipse that is appropriate based on the version of BBj and of the BASIS plug-in(s) that you will install. Follow the instructions there to download and install the appropriate Eclipse. More specific installation instructions are found at wiki.eclipse.org/Eclipse/Installation.
Install BASIS Eclipse Plug-ins
BASIS provides the Business BASIC Development Tools (BDT) suite of plug-ins for the Eclipse IDE as well as the Enterprise Manager and BBjUtilities plug-ins. The BDT plug-ins help developers create BBj applications. The Enterprise Manager plug-in provides the ability to configure and manage one or more BBjServices, in a development or in a production environment. Finally, the BBjUtilities plug-ins provide a number of productivity enhancing tools to make BBj development easier. On the Eclipse Plug-Ins page, locate the table of BASIS plug-ins in the “BASIS PLUG-INS” section, and you will find the BASIS BDT and Enterprise Manager plug-ins listed there. Follow the instructions given there for each of the BASIS plug-ins that you would like to install and use.
Updating BASIS Eclipse Plug-ins
Each BASIS Eclipse plug-in will be updated and released to the URL listed for it in the table of BASIS plug-ins on the Eclipse Plug-Ins page. You can configure Eclipse to automatically check for such updates, or you can manually check for updates. If you choose to manually check for updates, you will need to remember to do so on whatever schedule you find appropriate. Having Eclipse automatically check for updates on a schedule will help you to remain current in your plug-ins.
Configuring Eclipse to Automatically Check for Software Updates
-
Open the Eclipse Preferences window. In a Windows environment, this is done by selecting Window > Preferences in the Eclipse main menu:
-
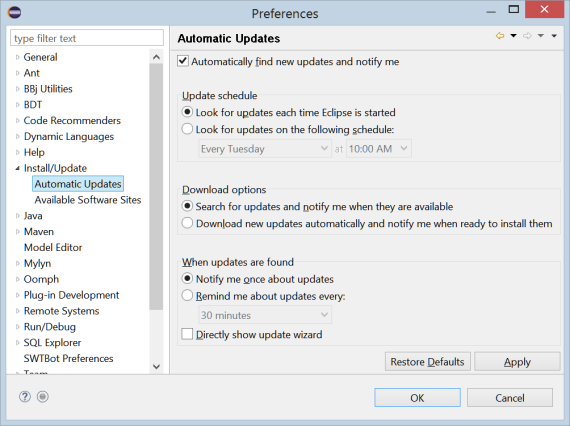
Expand the Install/Update node and select the Automatic Updates node under it. The Preferences window will offer options you can configure for automatic update checks.
-
If you do not check the Automatically find new updates and notify me box, Eclipse will never check for updates until you tell it to. In this case, we are configuring Eclipse to do automatic update checks, so check this box.
-
Select the Update schedule frequency that you prefer. If you choose to have Eclipse check on a predefined schedule, you will also need to select a frequency and a time of day in the drop-down lists.
-
Select the Download options that you prefer.
-
Select the action you would like Eclipse to take when it finds an update while automatically checking. You can have Eclipse notify you only one time (and if you decline to install at that time Eclipse will not notify you again until the next time it checks for updates), or to repeatedly remind you at a regular interval until you install the update.
-
In either case, you can choose to have Eclipse automatically launch the update wizard or you can choose to have Eclipse simply offer to launch the update wizard.
-
Click [OK] to save your preferences.
Manually Checking for Software Updates
-
Select Help > Check for Updates from the Eclipse main menu, which opens the Contacting Software Sites window:
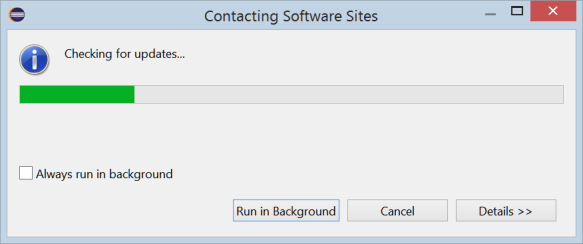
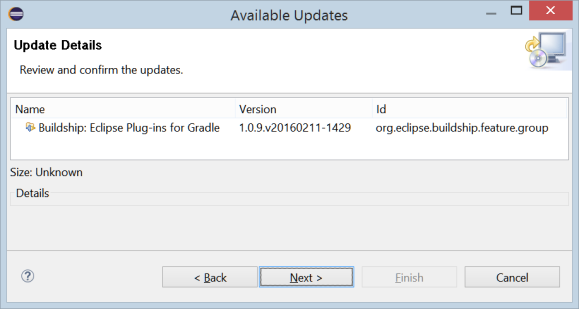
As part of “checking for updates…”, Eclipse contacts each enabled site in its Available Software Sites list and compares whatever version of that site’s software is currently installed to the newest version that is available. Eclipse will offer you an update for any installed software when the newest version available has a larger version number than the version that is already installed. When it is done, Eclipse offers an Available Updates window (shown below) listing each of the available updates:
-
Check each of the updates that you wish to install, or click [Select All], then press [Next]. If you have checked at least one update, Eclipse will request confirmation in the Available Updates window (shown below):
-
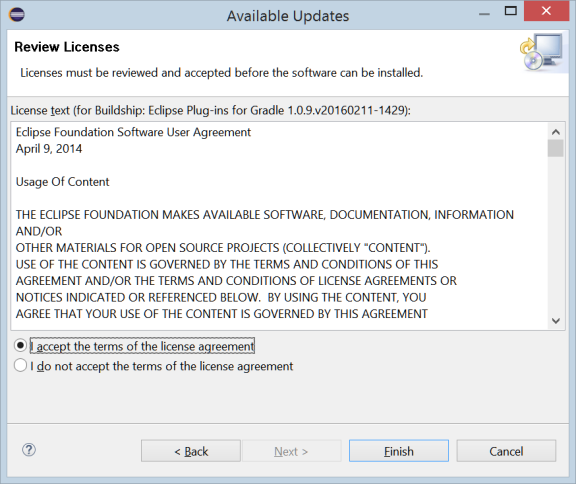
Review the list of updates; if the list does not agree with what you expected, click [Back] and change the preceding window. Otherwise, to confirm the updates, press [Next] again. Eclipse will present the appropriate license information for you to review and accept:
-
Once you have reviewed the licenses, you can click the “I accept…” radio button and then click [Finish] to download and install the updates, you can click [Back] and change the selection, or you can click [Cancel] and no updates will be installed.
-
After the plug-in updates are installed, you will be prompted to restart Eclipse to apply the changes. If you choose not to restart Eclipse, you can continue work and the plug-in updates will be applied the next time Eclipse is started.
Regardless of which update method you select, whenever Eclipse checks for updates it contacts each enabled site in its Available Software Sites list and compares whatever version of that site’s software is currently installed to the newest version that is available.
Viewing the List of Available Software Sites
-
Open the Eclipse Preferences window. In a Windows environment, this is done by selecting Window > Preferences in the Eclipse main menu.
-
Expand the Install/Update node and select the Available Software Sites node under it. The Preferences window will display the list of all available sites (Eclipse P2 repositories):
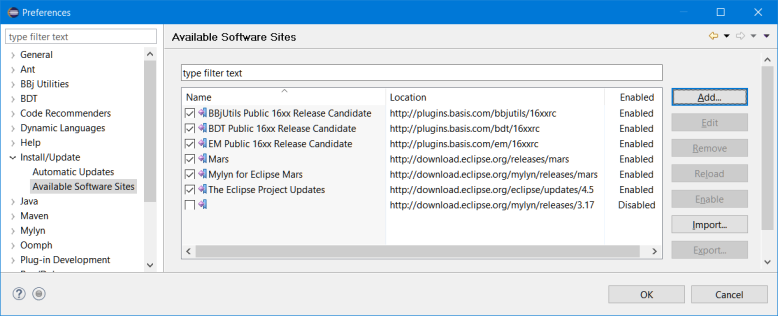
-
Only sites that have a check on the far left are “enabled”, and show “Enabled” in the third column. Only sites that are enabled will be checked for updates.
-
Each time you install a plug-in, Eclipse automatically adds an entry in this list with the appropriate Location (usually a URL) to check. However, you can disable or remove sites that are in the list, and you can add new ones using the buttons on the left. Under normal circumstances, leave this list as Eclipse creates it; you will want to know what is in it at times, but you likely will not need to manually affect this list except under unusual circumstances.
-
Click [OK] to save any changes made.