Sales Order Processing - Credit Review and Release
Function
The Credit Review and Release task is designed to track customer orders that were placed on hold for credit reasons. Customer orders are placed on hold when certain parameters are met. This task displays queues that show all pertinent customer information such as aging balances, outstanding invoices, outstanding orders, payment history and comments. A credit manager has the option to release an order to the floor, delete the order, enter additional comments and adjust the follow-up date. A [Credit Maintenance] button on the form allows a review/edit of the Credit settings for this customer.
=> To access this task...
Select Credit Review and Release from the Sales Order Processing main menu.
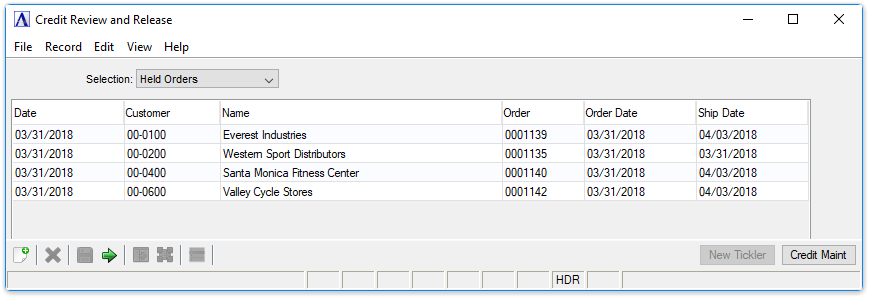
Credit Review and Release
About the Fields
There are two credit queues for this task. Both the Held Orders and the Credit Customers queues have the same fields and access detail information in the same way.
From the Selection dropdown...
Select the desired task from the drop down menu.
-
Held Orders
-
Credit Customers
The results are sorted by follow-up date with the oldest date displaying first. The window also allows access to Credit Maintenance using the button in the bottom right.
In the Date field...
Display only. Shows the date for follow up.
In the Customer field...
Display only. Shows the customer number.
In the Name field...
Display only. Shows the customer name associated with the number.
In the Order field...
Display only. Shows the order number that is on hold.
In the Order Date field...
Display only. Shows the date that the order was taken.
In the Ship Date field...
Display only. Shows the date that the order is to be shipped.
Credit Maintenance
Click ![]() to review/edit the Credit settings for this customer.
to review/edit the Credit settings for this customer.
Once a customer order is selected from the queue, additional information can be viewed or added to the customer’s records. Some options are only available from one queue or the other; some are available to both queues. To access the options available:
-
Double click a listed order from the queue.
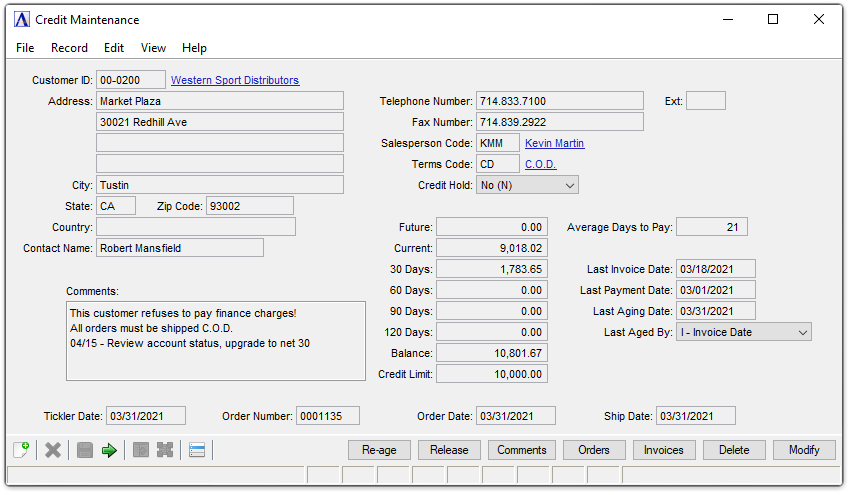
Credit Maintenance
All information associated with the customer order is displayed. In addition to the name, address and phone number of the customer, details also include the name of the salesperson, terms, credit records and contact person.
Re-age
-
Click
 to re-age this customer, showing the aging stats as of the current system date. If the customer invoices have never been aged, the "Last Aged By" is determined from the AR Parameters > Default Age By Option.
Release
-
Click
 to release the held order.
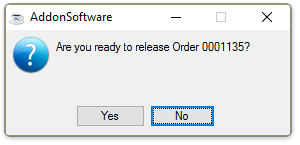
When the Release button is selected, the system issues this prompt:
-
Click [Yes] to release the order and proceed to Terms Code Entry screen.
-
Click [No] to return to the Credit Maintenance screen for the selected order.

-
Click
 to select from a list of all valid Terms Codes.
 -
Click
 to accept the terms and release the order.
 -
Click
 to review the details for the selected Terms Code.
 -
Click [OK] to accept the terms and release the order.
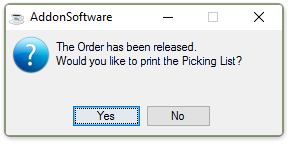
The system confirms the release of the order with the following prompt:
-
Click [Yes] to print a copy of the released order.
-
Click [No] to not print a copy of the released order.
The released order is removed from the queue.
The system issues the following prompt:
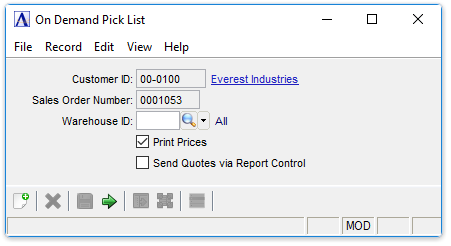
-
Mark the Print Prices box to include pricing on the Picking List.
-
Mark the Send Quotes via Report Control box to send quotes to the queue.
Comments
-
Click
 to open the Customer Comments for this order.
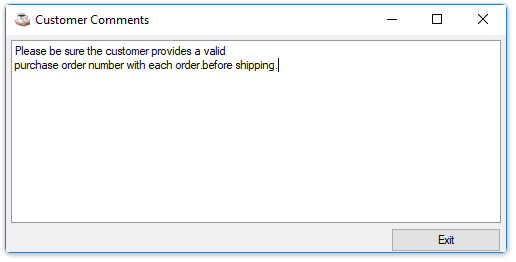
Customer Comments
In the Customer Comments form...
-
Enter the desired comment text. You may include blank lines if/as appropriate. Note that this is the same information that appears on the Comments tab of the Customer Master form.
-
Use the <escape> key, or click the [Exit] button to update the comments and dismiss the form.
Orders
-
Click
 to launch the Order or Invoice History Inquiry window.
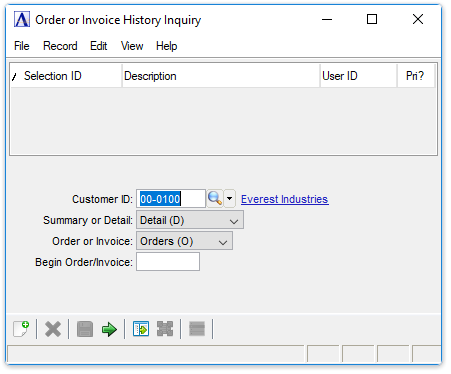
Order or Invoice Inquiry
In the Customer ID field...
-
Press [Tab] to accept the current customer selection.
-
Click
to select from a list of valid customer IDs. -
Click
to review the details for the selected Customer ID record.
From the Summary or Detail dropdown...
-
Select Summary (S) for a summary view of open orders or invoices.
-
Select Detail (D) for a detailed view of open orders or invoices.
From the Order or Invoice dropdown..
-
Select Orders (O) to display orders.
-
Select Invoices (I) to display invoices.
In the Begin Order/Invoice field...
Optional selection.
-
Enter the beginning invoice or order number to display.
After making the inquiry selections...
-
Click
to produce a report of all open orders or invoices for the selected customer.
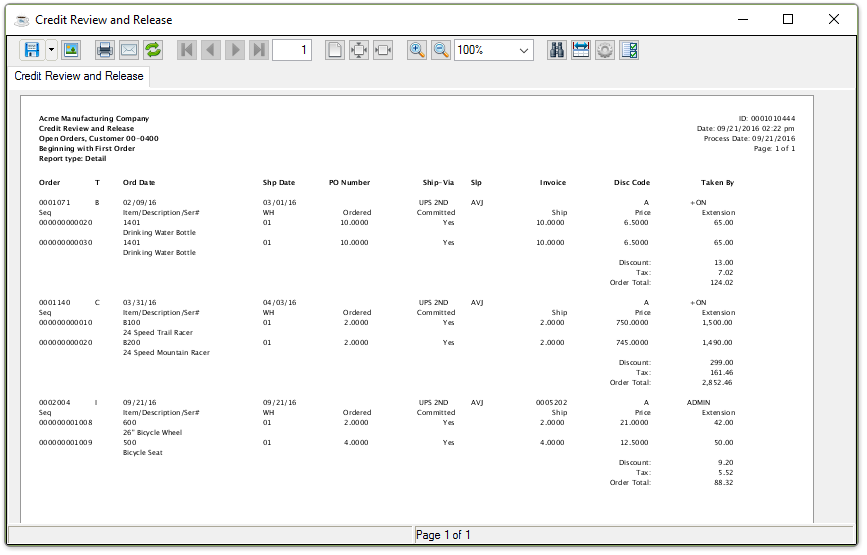
Sample Order or Invoice Inquiry Report
See Output Options.
Invoices
-
Click
 to display all invoices associated with this customer. The invoice inquiry window appears.
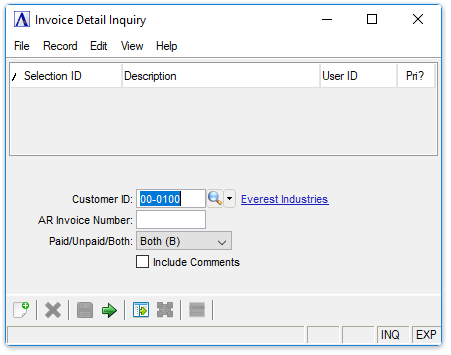
Invoice Detail Inquiry
In the Customer ID field...
-
Press [Tab] to accept the current customer selection.
-
Click
to select from a list of valid customer IDs. -
Click
to review the details for the selected Customer ID record.
In the AR Invoice Number field...
Optional selection.
-
Enter the AR invoice number to display.
From the Paid/Unpaid/Both dropdown...
-
Select Paid (P) to display only paid invoices.
-
Select Unpaid (U) to display only unpaid invoice.
-
Select Both (B) to display both paid and unpaid invoices.
Include Comments checkbox...
-
Mark the box to include comments.
-
Unmark the box to not include comments.
After making the inquiry selections...
-
Click
to produce a report of invoices for the selected customer.

Sample Invoice Detail Inquiry
See Output Options.
Delete
-
Click
 to remove the selected order and the follow-up date from the system.
This action produces the following prompt:

-
Select [Yes] to remove the order and follow-up date.
-
Select [No] to abort the removal process.
Modify
-
Click
 to edit the credit information for the selected held invoice or credit customer order. This option is available from both queues and accesses the Credit Hold, Credit Limit and Tickler Date fields for the customer.
The following prompt displays:
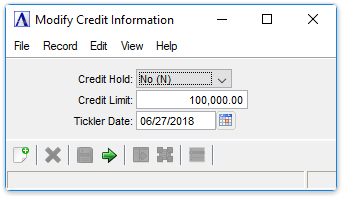
Modify Credit Information
From the Credit Hold dropdown...
-
Select [Yes] to place this customer on credit hold.
-
Select [No] to remove a credit hold for this customer.
-
Select [Exempt] to exempt this customer from credit hold rules.
In the Credit Limit field...
-
Enter an amount for this customer. Orders exceeding this amount are flagged at order entry.
In the Tickler Date field...
-
Enter date for follow up or click
 to select a date by using the calendar tool.
After making the credit edits...
-
Click
to save the changes for the selected customer.
______________________________________________________________________________________
Copyright BASIS International Ltd. AddonSoftware® and Barista® Application Framework are registered trademarks.