![]()
Document Management
The Barista Document Management system affords users a variety of features and options for system reports like registers or financials, as well as graphical documents such as statements or invoices. In addition, as mentioned in the Inquiry System section, virtually any inquiry grid can be routed through the Document Management system, giving users the ability to create ad-hoc reports from query output.
At the heart of the Document Management system are the Document Groups and Document Print Settings tasks, which define the parameters controlling how users' documents are generated and stored, as well as settings for specific documents. Additional run-time settings are available from the DocOut viewer as reports are created. Previously generated documents may also be available for recall or email/faxing via Document Inquiry. Documents queued up for email or fax transmission can be monitored, have their transmission settings altered, or be cancelled altogether from the Document Processing Queue.
Document Groups
A document group defines default settings for documents processed by users of that group, such as the save location, document name format, whether documents are also saved into a separate archive, and what output/export types are permitted and where they are saved. Each defined user belongs to a single document group for purposes of saving documents, but may be permitted to view documents for more than one group.
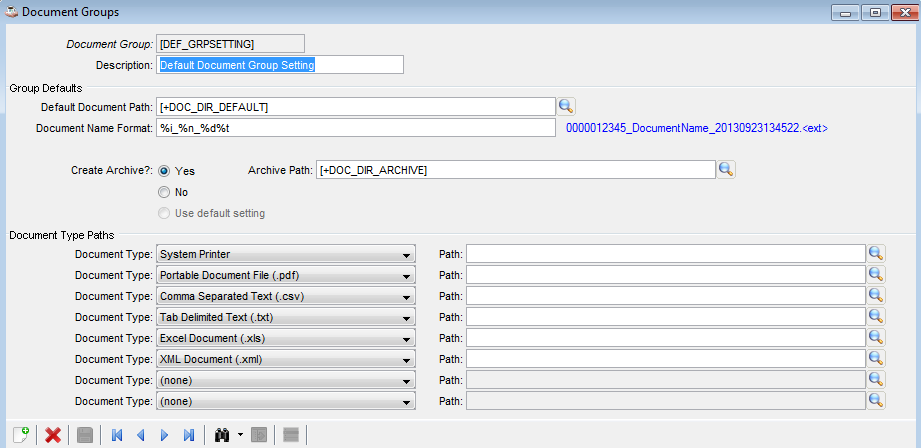
Document Groups dialog
The various Path fields can accept either a global string table value enclosed in square brackets (e.g., [+DOC_DIR_PDF]), or an actual pathname, ending with a slash (/) character. While it is possible to assign different paths to the different document types, it is not required. If a Document Type isn't specified, then users in that document group will not be permitted to create documents of that format. If the Path is left blank, the Default Document Path is used. If a particular field isn't filled in for a defined document group, the value from the [DEF_GRPSETTING] record is used.
CAUTION: The [DEF_DOCSETTING] record should not be deleted.
The following are valid Document Type values:
-
System printer
-
Comma-separated (.csv)
-
Google document
-
Portable document file (.pdf)
-
Tab-delimited text (.txt)
-
Excel format (.xls)
-
XML format (.xml)
Document Print Settings
Document print settings work in conjunction with document groups to establish how specific documents are handled, and also provide additional settings for margins, paper size, and orientation. If no document print settings are defined for a document, then the values from the [DEF_DOCSETTING] record are used.
CAUTION: The [DEF_DOCSETTING] record should not be deleted.
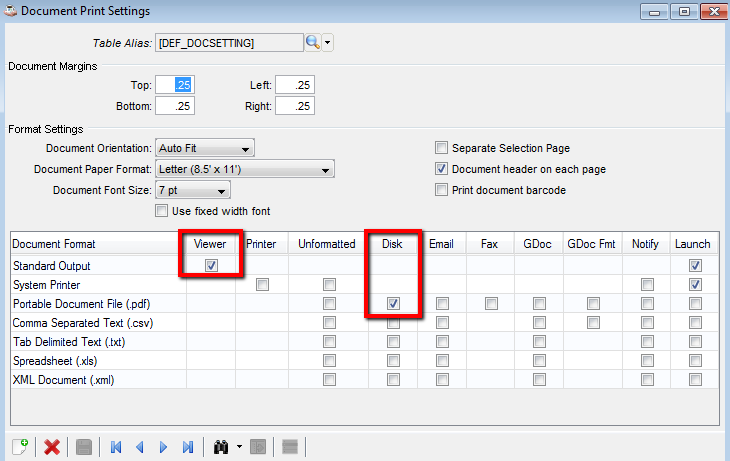
Document Print Settings [DEF_DOCSETTING] record showing default for all reports is to show the report in the viewer window, and save to disk as .pdf
The matrix presented in the grid lets users define a combination of the defined document types across several output formats:
-
Viewer – Shows a .pdf version of the report in the DocOut viewer.
-
Printer – Sends a .pdf version of the report to whichever printer the user selects, based on printers installed on the client machine, and whether or not Printer is one of the Document Types specified in the user's document group.
-
Unformatted – Reserved for future use.
-
Disk – Saves the report in the specified format on disk, according to the Document Types and Paths specified in the user's document group.
-
Email – Saves the report in the specified format as an attachment to an email, and registers the email/attachment in the processing queue.
-
Fax – Saves the report as a .pdf for transmission via fax. The fax information is registered in the processing queue.
-
GDoc – Creates a Google Document in the specified format.
-
GDoc Fmt – For .pdf and .csv only, converts the document to the Google Documents format.
The Notify and Launch checkboxes let the user specify whether or not a notification message displays when the document is saved in the designated formats, and whether or not the application associated with the document extension should be automatically launched once the document is saved.
DocOut
The DocOut process creates a report from data generated in an application program, and then either presents it in the viewer window for review and further handling, or bypasses the viewer and handles the document according to the document print settings and the user's document group.
If the Viewer box is checked, then DocOut reports are presented to the user in the DocOut viewer window. The viewer has its own toolbar for viewing, manipulating, or saving the document.
Note: In the unlikely event that there is insufficient memory to produce the .pdf in the DocOut Viewer, the mini option window below appears, giving the user an alternative way to produce and/or save the report rather than having to abort.
-
Save/Save As/Google Doc – Press the [Save] button to save the document in all of the types and formats specified by the document print settings and the user's document group. Press the drop down triangle to show the other save options. To save a local copy on the client machine, select Save As, and to save the document in the cloud as a Google Document, select the Google Doc option.
NOTE: If the user attempts to close the viewer window without first saving, then the +DOC_SAVE_ON_EXIT global determines whether or not the document is automatically saved in the designated formats, or if the user is warned that the document hasn't been saved and is allowed to exit without saving.
-
Printer – Pressing the [Printer] button brings up a standard printer dialog so the user can select from the printers installed on the client machine.
-
Reload – If the document columns have been adjusted or the font size or margins altered, use the [Reload] button to redisplay the document in the viewer.
-
Viewer settings – Page through the document, enter a specific page number, show the document actual size or fit the page or width, or increase/decrease the zoom. These options only affect how the document renders in the viewer; they have no bearing over printed or saved documents.
-
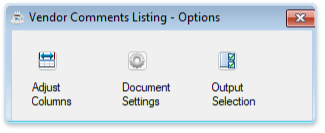
Adjust Columns – Depending on security settings, users may be able to adjust column widths. Once adjusted, press the [Reload] button to redisplay the report with the new column widths .
NOTE: Column width changes are global – all users running the report will see the changed widths.
- Document Settings – Access the Document Print Settings form for the current report to view or edit margins, orientation, font size, or the various output options. If no print settings record exists for the report, it is created and populated according to the settings in the [DEF_DOCSETTING] record. Visual settings such as margins or font size can be seen immediately by pressing the [Reload] button. Others, such as changes in output types, will take effect the next time the report is run.
NOTE: Changes to the document settings are global – all users running the report use the same settings record. However, some settings, such as saving in various disk formats, are also dependent on the user's document group.
-
Output Selection – Users can select output types/formats different from the default with the Output Selection grid. This is the same matrix as seen in the Document Print Settings form, except that it is aware of the current user's document group, so not all output options may be available. The selections made in this form are not saved, so the next time the report runs, the defaults based on the user's document group and the document print settings will once again apply.
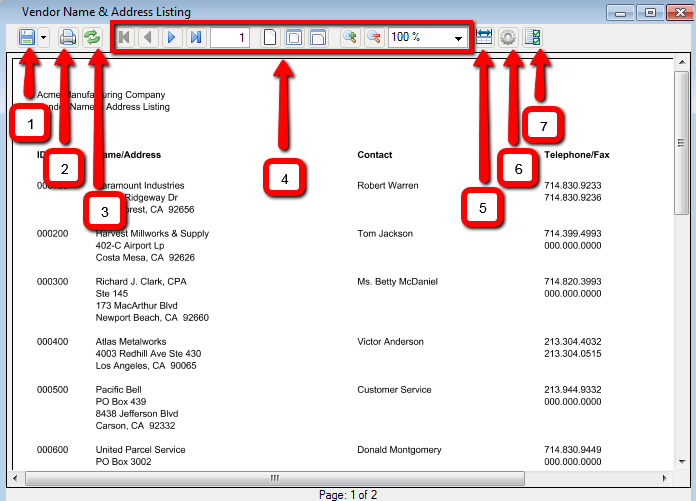
DocOut viewer toolbar controls document format and output
If not using the viewer, the specified output types and formats are generated automatically. If the Notify and/or Launch options are in effect for the document, the user is notified that the document has been saved, and/or the application associated with the saved extension is launched and the document opened in that application.
In addition, when any of the Notify boxes are checked, the mini option window below appears. The assumption here is that by checking a "Notify" box, the user wishes to interact with the operation in some way even though the viewer isn't used.
Finally, if not using the viewer and none of the Notify boxes are checked, then depending on the selected document formats, the user may be presented with a client-side save dialog to optionally save the file locally in the specified format(s).
Document Inquiry
By default, Barista builds an audit file of all documents as they are generated and output. Users can launch Document Inquiry to view the document audit for the document groups they are configured to view. As with other inquiries, users can sort, search, and filter the Document Inquiry grid.
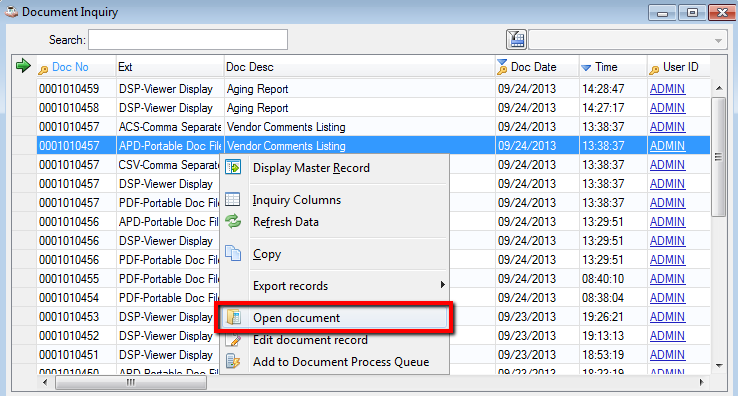
The Document Inquiry grid, using a multi-column sort on descending date and time, showing right-click context menu
Users can recall previously saved documents by double-clicking on the desired row, or by selecting the Open Document task from the right-click context menu or the Additional Options menu. Barista opens the document using the application associated with the extension (.pdf, .xls, etc.). Users can also add one or more documents to the document processing queue to be sent via email or fax.
NOTE: Not all items listed can be reopened. Some, such as DSP entries, are for archival purposes and not associated with a saved report file.
Document Processing Monitor
The Document Processing Monitor shows the status of the document processor and permits configuration of email and fax settings. Once configured, the document processor is usually set to start/stop at certain times each day, or to start/stop along with BBj services. If the processor isn't running, users may see the following when adding a document to the queue:
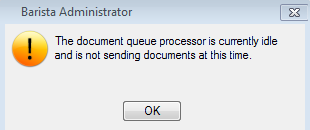
Warning message that documents can be added to the queue, but are not being transmitted
Document Processing Queue/History
When users email or fax documents from a Barista application, the documents are saved to disk, and then a record referencing the document and recipient information is added to the Document Processing Queue. If the document processor is running, it processes items in the processing queue according to priority and queue position. Once transmitted successfully, the processing queue record is moved to Document Processing History. If a document in the processing queue can't be sent because of invalid configuration or recipient information, it remains in the queue until corrected or manually cancelled. Cancellations are also moved to the history queue.
If an entry in the Document Processing Queue contains incorrect recipient information, users can correct the data or cancel the request using the right-click context menu or the Additional Options menu.
NOTE: Some columns, such as Status, may not appear in view. Remember to use the scroll bar to view additional columns and the Inquiry Columns option to adjust columns.
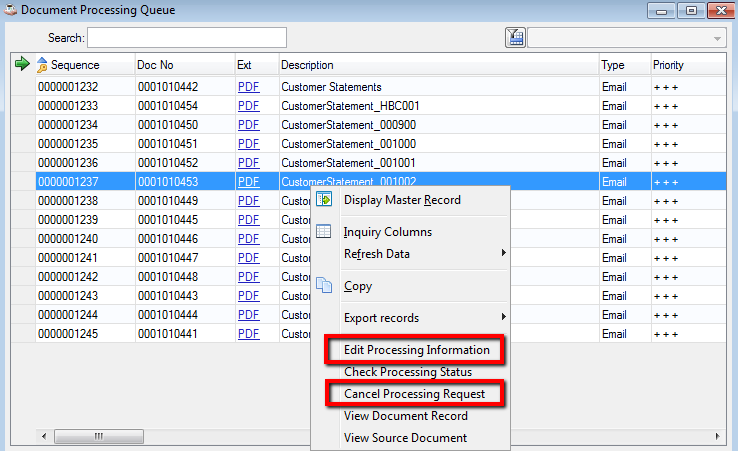
Document Processing Queue options
Like Document Inquiry, the Document Processing Queue and Document Processing History have full sort, search, and filtering capability. In addition, the processing queue and history inquiries refresh periodically so users can see documents moving out of the processing queue and into history as they are processed.
______________________________________________________________________________________
Copyright BASIS International Ltd. BARISTA®, AddonSoftware®, BBj®, Visual PRO/5®, PRO/5®, and BBx® are registered trademarks.