File Operations - Source Editor
Opening a Source Code File in the Source Editor
To open an existing file in the Source Editor, do one of the following:
-
Right-click on the name of the file in the NetBeans Explorer Filesystems window to open the pop-up menu associated with the file, then select the Open menu item.
-
Select File > Open File… from the main menu to display the file selector dialog. Browse to the desired file and press [Open].
-
Enter the keyboard shortcut Ctrl+O to display the file selector dialog. Browse to the desired file and press [Open].
The selected file opens in the Source Editor. In BBj version 2.01 and higher, the Source Editor has the ability to display and manipulate breakpoints. If a breakpoint file exists that corresponds to the source file, the breakpoints it contains automatically loads as well.
Creating a New Source Code File in the Source Editor
To create a brand new file in the Source Editor:
-
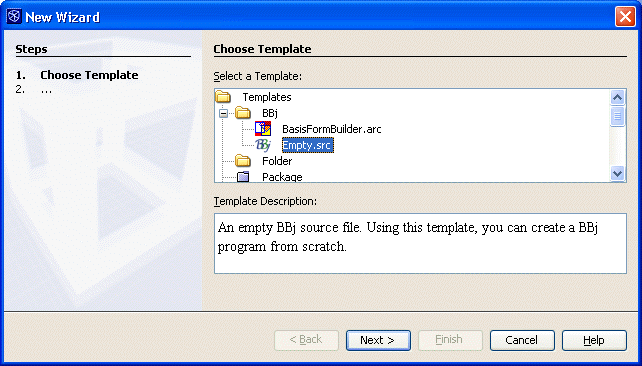
Select File > New from the main menu to open the New Wizard.
-
Expand the Templates > BBj folder in the directory tree window.
-
Select a template such as Empty.src and click on the Wizard's Next button, as shown below.
-
Enter the name for the new file in the name field. Do not add an extension (the selected template's extension is appended automatically).
-
Enter the directory path where the new file should be placed, or browse through the mounted filesystem and choose a directory, as shown below.

-
Click on the Wizard's [Finish] button, which creates the file and opens it in the Source Editor.
Saving a Source Code File from the Source Editor
To save a file after editing changes have been made in the Source Editor, do one of the following:
-
Right-click in the edit window to open the pop-up menu and select Save Document, which will save the file in text format.
-
Select File >Save or File > Save as BBj Tokens from the main menu. The Save as BBj Tokens menu item saves the file in BBj tokenized format.
The icon to the left of the file name in the NetBeans Explorer window indicates its type. When a text file is saved in BBj token format, or a PROGRESSION/4, PRO/5, or BBj token format file is saved as text, the file icon changes to reflect the format type.
When the file is saved, any breakpoints that are present are saved to a breakpoint file with the extension .bpf. If a corresponding breakpoint file was present when the source file was first loaded in the Source Editor, but all the breakpoints were removed during the editing session and then the source file was saved without any breakpoints, the existing breakpoint file is deleted.
Creating New Templates for use in the Source Editor
Templates are text files that serve as the basis for new source code files. For convenience, a template may contain pre-defined boilerplate code commonly shared between files. Any text file can be added to the list of BBj templates displayed in the New Wizard. To create a new template:
-
Prepare a text file and assign it a suitable name and file extension.
-
Right-click the file name in the NetBeans Explorer window and select Save As Template… to open the Save As Template dialog.
-
Expand the Templates > BBj folder and select the BBj folder.
-
Press the OK button.
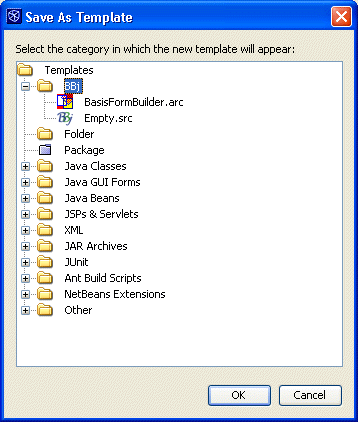
The above image shows the Save As Template dialog, where the BBj folder is selected.
Disabling or Removing Existing Templates
Undesired templates can be temporarily disabled or permanently removed so they no longer appear in the list of BBj templates in the New Wizard. To temporarily disable a template, do the following:
-
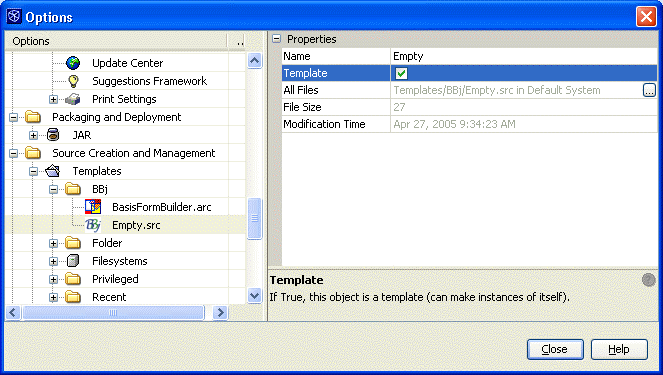
Select Tools > Options from the main menu to display the Options window.
-
Expand Source Creation and Management > Templates ->BBj to get the list of available templates.
-
Select the template to disable in order to display its properties.
-
Uncheck the Template property, which disables the template.
-
Press the Close button of the Options window to save the change.
After this procedure, the template no longer appears in the list of templates in the New Wizard, but it still exists and can be re-enabled at any time by returning to the Options window and placing a check in its Template property.
To permanently remove the template, follow these steps:
-
Select Tools > Options from the main menu to display the Options window.
-
Expand Source Creation and Management > Templates > BBj to get the list of available templates.
-
Right-click on the template to be removed to open the pop-up menu.
-
Select Delete from the pop-up menu and then confirm the deletion with the Yes button.
Removed templates are no longer visible in the Options window or in the New Wizard. Deleting a template in the Options window does not delete the original file from disk however, the original file remains intact and may be designated as a template once again in the future.
Concurrent Editing and Debugging/Testing
A common development technique involves editing a source code file in the Source Editor, saving the changes to disk, and then recompiling and re-executing the application to test the results without stopping and restarting BBjServices. This is perfectly acceptable as long as BBj is configured to run in Development Mode, where programs are "unpinned" (actually read from disk instead of taken from cache memory when loaded). If BBj is run in Production Mode, the executed programs are "pinned". Any changes saved to disk by the Source Editor will not be observed in the executing program. BBj instead executes the original version of the program, which was stored in cache memory, rather than the altered version stored on the disk.
Another problem may occur when a program is edited in both the Source Editor and some other text editor simultaneously. The other text editor in this case could be the IDE Debugger, or BBj's SysConsole, or WinConsole, or any text editor that is external to NetBeans and BBj. In normal operation, the Source Editor "listens" to the file system for any changes made to the file currently being edited. If a change is detected, as when a new version of the file is saved to disk by the other text editor, the Source Editor tries to automatically reload the file. Unfortunately, this automatic reload is not always successful. No warning messages are ever provided about its success or failure. The automatic reload feature of the Source Editor should not be relied upon to keep the file's text synchronized between the Source Editor and any other text editor inside or outside of the IDE. The safest procedure is to manually reload the file in the Source Editor after making and saving a change from the other editor.