Data-Aware Grid Tutorial
The small grid described in the first tutorial can be easily loaded and maintained under direct control of the programmer. When large volumes of data are presented, the advantages of a data-aware grid come to the fore, especially if the data is to be edited in the grid and not just viewed. A data-aware grid is created just like the standard grid. It is made data-aware by being bound to a channel that is opened to an MKEYED file, Visual PRO/5 SELECT or SQL SELECT channel. The grid then takes over managing the presentation of the data and the file I/O. This is a very powerful function that simplifies the presentation of large amounts of data.
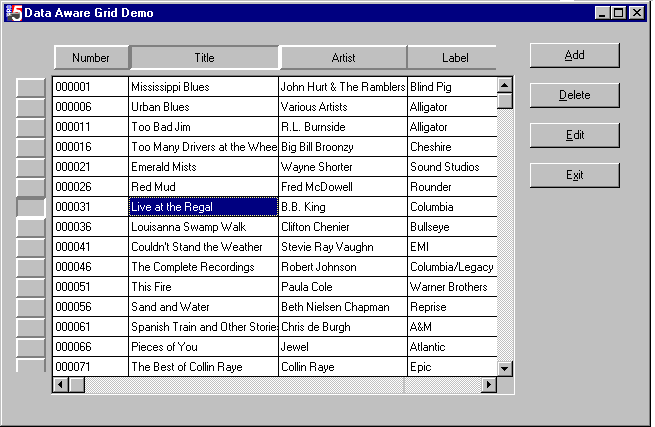
The following tutorial provides a step-by-step description of how to create a file maintenance grid using the datagrid.dat file that is provided with Visual PRO/5 Rev. 2.x. Because of the large amount of code needed for a program of this complexity, the tutorial uses GUIBuilder to cut down on the amount of code needed.
Creating the Resource
-
Start ResBuilder.
-
On the File menu, select New Resource File and create an empty resource file.
-
On the Edit menu, select Add Form to create a blank form that is numbered 101.
-
Open the form's property sheet and change only the following properties:
Property
New Setting
Title
Data-Aware Grid Demo
Name
frmDataAwareGrid
x position
100
y position
100
Width
875
Height
400
-
Create a grid control by clicking the Grid button on the Controls toolbar and then clicking anywhere on the face of the new form.
-
Open the grid's property sheet and change only the following properties:
Property
New Setting
Notes
Name
grdTestGrid
x position
12
y position
22
Width
731
Height
353
Num Rows
1
This property is set to 1 at design time, but the number of rows will be determined by the number of records in the file when the grid is bound to the channel.
Num Columns
12
This property is set to 12 because the grid will use a particular file that has 12 columns and the column width will be set at design time. It would also be possible to set this property to 1 and set the number of columns at run time with Visual PRO/5 code.
Row Head
checked
Row Head Width
15
Col Head
checked
Horiz Scroll
checked
Vert Scroll
checked
-
Click the ellipsis (...) button of the Column Prop property to display the Column Property dialog.
-
For each column, set the column width by selecting the column in the Column number list box and entering the width according to the following.
Column
Width
1
75
2
150
3
150
4
150
5
75
6
100
7
75
8
75
9
100
10
75
11
75
12
75
(It would have been possible to define column titles in the Column Property dialog, but they will be inserted as part of the Visual PRO/5 code.)
-
Add four buttons to the form. In the property sheet, change only the following properties:
Property/Button
1
2
3
4
Name
btnInsert
btnDelete
btnEdit
BtnExit
Text
&Add
&Delete
&Edit
E&xit
x position
758
758
758
758
y position
20
60
100
140
-
On the File menu, save the resource by selecting Save As. The resource is now ready to become part of the file maintenance program used in this tutorial.
Starting the Program in GUIBuilder
-
Start GUIBuilder.
-
On the File menu, select New to create a new GUIBuilder file. In the Name New GUIBuilder File dialog, enter a filename. To simplify keeping track of the project files, give the GUIBuilder file the same name as the resource just created.
-
When the Create New Resource message box appears, click No because the resource was just created in ResBuilder.
-
Select the resource that was just created and click Open.
-
The Program Options dialog appears, providing the capability to set options for the program to be created.
-
Click OK to accept the default values. GUIBuilder is now ready for development.
-
On the Object drop-down list, select End of Job Code. The EOJ header remarks will appear in the GUIBuilder edit area.
-
Type the following on a new line after the remarks to cause Visual PRO/5 to be released when the program terminates:
release
-
On the Object drop-down list, select Form 101 frmDataAwareGrid.
-
On the Control drop-down list, select Push Button 106 btnExit.
-
On the Event drop-down list, select Button Pushed.
-
Enter the following code in the GUIBuilder edit area below the remark that says "rem ' Push button operated." (If GUIBuilder is configured to use an external editor, invoke the editor instead.)
gb__eoj=1
This command will be executed when the user clicks the Exit button while the program is running. It sets the GUIBuilder exit flag to true and causes the event loop to terminate and execute the EOJ code. Note that two underscores are always used in the GUIBuilder special variables and function names.
-
On the Program menu, select Run Program.
-
On the Save Program As dialog click Save to save the generated program with the current name. The program will run, displaying the resource created in ResBuilder created. The program does not do much yet, but it is possible to see how the resource will look at run time.
-
Click the Exit button and the program will shut down, releasing the Visual PRO/5 session that GUIBuilder had started.
Making the Grid Data-Aware
For this project a file named datagrid.dat will be used. This file was provided with the release. Initialization code and three subroutines need to be written in order to get the project ready to present a grid bound to a file.
Writing the Initialization Code
-
On the Object drop-down list, select Initialization Code. The Initialization header remarks will appear in the GUIBuilder edit area.
-
Beneath the remarks add the following code:
rem get a template describing the form using GUIBuilder's get template function
dim datagrid_temp$:fngb__template$(gb__win_id$)
rem set up constants
gosub define_constants
rem open the data file and set up the template
gosub open_data_file
rem make the grid data-aware
gosub bind_grid_to_chanThis code uses a function provided with GUIBuilder to retrieve a templated string that describes the resource (fngb__template$()). The template will be used later to get the grid control ID. Then the code executes GOSUBs to three different subroutines, which will be written in the next three steps.
Creating the define_constants Subroutine
-
To create the define_constants routine, do the following:
-
On the Object drop-down list, select New Subroutine/Function.
-
In the Name Subroutine/Function dialog, type the following:
Define Constants
-
Click OK.
-
A set of remark headers will appear in the GUIBuilder edit area. Enter the following code after the initial comment block:
define_constants:
rem message box constants
msgboxYes=6
msgboxYesNo=4
msgboxExclamation=48
msgboxInfo=64
msgboxSecond=256
rem grid send message functions
gridSetHeadingTitles=23
gridEndEdit=26
gridStartEdit=31
gridGetEdit=34
gridSetEdit=35
gridGetNumberofCols=40
gridGetNumberofRows=41
gridGetSelectedCol=44
gridGetSelectedRow=45
gridGotoCol=47
gridGotoRow=48
gridShowCurrentHeading=77
gridSetDataAware=80
gridDataAwareFunctions=81
rem misc grid values
gridHeadingDepressedMode=1
gridHeadingNotDepressedMode=0
rem data-aware functions
gridSetReadOnly$=$01$
gridDeleteRow$=$02$
gridAddRow$=$03$
gridRetrieveRow$=$04$
gridCancelUpdate$=$05$return
This subroutine creates a series of variables that will be used in the grid's SENDMSG() functions to make the code more readable.
Creating the open_data_file Subroutine
To create the open_data_file routine, do the following:
-
On the Object drop-down list, select New Subroutine/Function.
-
In the Name Subroutine/Function dialog, type the following:
Open Data File
-
Click OK.
-
Beneath the remark headers for the new routine, enter the following code:
open_data_file:
data_chan = unt
open(data_chan)"datagrid.dat"
rem an alternate channel used for file operations
rem this channel will not be bound to the grid
alt_chan = unt
open(alt_chan)"datagrid.dat"
rem set up the template
datarec_desc$="CDNUMBER:C(6*=10):SHOW=1 ALIGN=0 LABEL=Number:," +
: "TITLE:C(50*=10):SHOW=1 ALIGN=0 LENGTH=50 LABEL=Title:," +
: "ARTIST:C(50*=10):SHOW=1 ALIGN=0 LENGTH=50 LABEL=Artist:," +
: "LABEL:C(50*=10):SHOW=1 ALIGN=0 LENGTH=50 LABEL=Label:," +
: "PLAYINGTIME:C(6*=10):SHOW=1 ALIGN=0 MASK=000.00 LABEL=Playing_Time:," +
: "RECORDINGTYPE:C(3*=10):SHOW=1 ALIGN=0 MASK=AAA LABEL=Recording_Type:," +
: "MUSICTYPE:C(15*=10):SHOW=1 ALIGN=0 LENGTH=15 LABEL=Music_Type:," +
: "BINLOCATION:C(10*=10):SHOW=1 ALIGN=0 LENGTH=10 LABEL=Bin_Location:," +
: "NUMBEROFTRACKS:N(10):SHOW=1 ALIGN=1 MASK=0000 LABEL=Number_of_Tracks:," +
: "ONHAND:N(10):SHOW=1 ALIGN=1 MASK=000000 LABEL=On_Hand:," +
: "COST:N(10):SHOW=1 ALIGN=1 LABEL=Cost:," +
: "RETAIL:N(10):SHOW=1 ALIGN=1 LABEL=Retail:"
dim datarec$:datarec_desc$
returnThis code opens the file on two channels: one will be used by the grid and one will be used by the program when creating new keys. It also creates a template description in datarec_desc$ and the template itself in datarec$. Each field defined in datarec_desc$ has user attributes that control how the grid will look and behave, as follows:
|
Attribute |
Description |
|
SHOW |
Controls whether or not the column will be shown. SHOW=1 indicates the column will be shown. SHOW=0 indicates the column will be hidden. |
|
ALIGN |
Controls the alignment of the grid cell data. ALIGN=0 causes the data to be left-justified, ALIGN=1 causes the data to be right-justified, and ALIGN=2 causes the data to be centered. |
|
LABEL |
Provides the column header text. If a space is needed in the label text use the underscore character ("_"), which will be replaced with a space at run time. Note that column headers can also be defined in ResBuilder. Defining column headers in code allows for greater flexibility but in some situations it makes maintenance more difficult. |
|
MASK |
Provides an input mask that will be used when the cell is placed in edit mode. Valid mask characters are the same as those used by INPUTE. When a cell is placed in edit mode the grid uses a special INPUTE control to do the editing. |
Creating the bind_grid_to_chan Subroutine
To create the bind_grid_to_chan subroutine, do the following:
-
On the Object drop-down list, select New Subroutine/Function.
-
In the Name Subroutine/Function dialog, type the following:
Bind Grid to Chan
-
Click OK.
-
Beneath the remark headers for the new routine, enter the following code:
bind_grid_to_chan:
rem get the grid id from the template describing the form
grid_id=num(fattr(datagrid_temp$,"grdTestGrid","ID"))
rem send message 80 (gridSetDataAware) to grid to bind it to the channel
tf$=sendmsg(gb__sysgui,grid_id,gridSetDataAware,data_chan,datarec_desc$)
tf$=sendmsg(gb__sysgui,grid_id,gridShowCurrentHeading,gridHeadingDepressedMode,$$)
return
The line after the first remark above extracts the grid control ID from the template that describes the form. The template was created in the initialization code. The line after the second remark binds the grid to the channel. This is a SENDMSG() Function 80. The function's parameter list contains several variables:
|
Variable |
Description |
|
gb__sysgui |
Channel that GUIBuilder opened the SYSGUI on. |
|
grid_id |
Grid control ID. |
|
gridSetDataAware |
Constant defined in define_constants; it is equal to 80. |
|
data_chan |
Channel that the files is opened on. |
|
datarec_desc$ |
Template description created in open_data_file. |
The last line uses Set Current Heading Mode - Grid SENDMSG() Function 77 to set the headings, both row and column, to be displayed as depressed for the current row and column as the user navigates through the grid. The program is now ready to run as a data-aware grid. All that remains to be done is to add the Add, Edit, and Delete functions.
Running the Program for the First Time
Do the following to run the program:
-
On the Program menu, select Run Program.
-
In the Save Program dialog, click the Save button.
-
The program will present the records from the file in the grid.
-
Use the vertical scroll bar to move through the file.
-
Click with the mouse in various cells. This will move the grid focus to the clicked cell. Notice how the column and row header for the highlighted cell are depressed.
That is about all the program can do at this point because no code has been added to provide the Edit, Add and Delete functions.
Placing a Cell in Edit Mode
To edit the data in a given cell, first there needs to be a way for the user to indicate a cell should be edited. Second, select a method that places the cell in edit mode. Third, save the changes. The sample program provides two methods for communicating the intention, double-clicking on the cell itself and clicking the edit button while the cell is highlighted.
-
On the Object drop-down list, select Form 101 frmDataAwareGrid.
-
On the Control drop-down list, select Push Button 105 btnEdit.
-
On the Event drop-down list, select Button Pushed.
-
In the GUIBuilder edit area, add code that will be executed any time the user clicks the Edit button:
gosub edit cell
-
On the Control drop-down list, select Grid 100 grdTestGrid.
-
On the Event drop-down list, select Grid Double Clicked.
-
Below the remarks in the GUIBuilder edit area, add code that will be executed any time the user double-clicks a grid cell:
gosub edit cell
Writing the edit_cell Subroutine
-
On the Object drop-down list, select New Subroutine/Function.
-
In the Name Subroutine/Function dialog, type the following:
Edit Cell
-
Click OK.
-
Beneath the remark headers for the new routine, enter the following code:
edit_cell:
rem get the current row
grid_id=num(fattr(datagrid_temp$,"grdTestGrid","ID"))
row$=sendmsg(gb__sysgui,grid_id,gridGetSelectedRow,0,"")
row = dec($00$+row$)
rem get the current col
col$=sendmsg(gb__sysgui,grid_id,gridGetSelectedCol,0,"")
col=dec(col$)
rem prep the edit
editparams_desc$="mask:c(1*=0),restore:c(1*=0),"+
: "initstr:c(1*=0),key:u(2),col:u(2),row:u(4)"
dim editparams$:editparams_desc$
editparams.key = 0
editparams.col = col
editparams.row = row
rem block editing the first column which is the primary key
if col=0 then
: msg$="You cannot edit the primary key for this record.";
: style = msgboxExclamation;
: title$="No Edit";
: trash=msgbox(msg$,style,title$)
: else
: trash$=sendmsg(gb__sysgui,grid_id,gridStartEdit,0,editparams$)
returnThe code below the first remark extracts the grid ID from the descriptive template obtained in the initialization code and then uses Get Selected Row - Grid SENDMSG() Function 45 to retrieve the row number of the selected cell.
The code below the second remark uses Get Selected Column - Grid SENDMSG() Function 44 to retrieve the column number of the selected cell. Start Edit - Grid SENDMSG() Function 31 requires a templated string with several values.
The code below the third remark creates this string and sets the values for the row and column that was retrieved above.
The code below the fourth remark checks to see if the user wants to edit a cell in the first column, which contains the primary key. If so, it presents a message box informing the user that the primary key cannot be edited. If the user wants to edit a cell in any other column it issues Start Edit - SENDMSG() Function 31, with the templated string that was defined earlier.
Running the Program
Do the following to run the program:
-
On the Program menu, select Run Program.
-
In the Save Program dialog, click the Save button. The program will present the grid as it did before.
-
Double-click a cell. Notice that a heavy outline surrounds the cell and the caret is placed at the beginning of the data.
-
Double-click any value in the Recording Type column.
-
Delete the current contents and type a new value. Notice that it will only accept alphabetic characters and it converts them to upper case. That is because an 'AAA' mask for that field has been set in the template.
-
After editing the cell's contents, move the focus to another cell by clicking it. This instructs the grid to automatically commit the changes made to the first cell.
Adding a New Record
To add a new record, a routine needs to be connected to the Button Pushed event for the Add button. Follow the steps listed below:
-
On the Object drop-down list, select Form 101 frmDataAwareGrid.
-
On the Control drop-down list, select Push Button 103 btnInsert.
-
On the Event drop-down list, select Button Pushed.
-
In the GUIBuilder edit area, add code that will be executed any time the user clicks the Add button:
gosub add record
Creating the add_record Subroutine
-
On the Object drop-down list, select New Subroutine/Function.
-
In the Name Subroutine/Function dialog, type the following:
Add Record
-
Click OK.
-
Beneath the header remarks in the GUIBuilder edit area, enter the following code:
add_record:
rem send the add row message
grid_id=num(fattr(datagrid_temp$,"grdTestGrid","ID"))
trash$=sendmsg(gb__sysgui,grid_id,gridDataAwareFunctions,0,gridAddRow$)
rem this flag is checked in the Grid Edit Mode start event so that
rem the primary key value can be set by the program when the grid
rem start edit event occurs
add_in_progress=1
returnThis code again gets the grid control ID from the descriptive template and then uses it in Perform Data-Aware Function - Grid SENDMSG() Function 81, which is used to perform various actions on the data-aware grid. The last parameter is a constant string value that is set in the Define Constants routine: gridAddRow$. This parameter causes the function to add a new row to the grid that will ultimately hold a new record. Finally, a flag will be set called add_in_progress. Every time a grid cell is placed in edit mode a Grid Edit Mode event occurs. When this event occurs and add_in_progress is true, it indicates that a new record has been added and a new key needs to be generated for that record.
Setting the Grid Edit Mode Event
-
On the Object drop-down list, select Form 101 frmDataAwareGrid.
-
On the Control drop-down list, select Grid 100 grdTestGrid.
-
On the Event drop-down list, select Grid Edit Mode.
-
In the GUIBuilder edit area, add the following code:
while add_in_progress
rem this code catches the start edit on col 0 (primary key) and sets the value)
add_in_progress=0
if gb__notice.col = 0 then
: gosub create_new_key;
: trash$=sendmsg(gb__sysgui,gb__notice.id,gridSetEdit,0,newkey$);
: trash$=sendmsg(gb__sysgui,gb__notice.id,gridEndEdit,0,$$);
: desc$="mask:c(1*=0),restore:c(1*=0),initstr:c(1*=0),";
: desc$=desc$+"key:u(2),col:u(2),row:u(4)";
: dim editparams$:desc$;
: editparams.key = 0;
: editparams.col = gb__notice.col+1;
: editparams.row = gb__notice.row;
: trash$=sendmsg(gb__sysgui,gb__notice.id,gridStartEdit,0,editparams$)
wend
This code will execute if the Grid Edit Mode event occurs and the add_in_progress flag is true. It immediately sets add_in_progress to false and does a gosub to the create_new_key routine. The new key value is placed in the variable newkey$ and passed to the grid's special INPUTE control via Set Edit Text - Grid SENDMSG() Function 35. This message places the data from newkey$ into the INPUTE control. It then immediately issues End Edit - Grid SENDMSG() Function 26 to end editing in the first column. Then an editparams$ string needs to be set up, as previously done in the edit_cell routine. Notice that the column value is bumped by 1. Next, a Start Edit - Grid SENDMSG() Function 31 is issued with the editparams$ that places the second column in edit mode.
The Grid Edit Mode event is a notify event. GUIBuilder automatically retrieves the notice from the sysgui device and places it in a templated string call gb__notice$. The routine above uses that string to access the row and column information.
Creating the create_new_key Routine
-
On the Object drop-down list, select New Subroutine/Function.
-
In the Name Subroutine/Function dialog, type the following:
Create New Key
-
Click OK.
-
Beneath the header remarks in the GUIBuilder edit area, enter the following code:
create_new_key:
rem ' assign new number
trash$=fattr(datarec$,"CDNUMBER")
keylen = dec(trash$(10,2))
keymask$ = fill(keylen,"0")
newkey$=keyl(alt_chan,err=cnk_no_keyl)
done=0
bump_it:
while !(done)
newkey$=str(num(newkey$)+5:keymask$)
done=1
read(alt_chan,key=newkey$,dom=got_it)
done=0
got_it:
wend
return
cnk_no_keyl:
rem this handles the case of an empty file
print err
newkey$=str(1:keymask$)
goto bump_it
This code generates a new key for the file. First, it gets an encoded information string for the CDNUMBER field and gets the length of the key from the string. Second, it builds a mask of all zeros that is as long as the key length. Third, it uses the KEYL function to get the last key in the file. Notice that it uses the alt_chan and not the channel that was bound to the grid. Once a channel has been bound the grid the program should avoid any I/O to that channel. Fourth, it bumps the CDNUMBER value by 5 and tests to see if it is in the file. If not, it is complete and the variable newkey$ contains the new key. If it is in the file, it will loop again. The cnk_no_keyl routine is there to handle the special case of an empty file.
-
On the Program menu, select Run Program.
-
In the Save Program dialog, click the Save button. The program will present the grid as it did before.
-
Click the Add button. A blank row will appear at the end of the grid, and the new key value will be inserted into the first column. The second column will be in edit mode. Once the focus moves off the new row the record is saved to the file.

Deleting a Record
Do the following to select the event and create the routine that makes it possible to delete a record from the file.
-
On the Object drop-down list, select Form 101 frmDataAwareGrid.
-
On the Control drop-down list, select Push Button 104 btnDelete.
-
On the Event drop-down list, select Button Pushed.
-
In the GUIBuilder edit area, add code that will be executed any time the user clicks the Delete button:
gosub delete current row
-
On the Object drop-down list, select New Subroutine/Function.
-
In the Name Subroutine/Function dialog, type the following:
Delete Current Row
-
Click OK.
-
Beneath the header remarks in the GUIBuilder edit area, enter the following code:
delete_current_row:
rem get the current row
grid_id=num(fattr(datagrid_temp$,"grdTestGrid","ID"))
row$=sendmsg(gb__sysgui,grid_id,gridGetSelectedRow,0,"")
row = dec($00$+row$)
rem create a temporary template to hold row contents
dim tmp_datarec$:datarec_desc$
rem get the data from the current row
tmp_datarec$=sendmsg(gb__sysgui,grid_id,gridDataAwareFunctions,row,gridRetrieveRow$)
rem confirm the delete
msg$="Are you sure you want to delete CD Number "+tmp_datarec.cdnumber$+"?"
style = msgboxYesNo+msgboxInfo+msgboxSecond
title$="Delete Confirmation"
resp = msgbox(msg$,style,title$)
rem if response is yes then send the delete message
if resp<>msgboxYes then
: return
rem delete the row
trash$=sendmsg(gb__sysgui,grid_id,gridDataAwareFunctions,row,gridDeleteRow$)
rem disconnect the grid
trash$=sendmsg(gb__sysgui,grid_id,gridSetDataAware,0,$$)
rem reset the file pointer
read(data_chan,key="",err=dr_continue)
dr_continue:
rem reconnect the grid
trash$=sendmsg(gb__sysgui,grid_id,gridSetDataAware,data_chan,datarec_desc$)
return
The code first gets the grid control ID and then use Get Selected Row - Grid SENDMSG() Function 45. Second, it dimensions a temporary template to hold the data from the grid row. Third, using the row number, Perform Data-Aware Function - Grid SENDMSG() Function 81 is issued with the Retrieve Row flag, which instructs the function to return all the data from the current row into the temporary template. Fourth, a message box is created to allow the user to confirm or reject the deletion.
The actual delete takes place with SENDMSG() Function 81 with the Delete Row flag. Once a record is deleted the grid will visually indicate this by displaying a deleted icon in the first column and filling all the data fields with asterisks. The only way to clear the empty row is to disconnect and reconnect the data channel. This is accomplished with the last three commands in the routine. A Set Channel and Template - Grid SENDMSG() Function 80 is issued with a channel number of zero. This disconnects the grid from the channel. Then reset the file pointer on the primary channel and rebind it to the grid with SENDMSG() Function 80.
-
On the Program menu, select Run Program.
-
In the Save Program dialog, click the Save button. The program will present the grid as it did before.
-
Click any row, then click the Delete button. The program displays a message box, prompting the confirmation or rejection of the deletion.
-
Clicking Yes allows the deletion process to proceed.
-
Clicking No cancels the deletion.
-