
Enterprise Manager - File System: Online Copy Jobs
Online Copy Jobs are available through the Enterprise Manager under File System > Online Copy Jobs. This feature allows administrators to copy BBj/BBx data files (e.g., Mkeyed, Xkeyed, Vkeyed) from a source directory to a target location, even while the files are in active use by applications or third-party tools. Online Copy Jobs keep the destination synchronized with the source during the process, ensuring changes made mid-transfer are captured.
Administrators can configure each job by specifying a name, source and destination folders, optional transfer delay, and advanced options such as bandwidth limits and key definition changes. Jobs are created and managed visually from the Online Copy Jobs panel.
Online copy jobs provide two primary features for administrators:
-
Creating backups of live data files without interrupting user access.
-
Copying files into new formats or folder structures with optional conversion settings.
Online Copy Job Pane
The Online Copy Job pane in Enterprise Manager provides a centralized view for creating, managing, and monitoring file copy jobs. The main table displays each job under the “Copy Job Name / File” column, and the “Progress” column shows the percentage of completion for each associated file or overall job. Below the table, the “Selected Item Status” panel shows real-time status messages or updates for the currently selected file or job. The toolbar at the top right includes, from left to right: Finish (completes the job), Pause (halts the job), Start/Resume (begins or resumes a job), Create New Job (plus icon), Edit Job (pencil icon), and Refresh (reloads job list data). Jobs are added and updated dynamically as they are processed or modified.
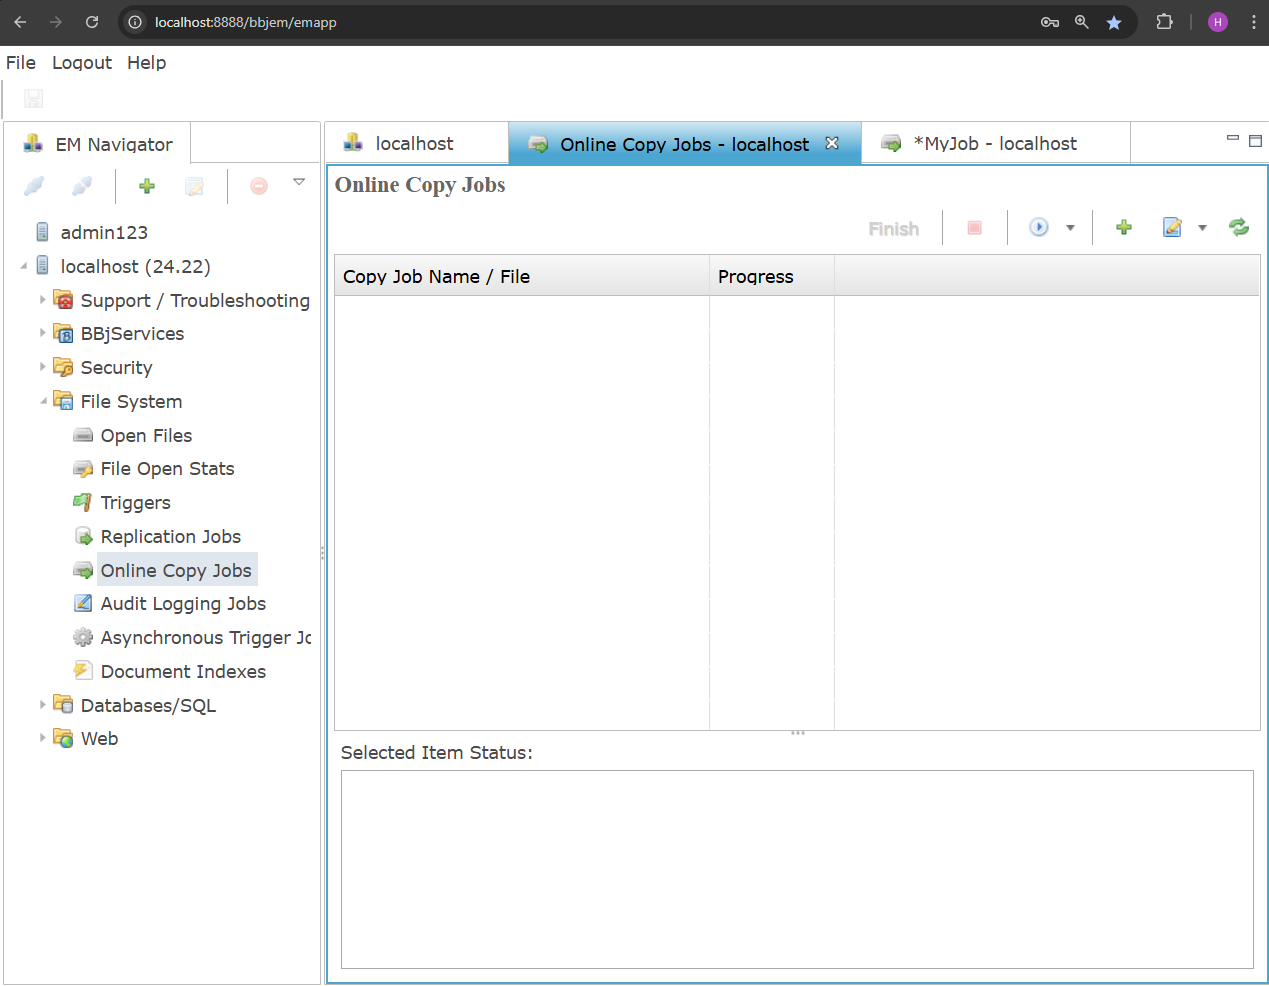
| Copy Job Name / File | Lists all configured jobs as expandable folders, with each file inside representing part of the job. |
| Progress | Displays the synchronization progress for each file or job. |
| Selected Item Status | Shows real-time status messages for the job or file currently selected in the panel. |
Creating an Online Copy Job
From the Online Copy Jobs pane, click the Add Job icon (plus sign) in the top-right toolbar. This opens the job creation panel, where you can begin configuring a new Online Copy Job.
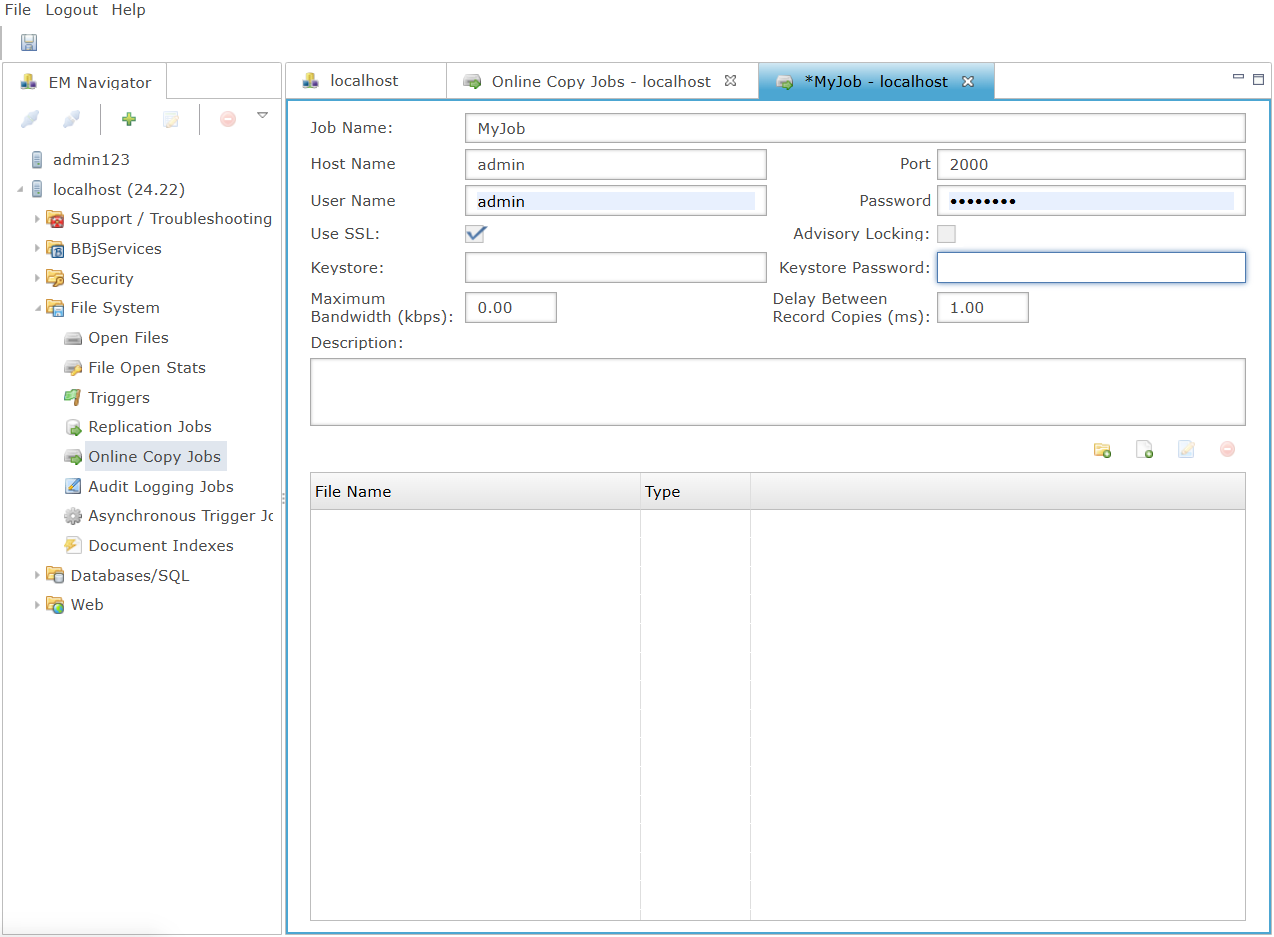
| Job Name | Sets a custom name to identify the online copy job. |
| Host Name | Indicates the server that will run the job. |
| Port | Specifies the port number used to connect to the server (default is 2000). |
| User Name | Displays the user account performing the job. |
| Password | Used to authenticate the user for the job operation. |
| Use SSL | Enables secure communication via SSL when checked. |
| Advisory Locking | Toggles file locking during the copy to prevent conflicts. |
| Keystore | Specifies the path to the SSL keystore file, if SSL is used. |
| Keystore Password | Password for accessing the keystore file. |
| Maximum Bandwidth (kbps) | Limits the bandwidth used by the job to reduce resource load. |
| Delay Between Record Copies (ms) | Sets a delay between copying each record to manage system impact. |
| Description | Optional field to add notes or job details for future reference. |
| File Name | Displays each data file included in the job; every row represents a file to be copied. |
| Type | Shows the file’s format. |
File Action Icons
From left to right, these icons help you build your file list within a job. The folder with a green plus icon opens the "Browse for Folder" dialog, allowing you to add an entire directory to the job. The document with a green plus icon opens the "Open" dialog for selecting individual files. The pencil-on-document icon opens the file editor where you can adjust file-specific settings. The red circle with a minus icon removes the selected file or folder from the job.

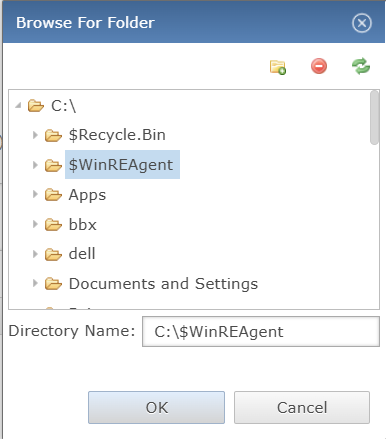
Browse for Folder Dialog
This dialog allows navigation through the file system to select a directory for inclusion in the copy job. The selected folder path is shown in the Directory Name field and is added to the job when OK is clicked. The red circle icon removes the selected directory from the list, while the refresh icon updates the folder view to reflect any recent changes.
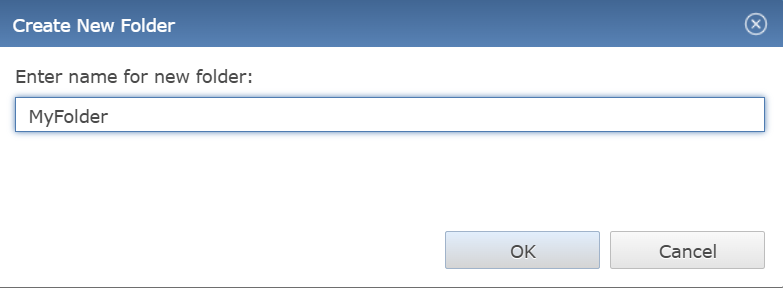
Create New Folder Dialog
This dialog appears when the folder icon with a green plus is selected in the Browse for Folder window. It allows a new directory to be created by entering a name and confirming with OK. The folder is then added to the current path and becomes available for selection in the copy job setup.
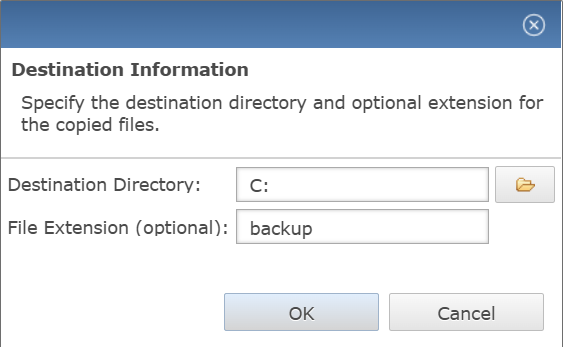
Destination Directory and File Extension Setup
This dialog is used to define where the copied files will be saved and optionally assign a custom file extension. The Destination Directory field specifies the target folder path, while the folder icon next to it opens the Browse for Folder dialog to visually select the destination. The File Extension (optional) field allows appending a suffix to the copied files, which can help with identification or file version.
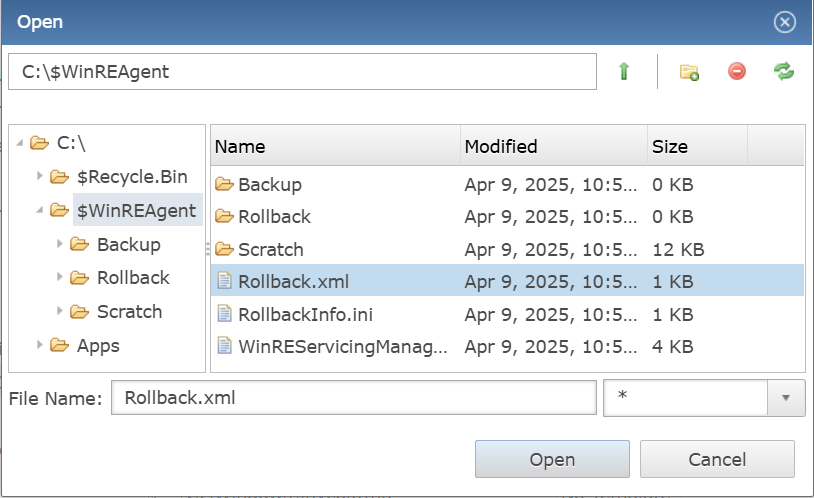
Open File Dialog
This dialog appears when the Add File icon is clicked, allowing selection of individual data files for the copy job. The user can browse folders, create a new directory, or refresh the view using the icons on the top right. The green arrow returns to the root directory, the red circle deletes the selected file, and the refresh icon updates the file list. Once a file is selected and "Open" is clicked, the Destination Information dialog appears to set the output path and optional file extension.
File Information Panel
The File Information panel is accessed by clicking the Edit File Entry icon (file with a pencil) and allows configuration of both source and target file paths for the copy job. The folder icon next to the Source File field opens a file browser to select the input file, while the magnifying glass next to the Source Template field is used to auto-generate or inspect the layout of the selected file. The folder icon beside the Target File field also opens the file browser to define the destination output path. This panel enables defining record sizes, file types, and templates, and supports automatic calculation of the target record size for accurate file conversion.
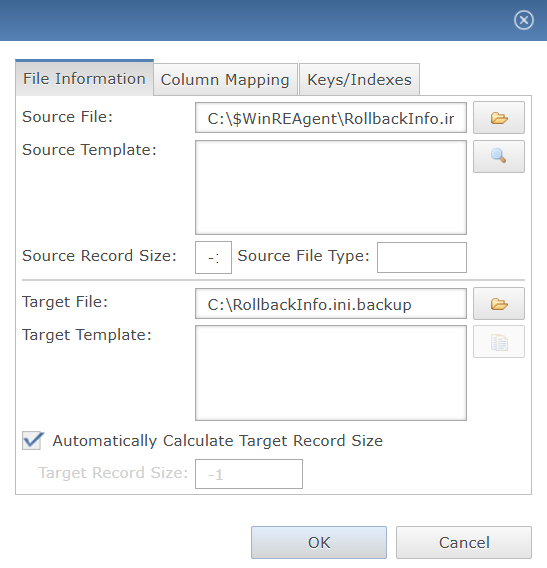
| Source File | Specifies the path of the original data file to be copied, serving as the input for the copy job. |
| Source Template | Defines the layout or structure of the source file’s records, which helps in interpreting its contents correctly. |
| Source Record Size | Indicates the fixed size of each record in the source file if known, useful when dealing with non-delimited data. |
| Source File Type | Allows manual entry of the file type if not automatically detected. |
| Target File | Specifies the output path where the copied data file will be created or updated during the copy job. |
| Target Template | Sets the format for how records should be written in the target file, useful for transforming data layouts. |
| Automatically Calculate Target Record Size | When checked, the system determines the appropriate record size for the target file based on the provided templates. |
| Target Record Size | This field becomes editable if automatic calculation is disabled, allowing the user to manually set the size of records in the target file. |
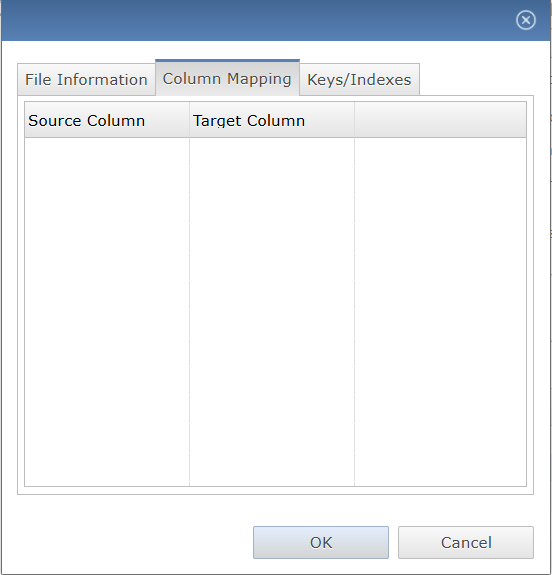
Column Mapping Panel
The Column Mapping panel allows users to define how data fields from the source file correspond to fields in the target file. Each row represents a mapping from a source column to a target column, ensuring that data is accurately transferred and formatted during the copy process. This is particularly useful when the source and target file layouts differ.
Key Configuration Panel
The Key Configuration Panel is used to define how records are indexed in the target file. Users can choose between a single keyed file or one that supports multiple keys, and specify the source and target key sizes accordingly. Clicking the green plus icon adds a new key definition, while the red circle icon deletes the selected key. The up and down arrows reorder key entries, and the refresh icon updates the key list. This setup is essential for customizing access paths and improving file performance during and after the copy process.

| Target Is Single Keyed File | Select this option when the target file uses a single key structure for indexing records. |
| Source Key Size | Specifies the length (in bytes) of the key used in the source file. |
| Target Key Size | Defines the length (in bytes) of the key to be used in the target file. |
| Target Supports Multiple Keys | Enables support for multiple key definitions if the target file requires more than one index. |
| Unique Checkbox | Marks a key as unique to ensure no duplicate values exist for that key. |
| Key Number/Name | (e.g., KNUM 0, KNUM 1, KNUM 2): Lists and identifies each key definition for the target file. |
| Segments Column | Displays key segments used to define the structure or fields involved in the key. |