 Defining Views for Use with Normalized Data
In a normalized database, the data contained in columns of individual tables cannot be broken into sub-components. Each record contains information that is set to the exact same data format. The following two examples describe the steps for creating views that display employee information using normalized data contained in a company's employee data file.
Example 1: Defining the SHORT_EMP View
In this example, the view uses the EMPLOYEE table's employee identification number (EMP_ID), and name (EMP_NAME) columns. Once the EMPLOYEE table and EMP_ID and EMP_NAME columns are defined in DDBuilder, do the following:
-
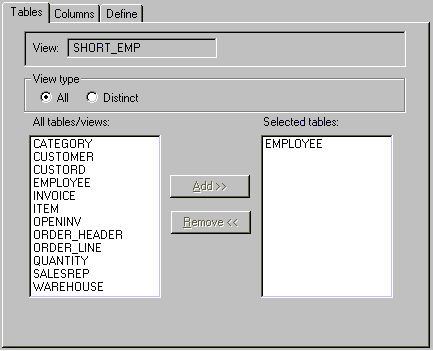
In the tree view, add a view and name it SHORT_EMP.
-
On the property page, click the Tables tab.
-
In the All tables/views box, select the EMPLOYEE table to copy it to the Selected tables box.
-
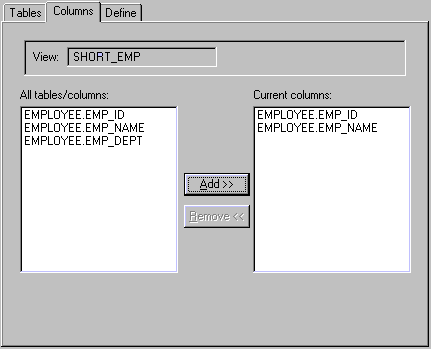
On the property page, click the Column tab.
-
In the All tables/columns box, select the EMPLOYEE.EMP_ID and EMPLOYEE.EMP_NAME columns and click Add to copy them to the Selected columns box.
-
On the properties page, click the Define tab. DDBuilder automatically inserts default column expression for the EMP_ID and EMP_NAME columns. These expressions do not need to be modified.
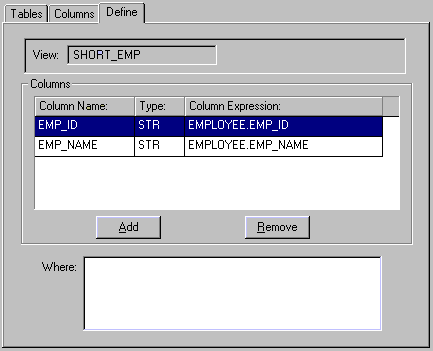
Do not enter anything in the Where box.
When the SHORT_EMP view definition is applied to the employee data file, the following is an example of the output:
|
EMP_ID |
EMP_NAME |
|
0001 |
Alicia Gomez |
|
0002 |
Fred Jones |
|
0003 |
John Lim |
|
0004 |
Laura Montini |
Example 2: Defining the SALES_EMP View
In this example, the view uses information contained in the employee identification number (EMP_ID), name (EMP_NAME), and department (EMP_DEPT) columns, The view incorporates an SQL " Where" clause that restricts the display to Sales department employees.
Once the EMPLOYEE table and EMP_ID, EMP_NAME, and EMP_DEPT columns are defined in DDBuilder, do the following:
-
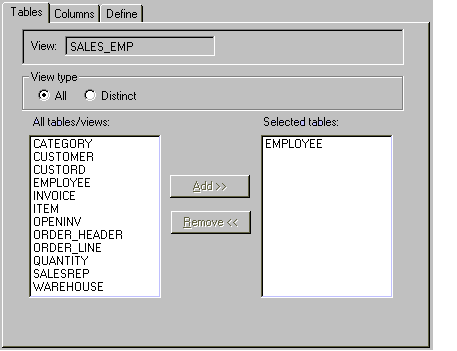
In the tree view, add a view and name it SALES_EMP.
-
On the properties page, click the Tables tab.
-
In the All tables/views box, select the EMPLOYEE table to copy it to the Selected tables box.
-
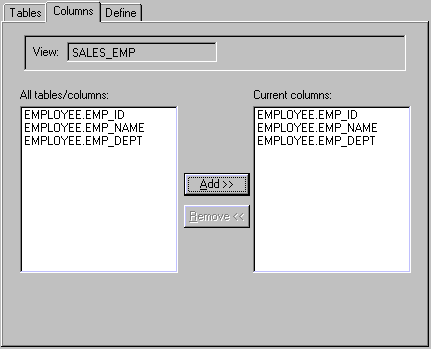
On the property page, click the Column tab.
-
In the All tables/columns box, select the EMPLOYEE.EMP_ID,,EMPLOYEE.EMP_NAME, and EMPLOYEE.DEPT_NAME columns and click Add to copy them to the Selected columns box.
-
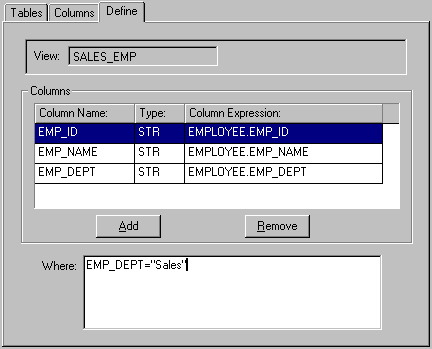
On the properties page, click the Define tab. DDBuilder automatically inserts default column expression for the EMP_ID, EMP_NAME, and EMP_DEPT columns. These expressions do not need to be modified.
-
Enter EMP_DEPT="Sales" into the Where box:
When the SALES_EMP view definition is applied to the employee data file, the following is an example of the output:
|
EMP_ID |
EMP_NAME |
EMP_DEPT |
|
0001 |
Alicia Gomez |
Sales |
|
0002 |
Fred Jones |
Sales |
(Information pertaining to John Lim and Laura Montini is not displayed in the view because they do not work in the sales department.)