BBj Plugin Manager Usage Guide
Overview
Available Plugins
The following table lists available BBj Plugins and a brief description of their functionality. For a completelist, see: BBj Plugins.
| Plugin Name | Description |
|---|---|
| AuthKit | Collection of authentication providers and multi-factor authentication (MFA) utilities for securing BBj applications. |
| BBjAppLayout | A DWC widget for building and managing common application layout structures. |
| BBjBatchRecompile | A plug-in to recursively recompile BBj programs. |
| BBjControlValidation | Provides a set of validation expressions for use in BBjControls. |
| BBjDocViewer | A document viewer (not only) for PDF documents. |
| BbjDrawer | A Custom BBj Widget for the DWC to build popover drawers |
| BBjGpsLocation | A Plugin that can display given GPS-Positions in a separate window. |
| BBjGridExWidget | An advanced BBj Data Grid / Data Table Widget for your BBj projects. |
| BBjInfiniteScroll | Lets a user loads content continuously as the user scrolls down, eliminating the need for pagination. |
| BBjLatencyIndicatorWidget | A graphical indicator for the UI to show the latency / quality of the connection. |
| BBjNotificationManager | Plugin that manages and displays noitifications autonomously. |
| BBjPullToRefresh | A quick and powerful plugin for your pull-to-refresh needs in your DWC app. |
| BBjRouter | A simple yet powerfully BBj Router for your DWC application. |
| BBjToast | BBjToast is a custom BBj Widget for the DWC which allows you to add notifications to your app with ease. |
| BBjWebDavClient | A BBj Wrapper class using the Sardine library to interact with a WebDav repository. |
| BBjWidget | Base Class for BBjUIWidgets. Most plugins that represent graphical widgets on the screen will inherit from this base class. |
| DemoPlugin | An educational plugin example, used for testing the mechanics around plugin manager. |
| DWCJ | This Plug-In installs the DWCJ libraries in your BBj environment. |
| PrintUtils | This plugin is a random collection of useful methods related to printing. |
| QRCodes | The qrcodes class allows to generate a QR code as a PNG with a single statement from BBj. |
| RestBridge | Provides REST integration capabilities for BBj applications. |
| WebKit | Web Development Components for BBj DWC. |
Plugin Manager Installation
To install and run the Plugin Manager, execute the launcher program named PluginManagerLauncher.bbj which resides in the <bbjhome>/plugins/ directory. For example, from an operating system shell:
<bbjhome>/bin/bbj <bbjhome>/plugins/PluginManagerLauncher.bbj
When you execute this launcher script, it will then install the Plugin Manager in the <bbjhome>/plugins/ directory and immediately launch it. You should then see Plugin Manager running, as shown in Figure 1.
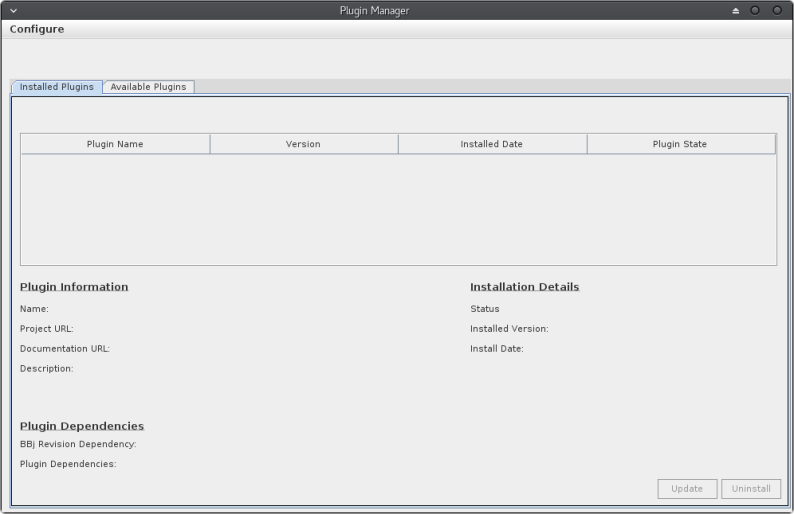
Figure 1. The Plugin Manager program running after installation
The launcher script's purpose is not only to install the Plugin Manager; subsequent launches will check for updates and update the Plugin Manager if necessary. Given the launcher script’s ability to update the Plugin Manager program, you should always start the Plugin Manager using the launcher script.
Installing a BBj Plug-in
To install a BBj plug-in, switch to the "Available Plugins" tab. From this tab, you can select the plug-in and the version you want to install. By default, the Plugin Manager will only display plug-ins which have a version number assigned to them by the developer. The Plugin Manager considers all other plug-ins to be under development and does not display them in the grid unless you check the "Show only development plugins" checkbox above the grid.
The Plugin Manager pre-selects the plug-in's latest version by default. To change the version or to see the available versions, double-click on the cell in the "Version" grid column. The cell will then display all the available plug-in versions (see Figure 2), allowing you to select the desired version.
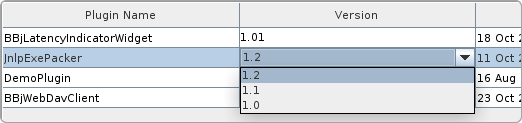
Figure 2. Displaying the available versions for a selected plug-in
After selecting the plug-in and the desired version, click on the [Install] button on the bottom right to install the plug-in. While installing, a progress bar displays an animation (see Figure 3) to show that the installation is in process.
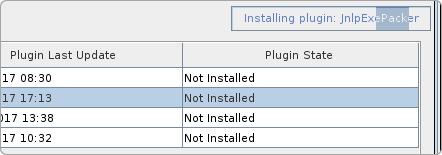
Figure 3. The installation progress bar
After the Plugin Manager installs the selected plug-in, it changes the plug-in’s state in the grid to "Installed" and the "Installed Plugins" tab’s grid displays the plug-in in a new row.
Updating an Installed Plug-in
The Plugin Manager reads the available plug-ins and the available versions from its repositories upon startup. If an update is available for one of the installed BBj plug-ins, the Plugin Manager changes the state of the plug-in to "Update Available", as shown in Figure 4.

Figure 4. The Plugin Manager showing that an installed plug-in has an available
update
To update a selected plug-in, click on the [Update] button on the bottom right of the "Installed Plugins" tab. The Plugin Manager will then proceed to update the selected plug-in. After the update is complete, the Plugin Manager changes the state of the plug-in to "Up to date" as shown in Figure 5.
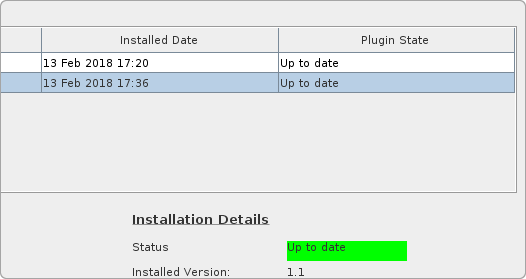
Figure 5. The Plugin Manager indicating that an installed plug-in is up
to date
Uninstalling a BBj Plug-in
To uninstall a BBj plug-in, select the plug-in you want to uninstall from the "Installed Plugins" tab then click on the [Uninstall] button on the bottom right. The Plugin Manager will then remove the plugin and update the list of the installed plug-ins.
Remarks
If you want to embed the downloaded plug-ins into your application, make sure to include the <bbjhome>/plugins path in your application's prefix. This document uses the default config.bbx file whose prefix already contains the path to the plugins/ directory.