Query Functions
Overview
AddonSoftware query grids provide multiple methods to search, sort, filter, adjust column display, adjust column order, adjust column width, and to select all or only highlighted rows of the grid for output. Users can create and save custom filters quickly by using the Filter Wizard function. Additionally, there are output type selections available for the grid data – output to system printer, pdf, csv, xml, xls, and txt. By default only active records are displayed. To display all records including inactive records, right click in the grid for Query Selection Options and select Show All (Customers).

AR Customer Lookup grid
About the Fields
In the Search field...
The Search feature creates a quick search filter of the query grid. The search can be configured to be case sensitive or case insensitive.
-
Select the column header to be searched.
-
In the Search Filed, begin to enter the beginning alphanumeric or numeric data of the desired record and the filtering of the grid begins.
Example: If the desired record is California, selecting the State column and entering "Cal" will cause the grid to filter for records beginning with Cal.
-
A wildcard filter may be used to look for the instance of a word or part of a word in the column by entering ‘%’ before the alphanumeric entry and selecting the Refresh button.
Example: Entering "%Spo" will search for all instances of the word 'sport' in the column selected.
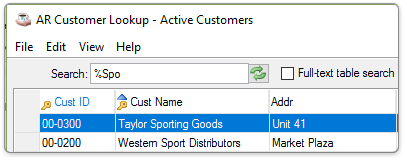
Query Search wildcard
-
To restore the grid back to displaying the full result set, clear the contents of the Search field.
Column Sorting
-
Select a column header to sort the data in ascending or descending order.
-
For multiple columns...
-
-
Sort by pressing the [Shift] key while making the column selections.
-
Deselect by clicking on any single column.
-
NOTE:The sorted column(s) is indicated by a blue triangle next to the column header name. The key icon Indicates a field that is indexed, so sorting on it is faster than on a column without a key.
Adjusting Column Widths
-
Column widths may be adjusted by selecting the left or right column border with the mouse, holding the selection and sliding to the desired position.
-
Column width adjustments are preserved for the user the next time the query grid is created.
Creating a Custom Filter
Function
Custom filters may be created and saved using the Filter Wizard. The wizard has selections for the operator, the data value, and the column selection.
Select the [Filter Wizard] button in the top right corner of the query grid frame that launches the wizard in the bottom half of the same window.
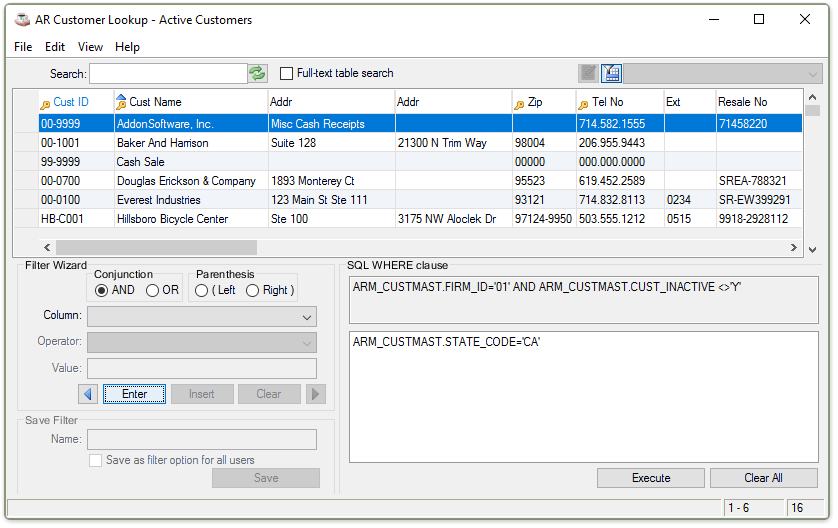
Filter Wizard in the lower right query panel
About the Fields
The Filter Wizard name reflects the column selection made in the panel on the right.
From the Column dropdown...
-
Select a column in the displaying grid from the dropdown list.
From the Operator dropdown...
- Select one of the following operator values from this dropdown list:
-
-
Greater than
-
Less than
-
Greater than/Equal to
-
Equal to Not equal to
-
Begins with
-
Ends with
-
Contains
-
Does not contain
-
Is contained in
-
Is not contained in
-
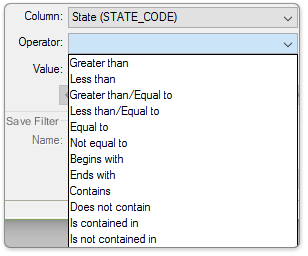
Filter Wizard selections
In the Value field...
-
Enter the value with which the operator selection is interacting.
When done making selections...
-
Select the [Enter] button to populate the editable SQL text field.
-
Select the [Execute] button to filter the grid based on the column, operator, and value selections.
-
Select the [Clear All] button to clear all selection made and begin again.
Saving a Custom Filter
Custom filters may be saved and shared to all users in the organization. After creating a filter proceed to the bottom of the Filter Wizard panel under the Save Filter section.
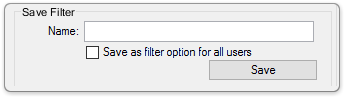
Save Filter
In the Name filed...
-
Enter a unique name for the custom filter.
Save as filter option for all users checkbox...
-
Mark the box to share the custom filter to all users in the organization. The shared filter will appear as a dropdown option next to the Filter Wizard button in the top right corner of the frame.
- Unmark the box to only save the filter for the current user. The shared filter will appear as a dropdown option next to the Filter Wizard button in the top right corner of the frame.
When done making selections...
-
Select the [Save] button to save the custom filter. The Filter Wizard remains open and the saved filter appears as a dropdown option next to the Filter Wizard button in the top right corner of the frame. To remove a saved filter from the dropdown filter list, select the named filter and then select the [Delete current record] button in the top left corner of the AddonSoftware frame.
-
To collapse the Filter Wizard panel, select the Filter Wizard button in the top right corner of the window.
Query Selection Options
Right click on a record in the query grid to open the query selection options.
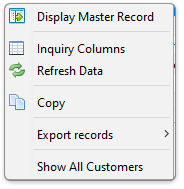
Query selection options
Display Master Record function...
Displays the Master Record of the highlighted row.
Inquiry Columns function...
Selecting the Inquiry Columns function allows editing of the column display and display order, and restoring the defaults for both. Edits are preserved at the user level for returning to the grid.
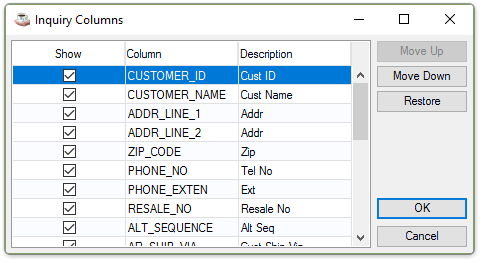
Inquiry Columns
Editing which columns are displayed...
Unmarking the "Show" checkbox removes the data column described in that row from the grid.
When done making changes...
-
Select the [OK] button and the changes cause the grid to refresh.
-
To undo changes, right click on the grid, select Inquiry Columns, and select the [Restore] button.
Editing the order in which the columns are displayed...
-
From the Inquiry Columns window, select the column to be moved highlighting it, and then select the [Move Up] or [Move Down] buttons.
-
Another method to change the column order is to select the column to be moved and drag and drop it in the desired position.
When done making changes...
-
Select the [OK] button and the changes cause the grid to refresh.
-
To undo changes, right click on the grid, select Inquiry Columns, and select the [Restore] button.
Query selection options
Refresh Data
Selecting the Refresh Data function forces a refresh of the grid to reflect all changes.
Copy
Selecting the Copy function opens the Inquiry Copy Options selection window.
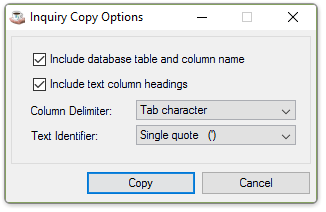
Inquiry Copy Options
Include database table and column name checkbox...
-
Mark the box to include the table and column names on the copy.
-
Unmark the box to not include them.
Include text column headings checkbox...
-
Mark the box to include the column headings on the copy.
-
Unmark the box to not include them.
Column Delimiter dropdown...
-
Select the column delimiter from the dropdown list:
-
-
Tab character (default selection)
-
Comma
-
Semi-colon
-
Space
-
Text Identifier dropdown...
-
Select the text identifier from the dropdown list:
-
-
None
-
Single quote (default selection)
-
Double quote
-
When done making changes...
-
Select the [Copy] button.
-
Select the [Cancel] button to exit the copy process and close the Inquiry Copy Options window.
Export Options
Export Records option supports several export functions - Data Selection, Document Output Viewer, Document Output Selection Form, as well as the type of output.
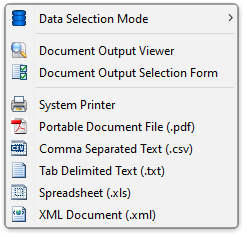
Query Export options
Show All Customers
This selection allows toggling between active and inactive records.
Data Selection Mode
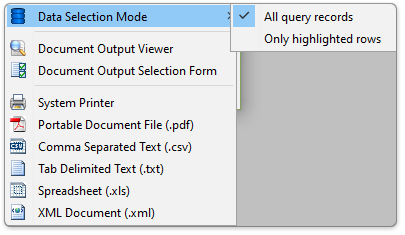
Data Selection options
-
Select All Query records (default selection) to include all grid records for export.
-
Select Highlighted rows to include only selected/highlighted grid records for export. The Data Selection Mode icon changes to reflect the underlying selection made.
See Output Options
______________________________________________________________________________________
Copyright BASIS International Ltd. AddonSoftware® and Barista® Application Framework are registered trademarks.