Payroll - Employee Deduction History
This task is accessed from the Display additional options button  on the Employee maintenance form.
Function
This option is used to create and maintain deduction code information for the selected employee. The deduction codes assigned to each employee are used to deduct the appropriate amounts from earnings during payroll entry and calculation, based on the pay periods specified for the deductions. Deductions may be automatically generated during payroll calculation or may be manually entered through the Payroll Entry task. This option may be used at any time to change information for employees.
NOTE: All non-special deduction codes (where the Special Deduction Checkbox was left unchecked in the Deduction Code Maintenance task) are automatically assigned to new employees when they are added to the Employee Masterfile. Be certain that all automatically assigned deduction codes apply to the new employee. When an automatically generated deduction code does not apply, delete the deduction code from the employee’s record.

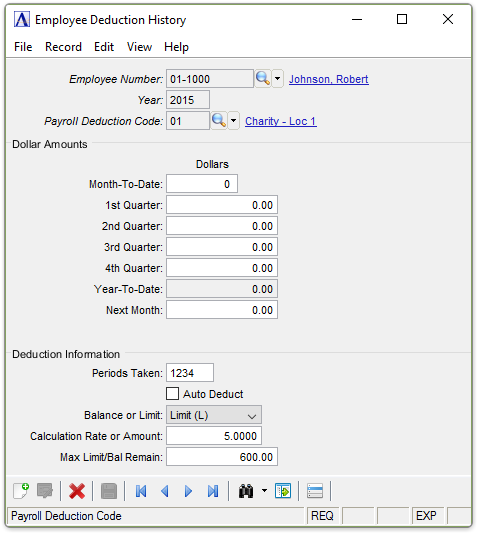
Employee Deduction History
About the Fields
The Deduction Code Maintenance screen is divided into three sections. The upper section (header) fields are used to enter the Payroll Year and Select the appropriate code. The middle section displays historic information. The lower Deduction Information section is used to enter and edit items specific to this employee.
If designated as an Administrator, you may edit the Historical Data by selecting the Display additional options... button and selecting

Edit Employee Deduction History
The Month-To-Date and Next Month Fields are only relevant to the current Payroll Year. Non-current year fields are disabled.
As an Administrator, when finished entering Deduction History Information...
-
Click
 to save the record.
 -
Click
 to clear the form and begin again.
 -
Click
 to delete the record selected. A record may be deleted if all numeric data is set to zero.
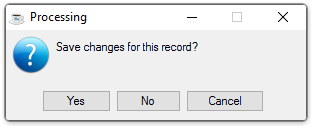
If the Window is closed without saving the record, the module issues this confirmation prompt:
-
Click [Yes] to save the changes.
-
Click [No] to return to Employee Masterfile Maintenance without saving the record.
-
Click [Cancel] to return to the Deduction Code you are Editing.
In the Year field...
-
Enter the Calendar Tax Year that this Record Applies to.
-
Click
 to select from a list of all existing employee deduction records.
 -
Click the record navigating buttons;
 to view the first record,
  to view the previous record,
  to view the next record, and
  to view the last record.
In the Payroll Deduction Code field....
Deduction codes with the Special Deduction checkbox left unmarked in the Deduction Code maintenance task are automatically assigned to new employees.
-
Enter a valid Deduction code. The description is displayed.
-
Click
 to select from a list of valid codes.
For established employees, historical information for the deduction code entered is displayed in the Dollars fields. When the initial payroll is processed as the first payroll in January, this information begins accumulating to the Employee Masterfile. When the payroll is initiated at any other time, this annual historical data must be entered during the conversion process (refer to the Installation section of this manual).
NOTE: When defining new employees, be certain that any automatically assigned deduction codes that do not apply to the employee are deleted immediately.
All automatically assigned deduction codes may be displayed by using the navigating buttons or record lookup. Normally the only fields that can be changed within this option are those in the Deduction Information section of the screen.
In the Periods Taken field....
The periods defined in the Deduction Code Maintenance task for this deduction code are displayed, but may be overridden with periods specific to this employee.
-
Enter the payroll period(s) this deduction is to be taken, using the numbers 1, 2, 3, 4 and 5 to represent the payroll periods.
When entering more than one payroll period, enter the numbers one after another, with no spaces separating the entries (e.g., 12345, to specify pay periods 1 through 5).
Auto Deduct checkbox...
-
Mark the box to automatically generate the deduction during Payroll Calculation on each specified payroll period.
-
Unmark the box unchecked to manually enter the deduction through the Payroll Entry task.
From the Balance or Limit dropdown...
-
Select Limit (L) for the deduction to be taken until a fixed dollar amount per year is reached.
-
Select Balance (B) if the deduction is to have a balance that will be reduced by the amount of the deduction each payroll period until that balance is zero.
This selection will override the method listed in the Deduction Code maintenance task.
In the Calculation Rate or Amount field...
-
Enter the rate to be used to calculate the deduction when you enter Units (U) or Dollars (D) in the Deduction Type field.
-
Enter the fixed dollar amount to be deducted each specified payroll period when you enter Fixed (F) in the Deduct Type field.
When the employee’s deduction rate is different from what is specified in the Deduction Code Maintenance task, the employee’s rate/percentage is used. When a deduction amount is not specified for an employee, the rate/percentage from the Deduction Code Maintenance task is used.
In the Max Limit/Bal Remain field...
-
Enter the deduction limit or balance.
Limit
When a deduction is to be taken only until a certain total dollar amount is reached, enter the dollar amount limit. During automatic payroll calculation, the employee year‑to‑date deduction amount for this deduction is compared to the limit, and deductions will not be taken once the limit is reached.
When a limit is entered here it will override this limit set in the Deduction Code Maintenance task. In order for the deduction to continue indefinitely, the limit must be set to zero here and in the Deduction Code Maintenance task.
Limit Example
A $50. contribution to charity has a limit of $500. When $500. has been deducted for the year, the deduction ends, but resumes in the next year. If the limit is set to zero, $50. will be taken out without restriction to total dollar amount.
Balance
Enter the dollar amount balance for this deduction. A deduction with a balance differs from a deduction with a limit in two major ways. The initial Balance is copied over from the Deduction Code Maintenance task, but the tabulation of the remaining balance is kept here.
- The balance of the total deduction is reduced by the amount of the periodic deduction during the payroll update. When the balance reaches zero, the deduction is no longer taken.
- During year-end processing, any balance remaining is carried over to the new year.
Balance Example
An example of balance might be a specific garnishment. Once the balance equals zero, it is complete. For a $500. garnishment with $200. remaining at year-end,that balance of $200. carries over to the new year.
When finished entering Deduction Code Information...
-
Click
to save the record. -
Click
to clear the form and begin again. -
Click
to delete the record selected. (All Numeric Fields must be Zero to Allow Deletion)
If the Window is closed without saving the record, the module issues this confirmation prompt:
-
Click [Yes] to save the changes.
-
Click [No] to return to Employee Masterfile Maintenance without saving the record.
-
Click [Cancel] to return to the Deduction Code you are Editing.
If an "Allow Undefined Code" option was accepted for an employee during Payroll Entry, and the Payroll Check Register is updated by over-riding the warnings. A new record will automatically be created for the employee. You should then be sure to check the Deduction Information, which will initially be blank.
______________________________________________________________________________________
Copyright BASIS International Ltd. AddonSoftware® and Barista® Application Framework are registered trademarks.