Purchase Order Processing - Purchase Requisition Entry
Function
Use this task to enter requests for purchases without actually creating purchase orders. After a requisition is created, it can be manually converted into a purchase order at any time by entering the requisition number in the Purchase Order Entry task. You can also generate multiple purchase orders automatically from requisitions with the Purchase Requisition Register. Purchase Requisition Entry features appear in two tabs; Basics and Dropship.
The main form includes buttons Queue for Printing, Print Requisition, and Comments.
=> To access this task...
Select Purchase Requisition Entry from the Purchase Order Processing main menu.
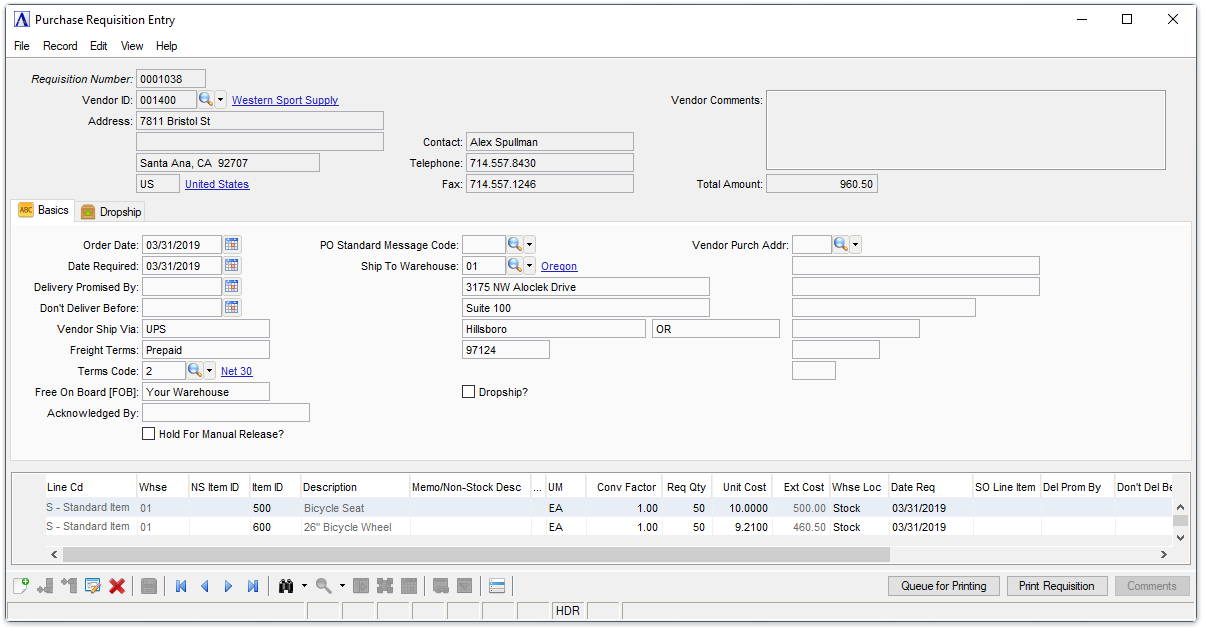
Purchase Requisition Entry
About the Fields
Use the fields in this task to enter requisition information, such as vendor name, required dates, and terms. This is the same information requested for purchase order entry. You can access requisition information by requisition number. The window is separated into three sections: Requisition Header, the Basics tab, and the Dropship tab.
To enable edits to the form select  .
.
In the Requisition Number field...
When entering an existing requisition number, information regarding the requisition displays in the Requisition Detail section.
-
Enter a valid requisition number.
-
Press [Tab] to select the next available number.
-
Click the record navigating buttons;
 to view the first record,
  to view the previous record,
  to view the next record and
  to view the last record.
In the Vendor ID field...
-
Enter a valid vendor number.
-
Click
 to select from a list of vendor codes.
 -
Click the record navigating buttons;
to view the first record, to view the previous record, to view the next record and to view the last record.
When a valid vendor is selected, the name and address are displayed. If the Display Vendor Comments? field is checked in the Application Parameters task in the Maintenance folder, any comments associated with the vendor are also displayed. In the Contact section, the vendor contact, phone number, and fax number are displayed.
In the Address, Contact, Telephone, Fax, and Comments fields...
Display only. Shows the information for the vendor.
In the Total Amount field...
Display only. Shows the dollar total for this requisition.
Basics Tab (back to top)
To enable edits to the form select .
In the Order Date field...
-
Enter the order date.
-
Accept the default of the current date.
-
Click
 to select a date by using the calendar tool.
In the Date Required field...
-
Enter the required date for an order.
-
Click
to select a date by using the calendar tool.
In the Delivery Promised By field...
This field is optional.
-
Enter the promised delivery date.
-
Click
to select a date by using the calendar tool.
In the Don't Deliver Before field...
This field is optional.
-
Enter a date before which delivery cannot be made.
-
Click
to select a date by using the calendar tool.
In the Vendor Ship Via field...
-
Enter 1 to 15 characters for a shipping method or a carrier.
-
Press [Tab] to select the default established in the Application Parameters Maintenance - Default tab.
In the Freight Terms field...
-
Enter 1 to 15 characters for freight terms.
-
Press [Tab] to select the default established in the Application Parameters Maintenance - Default tab.
In the Terms Code field...
-
Enter a valid terms code.
-
Click
to select from a list of terms codes. -
Press [Tab] to select the default established in the Vendor Maintenance task of the Accounts Payable module.
In the Free On Board (FOB) field...
-
Enter 1 to 15 characters of optional FOB information.
-
Press [Tab] to select the default established in the Application Parameters Maintenance - Default tab.
In the Acknowledged By field...
-
Enter 1 to 15 characters for the vendor acknowledgment of the order.
Hold For Manual Release? checkbox...
-
Mark the box to hold this requisition for manual release.
-
Unmark the box to enable selection by the Purchase Requisition Register task.
The Purchase Requisition Register task automatically converts selected requisitions to purchase orders during an update. If a requisition has a hold on it, the conversion will not take place.
In the PO Standard Message Code field...
-
Enter a valid standard message code.
-
Click
to select from a list of message codes. -
Press [Tab] to select the default established in the Application Parameters Maintenance - Default tab.
AddonSoftware provides for two different types of messages for your requisitions/purchase orders:a Standard Message that appears on all requisitions/purchase orders (i.e., Season’s Greetings) and specific messages pertaining to line items (i.e., Requires Part #3342). The PO Standard Message Code field is for the standard message.
In the Ship To Warehouse field...
A valid warehouse code entry populates the address fields. The warehouse selected in this field becomes the default warehouse for the line items.
-
Enter a valid warehouse ID.
-
Click
to select from a list of warehouse codes.
Dropship? checkbox...
Selection is disabled if AR is not installed. When AR is installed, the Drop Ship is also disabled when detail lines are entered into the grid. In order to create a dropship PO, a SO must already exist with one or more lines marked for dropship.
-
Marking the box affects the entire Requisition/PO. Enter corresponding customer/order on the Dropship tab and fill out the other fields. The dropship line code is not used for the individual lines; instead, select the corresponding SO line item from the SO Line Item (a.k.a. SO Seq No) listbutton in the grid row.
-
Unmark the box if the requisition is to be a standard shipment from inventory.
In the Vendor Purch Addr field...
-
Enter the alternate address code.
-
Click
to select from a list of addresses for this vendor.
Dropship Tab (back to top)
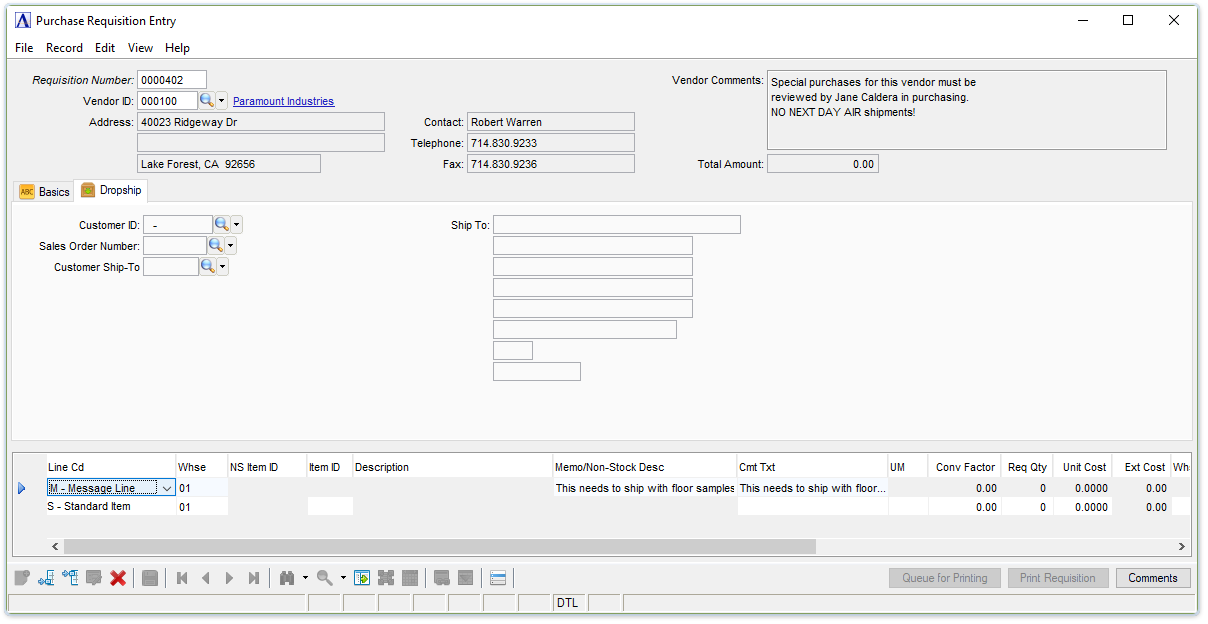
Purchase Requisition Entry - Dropship tab
The Dropship tab automatically displays whenever the drop ship checkbox is selected.
About the Fields
To enable edits to the form select .
In the Customer ID field...
-
Enter a valid customer ID number.
-
Click
to select from a list of customer ID's.
In the Sales Order Number field...
-
Enter the associated sales order number.
-
Click
to select from a list of sales order numbers for this customer.
In the Customer Ship-To field...
Optional field. Enter a tracking number.
In the Ship To field...
Display only. The shipping address related to the Customer ID is displayed.
Creating a New Vendor Purchase Address
It may be necessary to send a purchase order to an address not currently listed in system. The new address may be created without leaving this task. Return to the Vendor ID field at the top on the window and select the Display Master Record button  to open the record file for this vendor. From the Vendor master record window, select Vendor Purchasing Addresses from the dropdown list.
In the Address Code field...
-
Click the record navigating buttons to review existing address records for this vendor;
to view the first record, to view the previous record, to view the next record and to view the last record. -
Enter a new code number to create a new vendor address.
In the Name field...
-
Enter 1 to 30 characters for a name to associate with the address.
In the Address field...
Two lines of address information are available.
-
Enter 1 to 24 characters for the address.
In the City field...
-
Enter the city for this address.
In the State field...
-
Enter the state for this address (if applicable).
In the Zip/Postal field...
-
Enter 5 to 9 digits for the zip/postal code.
In the Telephone field...
-
Enter the telephone number for the purchase address.
In the Ext field...
-
Enter 1 to 4 digits for a telephone extension.
In the Fax Phone field...
-
Enter the facsimile number for the purchase address.
In the Contact field...
-
Enter 1 to 20 characters for the name of the contact at the purchase address.
In the FOB field...
-
Enter the free-on-board information.
In the Ship Via field...
-
Enter the method of shipment.
Leaving this window without saving results in the following prompt:
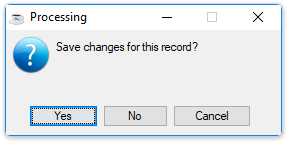
-
Click [Yes] to save the record changes.
-
Click [No] to return to the Requisition Header window without saving changes.
-
Click [Cancel] to return to the Vendor Purchasing Addresses window.
When done making selections...
-
Click
 to run the process.
 -
Click
 to clear the form and begin again.
Return to Purchase Requisition Entry - Item Detail
Selecting a line item in the detail section of the Requisition Header window allows the following functions:
-
Select the Display master record button
to open the record file. -
Click Add new
 to a new comment line or click Insert new
  to insert a new line above the current row.
Entering Item Detail Lines
Line codes are assigned line types in the Line Code Maintenance task. One of five different types may be assigned to a line code. A line code assigned the Standard type requires input to most of the following fields. Line codes assigned the non-stock, vendor part number, message, or other types require less input. At a minimum, AddonSoftware recommends the following Line Codes:
-
S- Standard Item
-
D- Standard Dropship
-
V- Vendor Part Number
-
N -Non-Stock Item
-
O - Other Type Line
-
M - Message Line
See the Installation section for more information on line code types.
If the Order Processing module is installed, a valid customer and order/line number are required for drop shipment. If a line code that requires delivery is selected, the Drop Shipment Information window appears. See Entering Drop Shipment Information following the Purchase Requisition Entry field descriptions.
In the Whse field...
This field is automatically populated from the Warehouse ID selection made previously in the Miscellaneous section.
In the NS Item ID field...
This field is activated when N- Non-Stock Item is selected in the Line Cd field.
-
Enter a valid item number.
-
Click
to select from a list of item numbers.
In the Item ID field...
This field is activated when S- Standard Item and D- Standard Dropship is selected in the Line Cd field.
-
Enter a valid item number.
-
Click
to select from a list of item numbers.
In the Memo/Non-Stock Desc field...
A comment editor pop-up is available when using line codes - M - Message Line, N - Non-Stock, O - Other, and V- Vendor Part #. Up to 1024 characters, line feeds and tab characters may be used.
-
The first 40 characters or up to the first line feed (whichever is less), is stored in the Memo/Non-Stock Desc field.
-
Hover over the column to the right of the Memo/Non-Stock Desc column to see the full text or select the column (double-click or single click and Ctrl-F/magnifying glass), or via the [Comments] button (or Alt-C) to invoke the comments editor.
NOTE: Comments can only be edited when in the Edit mode.
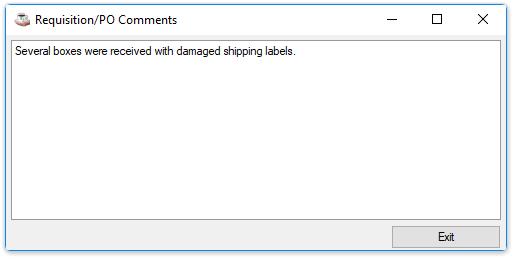
Requisition / PO Comments
-
Enter the description of the item or the comment when selecting the specified line codes.
-
When done with comments, select thew [Exit] button
In the UM field...
-
Enter the standard unit of measure for the item.
-
Press [Tab] to accept the default.
Unit of Measure Example
Any two characters can be entered, such as “PR” for pair, “CS” for case, “PL” for pallet, or “LB” for pound.
In the Conv Factor field...
-
Enter the conversion factor for the item.
-
Press [Tab] to accept the default.
Conversion Example
Type the factor used to convert from purchase quantity to stocking quantity. For example, if the item ordered is shipped in cases of 24 but inventoried and stocked singly, enter 24. If the item is shipped in cases of 12 but stocked in pairs, enter 6. The displayed cost changes automatically.
In the Req Qty field...
-
Enter the amount of the item ordered.
Quantity Order Example
Use the same unit of measure that the vendor uses to ship the item. For example, if two cases of 24 items each are being ordered, enter 2. The extension is automatically recalculated.
In the Unit Cost field...
-
Enter the cost per unit.
-
Press [Tab] to accept the default.
In the Ext Cost field...
Display only. Shows the extended cost of Quantity times Cost.
In the Whse Loc field...
-
Enter the receiving location for the item.
-
Press [Tab] to accept the default.
In the Date Req field...
-
Enter the date the item is required.
This date is used once the requisition is converted to a purchase order for calculations in Material Requirements Planning, the Cash Requirements Report, the Purchase Order Expediting Report, and to update the Last Purchase Date in the Inventory Master File.
In the SO Line Item field...
-
Enter the SO line item.
In the Del Prom By field...
-
Enter the date promised.
In the Don't Del Bef field...
-
Enter a date before which the item cannot be delivered.
In the Std Msg Cd field...
-
Enter the message code to be included on the requisition.
-
Click
to select from a list of message codes. -
Press [Tab] to accept the default.
In the W O No field...
-
Enter the work order number that generated this purchase requisition.
-
Press [Tab] to skip this field.
-
Click
to select from a list of work order numbers.
When selecting a work order you are required to specify a detail line number.
In the W O Seq No field...
-
Enter the detail line number from the work order that lists the materials for this item.
When finished making entries to the fields...
-
Click
 to save the records listed in the grid.
 -
Click
 to delete the current purchase order.
-
Select the [Queue for Printing] button or the Display additional options drop down
 to prepare the requisition for printing. The system issues the following prompt:
-
Click [OK] and proceed to the Purchase Requisition Print Task.
-
Click the Print Requisition button
 or the Display additional options drop down to print the requisition immediately, thereby bypassing the queuing task. A print preview version of the requisition is created.
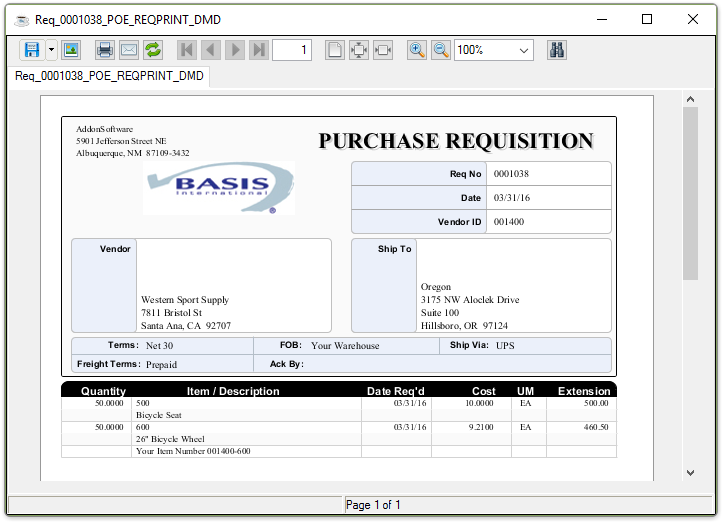
Sample Purchase Requisition
See Output Options.
______________________________________________________________________________________
Copyright BASIS International Ltd. AddonSoftware® and Barista® Application Framework are registered trademarks.