General Ledger - Bank Reconciliation
Function
Use this task to add, delete, change, and inquire into checking account information. All information associated with the account is accessed through an option menu that displays when selecting an account. Bank Reconciliation features appear in two tabs; Bank Account Information and Statement Information.
=> To access this task...
Select Bank Reconciliation from the General Ledger main menu.
Bank Account Information Tab
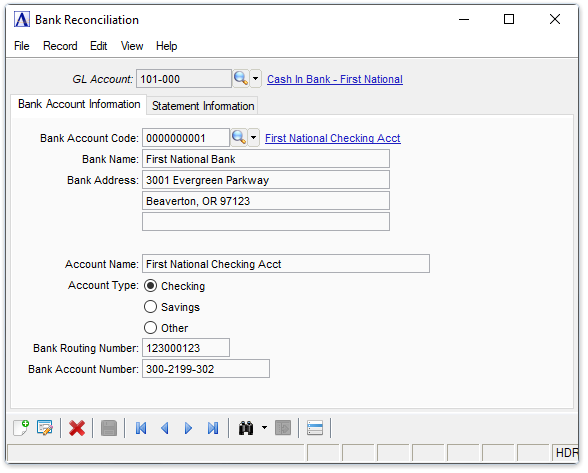
Bank Reconciliation - Bank Account Information tab
About the Fields
This screen is divided into two sections. In the upper section you enter the account number and a description of the account is displayed. When an existing account is entered, an option menu appears. The lower section is the workspace for information related to the option menu selection.
To enable edits to the form select  .
.
Bank Account Information tab
In the GL Account field...
-
Enter the general ledger cash account number that identifies this checking account.
-
Click
 to select from a list of valid GL Accounts.
 -
Click the record navigating buttons;
 to view the first record,
  to view the previous record,
  to view the next record and
  to view the last record.
The general ledger description is displayed, along with a menu of options for performing reconciling the selected account.
About the Bank Reconciliation Options
The Bank Reconciliation drop down option menu allows the entry of varied information regarding an account without ever leaving the main task. By selecting available options from the option menu once an account is accessed, info can be viewed, edited or deleted or new data added.
Along with the account number and description, any information previously entered for an option is displayed in the working area of the screen. Prompts requiring attention and pertaining to the selected option’s fields, appear at the bottom of the screen.
In the Bank Account Code field...
Bank Account Codes are maintained in AddonSoftware Administration ->Settings ->Bank Account Codes task.
-
Click
 to select a bank account code from a list of active code records. See Query Functions.
 -
Click the record navigating buttons;
to view the first record, to view the previous record, to view the next record and to view the last vendor record.
In the Bank Name field...
-
Display only. Displays the name of the banking institution.
In the Bank Address fields...
-
Display only. Displays the bank's mailing address.
In the Account Name field...
-
Display only. Displays the description of the account.
In the Account Type selector...
-
Display only. Displays Checking, Savings, or Other.
In the Bank Routing Number field...
-
Display only. Displays the bank's routing number.
In the Bank Account Number field...
-
Display only. Displays the account number.
Selecting the Additional Option Key
Click  to reveal a dropdown of additional functions:
Use this option to review the list of checks that haven't been removed, and change the status of checks that have been paid by the bank. The <Shift> and <Ctrl> keys can be used to select multiple rows in the grids. A right-mouse click on the grid pops up a menu to allow selecting the "Code" for all the selected rows. Note that the "Codes" are different for the two grids.
Note: Because you can opt not to remove paid transactions, the list may show paid as well as outstanding checks.
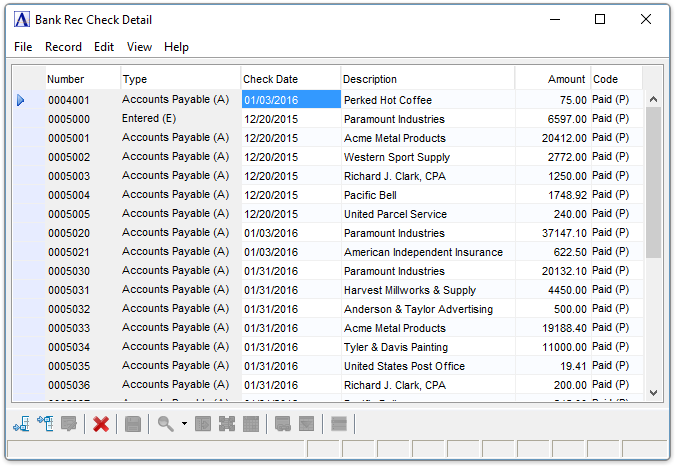
Sample Bank Rec Check Detail
Use this option to make additions, deletions, inquiries, payments and changes to information for bank account deposits, service charges, adjustments or other types of non-check transactions. You can also review and mark as "Posted" any transactions (other than checks) that have cleared the bank. The <Shift> and <Ctrl> keys can be used to select multiple rows in the grids. A right-mouse click on the grid pops up a menu to allow selecting the "Code" for all the selected rows. Note that the "Codes" are different for the two grids.
![]()
Sample Bank Rec Other Transactions
About the Fields
In the Number field...
-
The Number column is now only enabled for new rows. Deposits that are generated during Cash Receipts or Invoice Entry Cash Sales will carry the deposit number assigned when the deposit record was created.
-
Enter a number to identify the new transaction. For Deposit type transactions, if the number entered matches an existing Deposit record, it is rejected and you’re asked if you’d like a new deposit number.
In the Type field...
-
Select Deposit (D), Service Charge (S), or Adjustment (A) from the pull down.
In the Trans Date field...
-
Enter the transaction date.
In the Description field...
-
Enter a brief description for the transaction.
In the Amount field...
-
Enter the transaction amount.
In the Cash Rec Code field...
-
The Cash Rec Cd column is only enabled for Deposit type transactions.
-
Enter the code, or ctl-F to select from a query of existing codes.
In the Description field...
-
This field is display only, and contains the description for the selected Cash Rec Cd.
In the Code field...
-
Select Outstanding (O) or Posted (P) from the pull down.
Use this option to recalculate the Book Balance for the GL Account.
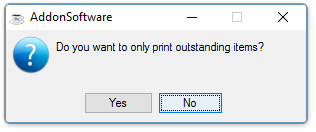
Use this option to generate a list of check and other transactions. It is recommended that you print a final version of this report for future reference after the account is balanced. Selecting this option gives the following prompt:
The Detail List shows Check transactions first, followed by Other transactions (Deposits, Service Charges, Adjustments). For Deposit type transactions, the corresponding Cash Rec Cd appears in parentheses at the end of the Description.
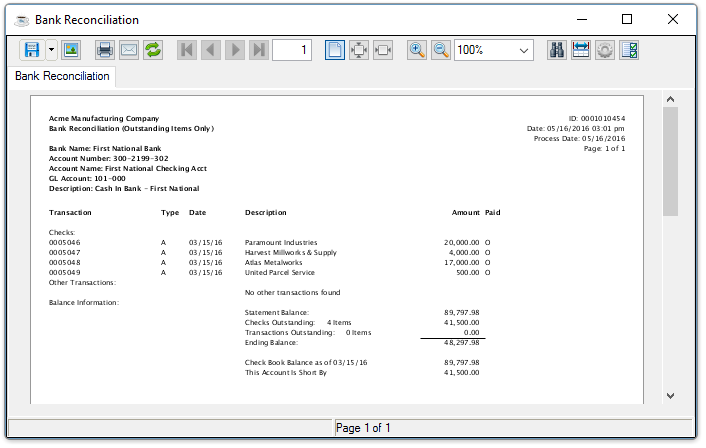
Detail Listing, Checks section
See Output Options.
This option reconciles the general ledger account to the corresponding bank account using the entered and calculated data from the Statement Information tab. A calculation is performed to determine whether the bank statement is in balance with the corresponding general ledger account.
CAUTION: Be sure to print a Detail Listing of all transactions before posting. Once paid transactions are removed it is not possible to recover them except from a backup, if available.
Statement Information Tab
Select the Statement Information tab for a recap of bank activity for the selected GL Account.
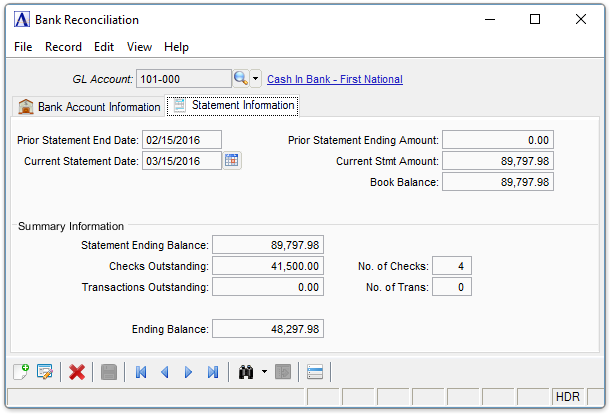
Bank Reconciliation - Statement Information tab
About the Fields
To enable edits to the form select .
In the Prior Statement End Date field...
Display only. Shows the ending date of the prior bank statement. This date is updated using the Current Statement Date field each time the account is indicated as “balanced.”
In the Prior Statement Ending Amount field...
Display only. Shows the ending balance of the prior statement. This amount is updated using the Current Ending Balance field each time the account is indicated as “balanced.”
In the Current Statement Date field...
-
Enter the ending date from the current bank statement.
-
Click
 to select a date by using the calendar tool.
In the Current Stmt Amount field...
-
Enter the ending/closing balance from the current bank statement.
In the Book Balance field...
-
Display only. The balance of the GL Account as of the Current Statement Date. This value is calculated using the Recalculate item in the Additional Options menu.
Summary Information
In the Statement Ending Balance field...
Display only. Repeats the Current Stmt Amount from above.
In the Checks Outstanding/No. of Checks fields...
Display only. Amount and number of checks with an Outstanding status. The list of checks is available via the Bank Rec Check Detail item in the Additional Options menu.
In the Transactions Outstanding/No. of Trans fields...
Display only. Amount and number of other transactions with an Outstanding status. The list of other transactions is available via the Bank Rec Other Transactions item in the Additional Options menu.
In the Ending Balance field...
Display only. This amount should match the Book Balance above: Statement Ending Balance - Checks Outstanding + Transactions Outstanding = Ending Balance.
When finished making entries to the fields...
-
Click
 to save changes.
 -
Click
 to clear the form and begin again.
 -
Click
 to delete the record.
______________________________________________________________________________________
Copyright BASIS International Ltd. AddonSoftware® and Barista® Application Framework are registered trademarks.