Accounts Receivable - Conversion Invoice Entry
Function
The Conversion Invoice Entry task creates summary invoice records that are posted to the customer's account and optionally, to the general ledger. These records represent open accounts receivable invoices.
=> To access this task...
Select Conversion Invoice Entry from the Utilities menu.
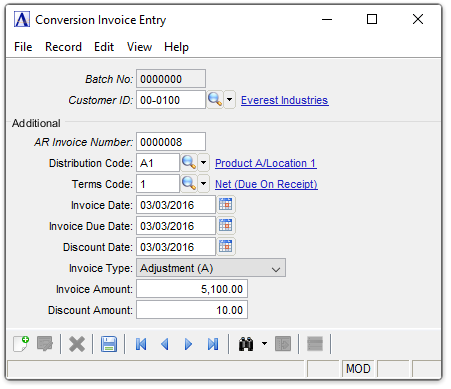
Conversion Invoice Entry
This task is used to enter invoices that existed prior to the installation of the Accounts Receivable module (Conversion Invoices). It may also be used to post after-the-fact invoices in systems where there is no Order/Invoice processing module installed.
NOTE: This task may also be used to modify, add, or delete finance charge records to the Finance Charge Register. It is recommended that regular conversion invoices and finance charges be entered in two separate batches to avoid confusion between the two processes.
About the Fields
In the Customer ID field...
-
Enter a valid customer number.
-
Click
 to select from a list of valid customers.
When the customer number already exists, the customer name is displayed.
In the AR Invoice Number field...
-
Enter a seven-digit invoice number.
NOTE: If the invoice is already in the module, you will not be able to enter the transaction. To adjust invoices, refer to Cash Receipts Entry or Simple Invoice Entry.
In the Distribution Code field...
The distribution code determines the general ledger account numbers for sales, accounts receivable and discounts when the invoice is updated and the update option is selected.
-
Enter a valid distribution code.
-
Click
to select from a list of Distribution codes.
In the Terms Code field...
The terms code will determine the invoice due date and discount due date using the invoice date as a basis for calculation.
-
Enter a valid terms code.
-
Click
to select from a list of valid Terms codes.
In the Invoice Date field...
This date is used as the reference point by the terms code to determine the due date and discount due date of the invoice. These dates are displayed and may be overridden as needed.
-
Enter the date that the invoice is to be posted to general ledger.
-
Click
 to use the calendar tool to set the date.
Example
When the invoice date is 10/10/## and the terms code is 2% 10 NET 30, then the discount is due 10/20/## and the invoice is due 11/09/##.
In the Invoice Due Date field...
-
Enter the due date of the net invoice.
-
Click
to use the calendar tool to set the date.
In the Discount Date field...
-
Enter the due date of the net invoice.
-
Click
to use the calendar tool to set the date.
Example
When the discount due date is 10/20/##, the customer may receive a discount (if applicable) by paying on or before this date.
From the Invoice Type dropdown...
-
Select Adjustment (A) for adjustment transaction.
-
Select Cash (C) for cash transaction.
-
Select Invoice (I) for adjustment transaction.
-
Select Sale (S) for sale transaction.
-
Select Void (V), if the other four types cannot be used.
In the Invoice Amount field...
-
Enter the total amount of the invoice.
In the Discount Amount field...
-
Enter the amount of discount available on this invoice.
NOTE: Discounts are recorded as memo amounts only at this point. They are not posted to the general ledger until after they are actually taken. This is determined during cash receipts processing.
After entering/modifying all the fields, click  . If you use
  without saving the current record, the following prompt displays:
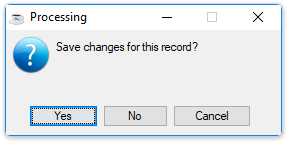
Save Changes
-
Click [Yes] to save the current record and cursor focuses on the Customer ID field for the next new entry.
-
Click [No] to discard the current record and the cursor focuses on the Customer ID field for the next new entry.
-
Click [Cancel] to retain the record.
When finished making selections...
-
Click
to clear the form and begin again. -
Click
to save the changes.
______________________________________________________________________________________
Copyright BASIS International Ltd. AddonSoftware® and Barista® Application Framework are registered trademarks.