Bill of Materials - Materials Detail
To access this task...
Select the Display additional options dropdown from the Bill of Materials Masters task in Maintenance.
Function
Material information is
used for inquiry, addition, change and deletion of material components
in a bill of materials![]() A listing of materials, operations, and subcontracts used to describe the manufacture of an item.
definition. When selecting Materials Detail from the option menu, the
bill’s current material information displays.
A listing of materials, operations, and subcontracts used to describe the manufacture of an item.
definition. When selecting Materials Detail from the option menu, the
bill’s current material information displays.
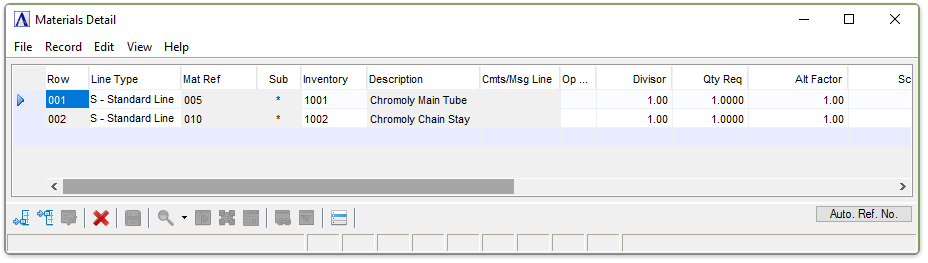
Materials Detail
About the Fields
In the Line Type field...
-
Select Standard Line or Memo from the dropdown. Using the Memo selection enables the Cmts/Msg Line field for entry of a message regarding the material.
In the Mat Ref field...
Disabled for kits. It is a display only field, and shows the "Work Order Material Reference" for that line.
In the Sub field...
Display only. An asterisk indicates this item is a subassembly or a manufactured component.
In the Inventory field...
-
Enter a valid inventory item number.
-
Click
") to display all valid inventory item numbers.
to display all valid inventory item numbers. -
Click
") to open the master record for the code entered
to open the master record for the code entered
In the Description field...
Display only. Displays the description for the inventory item number entered.
In the Cmts/Msg Line field...
Available for Memo Line Types only.
In the OP Ref field...
(Disabled for kits.)
-
Select an operations code from the dropdown list. The dropdown list is populated with operations previously entered in the Operations Detail grid for the bill.
In the Divisor field...
(Disabled for kits.)
The number by which the quantity required for this item will be divided, in order to arrive at the adjusted net quantity to be used for this bill. A divisor may be used when unit of measure conversions are required. For instance, 36 will convert a material stocked in yards to be used in inches.
-
Enter a divisor number.
-
Press Tab to accept the default value of 1.00.
In the Qty Req field...
-
Enter the quantity of this item required for the bill.
In the Alt Factor field...
(Disabled for kits.)
The number by which the quantity required for this item will be multiplied, in order to arrive at the adjusted net quantity to be used for this bill. An Alt Factor may be used when unit of measure conversions are required. For instance, 12 will convert a material stocked in inches to be used in feet.
-
Enter an alt factor number.
-
Press Tab to accept the default number of 1.00.
In the Scrap Factor % field...
(Disabled for kits.)
-
Enter the scrap material percentage.
-
Press Tab to accept the default number of 0.00.
Entering a scrap factor will increase the net quantity needed to compensate for the anticipated scrap. For instance, if a 3’x7’ piece is cut from a 4’x8’ piece of plywood, a scrap factor of 35.37% would be entered. This factor is figured by dividing the sq. feet required by the sq. feet of the original piece and then converting it to a percentage.
21 sq. ft ÷ 32 sq. ft = .6563 or 65.63% used
100 - 65.63 = 35.37% scrapped
-or-
32 sq. ft. - 21 sq. ft. = 11 sq. ft. scrapped
11 sq. ft. ÷ 32 sq. = .3537 or 35.37%
In the Unit of Measure field...
-
Enter the two-character engineering unit of measure for this item.
-
Press Tab to accept the unit of measure from the Inventory Master File.
In the Net Required field...
Display only. Shows the actual net quantity of material needed to create the finished product.
The formulafor determining the net quantity is as follows:
Qty Req x Alt Factor ÷ (Divisor x ( 100 - scrap factor ) ÷ Yield %) = Net Qty
In the Unit Cost field...
Display only. Shows the unit cost from the Inventory Master File.
In the Total Cost field...
Display only. Shows the Net Required times Unit Cost.
In the Date Effective field...
Optional input. Displays the effective date for the material item.
In the Obsolete Date field...
Display only. Displays the date the material item becomes obsolete – based on the effective date for its replacement.
When finished making entries to the fields...
-
Click
") to clear the form and begin again.
to clear the form and begin again. -
Click
") to save the report settings.
to save the report settings. -
Click
") to delete the line.
to delete the line. -
Click
") to
add a new line.
to
add a new line. -
Click
") to insert a new line.
to insert a new line.